E-25
English
Inserting & Removing Discs
OPERATE
PHONES REV
STOP PLAY
DVD RECORDER
BD-X200
FWD PAUSE REC
BUSY
OPEN/CLOSE
TOP
MENU MENU
OPTION DV Y/C LINE
SET UP
AUDIO
CH1
CH2
TITLE
DOLBY DIGITAL
LPCMMPEG
CHAPTER
SET
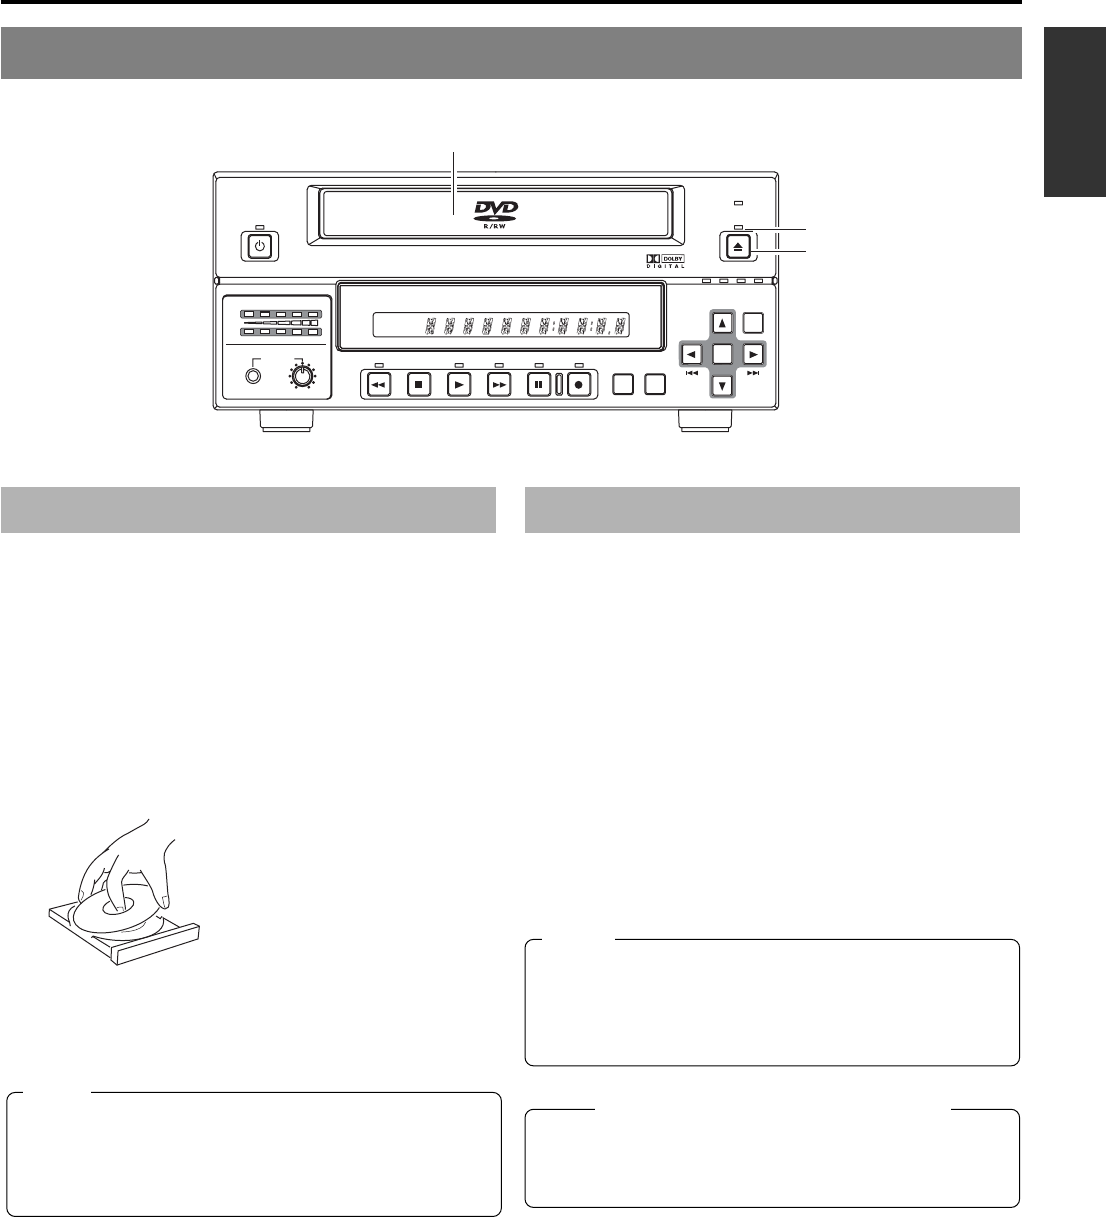
Disc tray
Inserting a Disc
Ⅵ Press the OPERATE button to activate Operate On mode.
1.
Press the OPEN/CLOSE button.
● The disc tray will open automatically.
While the disc tray is open, the OPEN/CLOSE indicator
will be lit up.
2.
Place the disc on the disc tray.
Ensure that the disc is inserted correctly into the tray’s recess
with the printed side facing upward.
● Carefully place the disc in the tray so as not to hit the front
panel.
3.
Press the OPEN/CLOSE button.
● The disc tray will close automatically.
Notes
● When a disc is inserted, information about that disc is
displayed on-screen. (☞ Page 18)
● When either a new DVD-RW or one that has been erased
on another machine is inserted, quick erase starts up.
(☞ Page 31)
Removing a Disc
Ⅵ Stop the DVD recorder.
1.
Press the OPEN/CLOSE button.
● The disc tray will open automatically.
While the disc tray is open, the OPEN/CLOSE indicator
will be lit up.
● If the current disc has not been finalized, the message
“NOT FINALIZE” will appear on both the monitor and LCD
display.
2.
Remove the disc from the disc tray.
Be sure to wait until the disc tray has opened fully before
removing the disc.
3.
Press the OPEN/CLOSE button.
● The disc tray will close automatically.
Precautions regarding the disc tray
● Do not push the disc tray as it is opening or closing.
● Do not place objects other than discs on the disc tray.
● Do not press down on the disc tray.
OPEN/CLOSE indicator
OPEN/CLOSE button
Notes
● If the DVD recorder is in either Recording mode or
Recording Pause mode, the disc tray will not open when
the OPEN/CLOSE button is pressed.
● Pressing this button also has no effect during finalizing,
erasing, and dubbing.


