


88
Chapter
2
File
Menu
900
910
File – Import – Digitizer – Step Scan (When VIVID 900/910 is Selected)
15
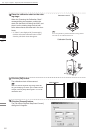
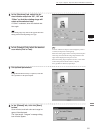
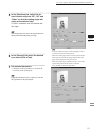
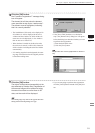
Click the [OK] button.
Each scanned image will be subjected to reg-
istration and displayed, and the “Proceed to
registration?” message dialog box will appear.
The element list will also show the element
name specied at step 14 plus “rotation step”.
The element name is highlighted, indicating
that it is currently selected.
• The loaded data will be ready to be displayed in
all windows. It will be displayed in the active
window and the windows for which all the ele-
ments are set to be displayed (i.e. the windows
that are not set to “Selective”).
• When the data is loaded for the rst time after
the software is started, it will be fully framed in
all the windows including those that are hidden
automatically.
• If a rotating stage has been designated, the rotat-
ing stage will rotate back to the original position
before data reading starts.
13
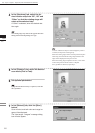
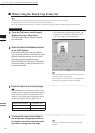
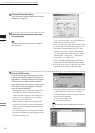
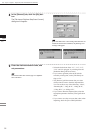
Click the [Convert] button.
The [File-Import-Digitizer-Step Scan-Convert]
dialog box will appear.
1
4
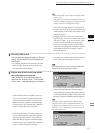
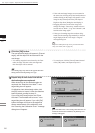
Enter the desired element name, and
set parameters.
• Select the desired rate from “1/1”, “1/4”, “1/9”,
“1/16”, and “No polygon”, by selecting from the
[Reduction Rate] pull-down menu.
• If you want to generate points to ll in holes caused
by missing data, set the [File Holes] setting to “On”.
• The [Remove] pull-down menu lets you select
which points to remove from the imported data.
You can set this to any of the following: “None”,
“Boundary(B.)”, “5deg. & B.”, “10deg. & B.”,
“15deg. & B.”, or “20deg. & B.”
• If you want to lter the imported data, select the ap-
propriate parameter from the [Filter] pull-down menu.
• If you want to save the raw scan data (.cdm) when
importing, check the [Save CDM] checkbox.
Note
Theelementnamemustconsistofupto31alphanu-
mericcharacters.
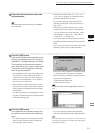
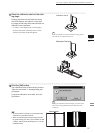
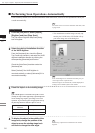
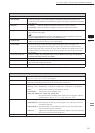
• If the [Save CDM] checkbox was checked at step
14, the [Remote-Save] dialog box will appear
before the dialog box that asks whether you want
to perform ne-registration.
q Enter the desired le name.
w Click the [Save] button.
Note
Thelenamemustconsistofalphanumericcharacters
only.