


Hookups (cont’d) 17
Connecting to Other Equipment for Dubbing
• Most prerecorded videotapes
and DVDs are copy protected. If
you try to copy them, the
Recorder display may show
“COPY PROTECT.”
• If the Recorder’s display shows
“NO SIGNAL,” adjust the
tracking or play the videotape
on the VCR/Camcorder/External
VCR.
See your VCR/Camcorder
manual to improve the quality
of tape play.
• Do not connect a Progressive
Scan video source (such as a
DVD Player) to the EXT 1
COMPONENT VIDEO IN jacks.
The Recorder cannot receive
Progressive Scan video.
Helpful Hints
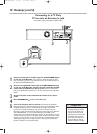
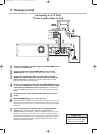
You can connect a VCR, Camcorder, or DVD Player
to the COMPONENT VIDEO IN (Y PB PR), S-VIDEO
IN,VIDEO IN, and AUDIO IN jacks on the rear panel
or to the VIDEO IN,AUDIO IN, or SV (S-Video) IN
jacks on the front panel.
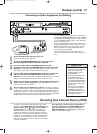
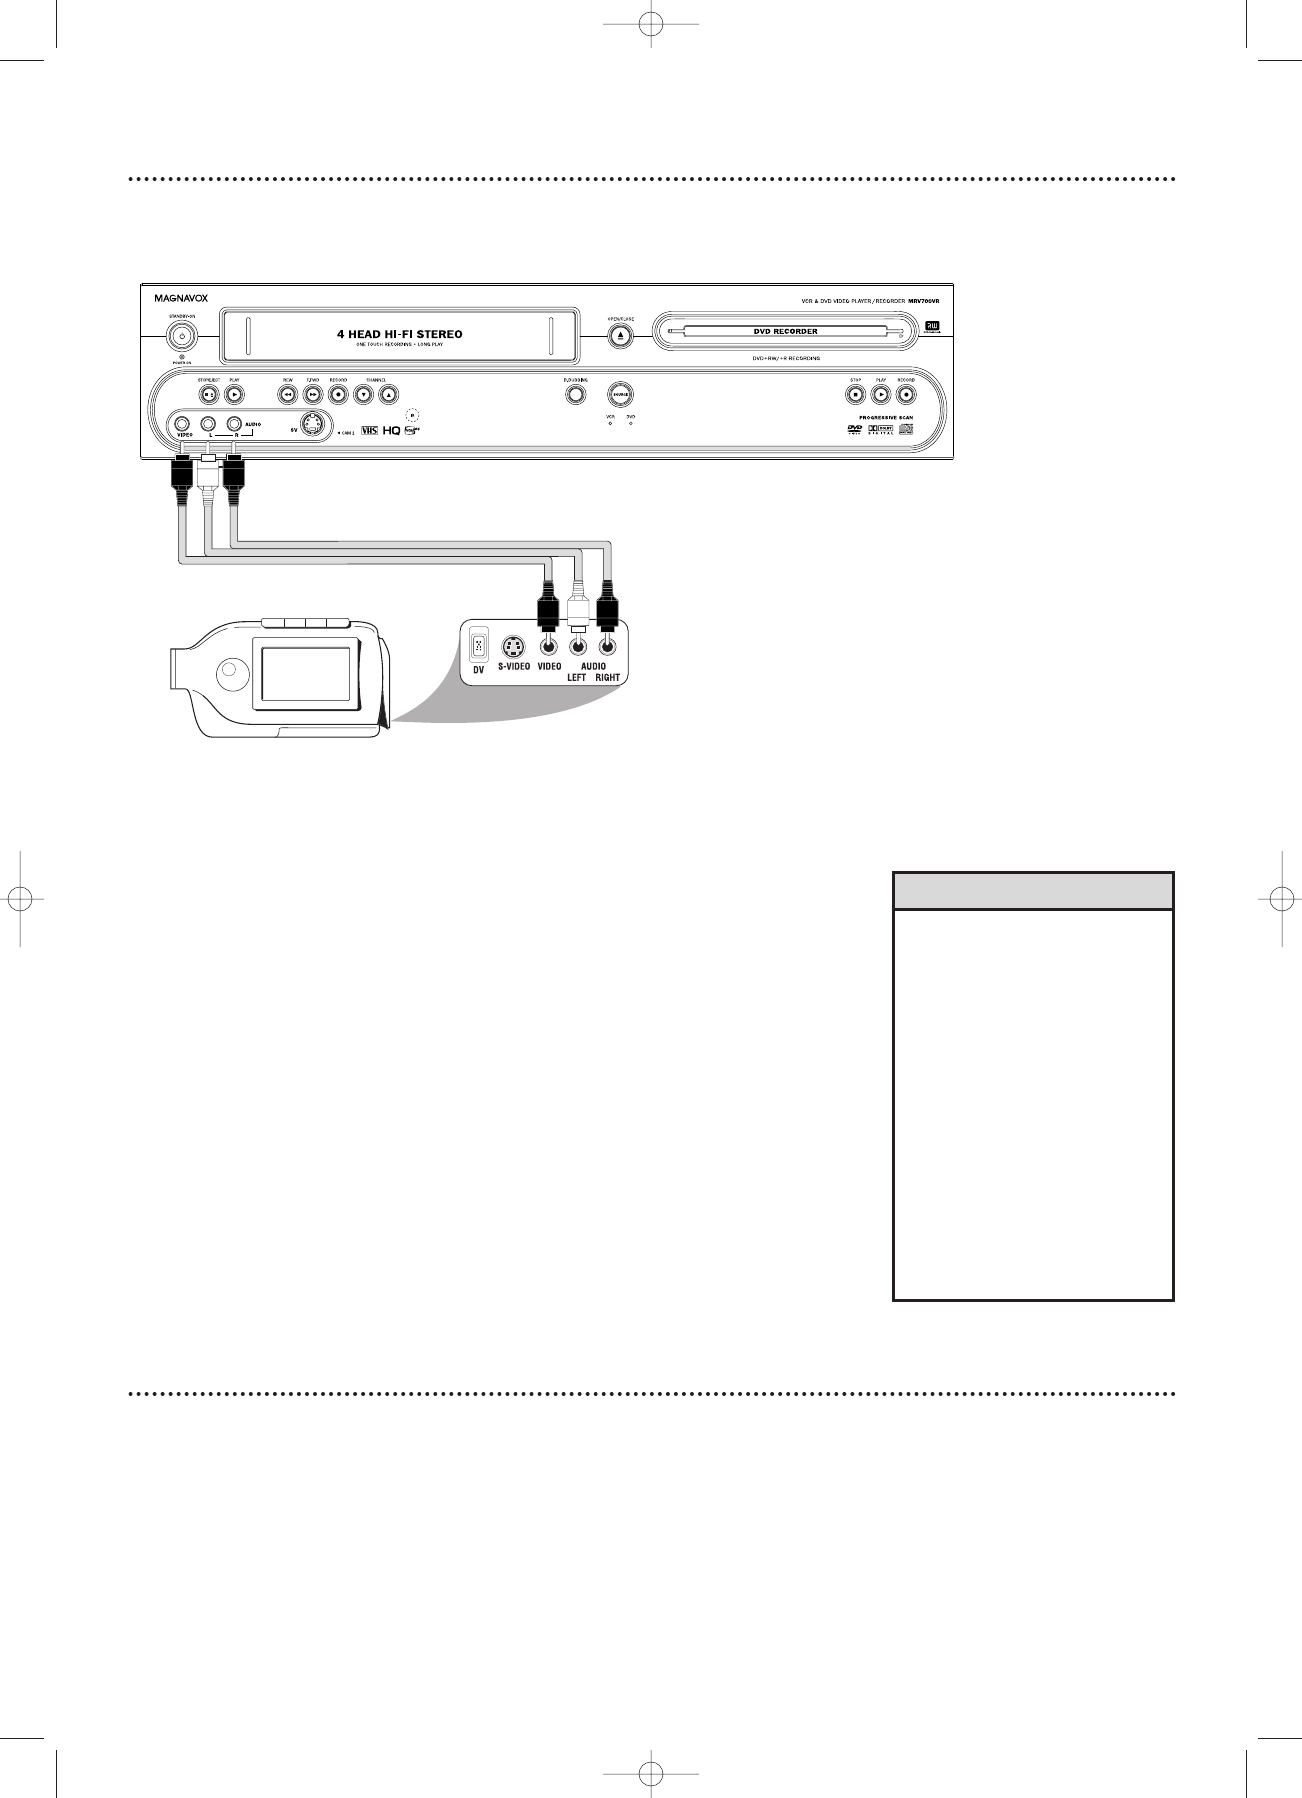
A sample connection with a Camcorder is shown here,
using the AUDIO/VIDEO IN jacks on the front of the
Recorder. These jacks are the most easily accessible.
Other equipment will connect similarly, but this is a
common connection possibility.
Use the IN jacks on the rear of the Recorder for
permanent connections.That will hide the cables from
view.
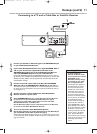
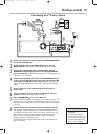
1
Connect the Recorder directly to your TV.
Choose a connection from pages 10-16.
2
To access the AUDIO/VIDEO IN jacks on the front of the
Recorder, flip down the door that covers the jacks.
3
Connect a video cable to the VIDEO OUT jack of your
Camcorder and to the yellow VIDEO IN jack on the front of the
Recorder.
Use an RCA-style video cable, which is usually marked with
yellow. (One video cable is supplied with the Recorder.)
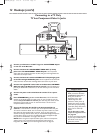
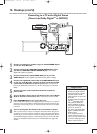
4
Connect audio cables to the AUDIO OUT jacks of your Camcorder
and to the red and white AUDIO IN jacks on the front of the
Recorder.
One set of audio cables is supplied with the Recorder. Most audio
cables are red and white. Match the cable colors to the jack colors.
5
When all connections are complete, connect all the equipment to
power. Turn on all the equipment. Press STANDBY-ON y on the
front of the Recorder to turn it on.
6
Set your TV to the correct Video In channel. This will be channel 3
or 4 or a specific Video In channel, depending on your connection between
the Recorder and the TV.
Refer to the connection details on pages 10-16. Or,
simply go to channel 5 on your TV, then change channels down until you
see the Recorder’s logo on the TV screen.
The Initial Setup screen will appear
the first time you turn on the Recorder. Go to page 18 to continue.
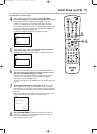
Recording from External Devices (DVD)
To watch or record the material playing on the other
equipment,
press MONITOR to put the Recorder in
Monitor mode. Press
KK
or
LL
to select CAM1 at
the Recorder.
This is located after your highest TV
channel and before your lowest TV channel. Choose
CAM1 if you used the connection shown on this page
(with the jacks on the front of the Recorder). If you use
the EXT 1 or EXT 2 jacks on the rear of the Recorder
instead, choose channel EXT 1 or EXT 2. Choose the
channel that matches the jacks to which you connected
the other equipment.
Start playing the material by pressing PLAY on
the other equipment. Press RECORD
I on the
front of the Recorder to start recording on a
DVD+R/DVD+RW or a videotape.
(See page 44 for
DVD+R or DVD+RW recording.)
E9490UD_EN.qx3 04.9.21 11:53 AM Page 17