


Microboards Technology, LLC
10
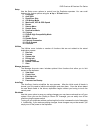
Counter:
Specify Counter
Specify Counter:
[0 ] OK?
Counter
:
No
Counter
Microboards B.30
1. Copy
Counter:
No Counter
Preparing... 4063MB
3 Discs Detected, Go?
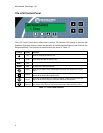
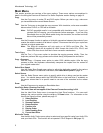
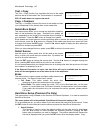
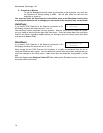
Setting Counters
The Premium and Premium Pro Series give you the option to set a counter so that the machine
can keep track of the number of copies made. Follow these steps when you see a Counter
Selection Menu:
The Counter Selection Menu lets you set how many copies you want to
make for your project. The Counter Selection feature tells the duplicator
to count the number of successful copies you have made and stop the
job when the desired number of copies has been reached.
You can select “No Counter” if you prefer to copy continuously with no interruption. (It will still
count the number of copies, but it will not notify you when to stop.) To select the “No Counter”,
simply press the ENT button when you see the screen above.
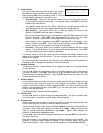
Or, you can select “Specify Counter” between 1 to 9999 by pressing the ▲ Up or ▼ Down button
to go to the Specify Counter menu:
Press the ENT button to select this option. You will see the next
Specify Counter menu.
To specify the number of copies for your project, you need to input a
four-digit number. If you need to specify a number that is less than
four digits, fill the leading spaces with zeros. Examples are “0234”
(two hundred and thirty four), or “0010” (ten).
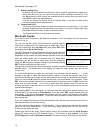
To enter the number, you need to use the ▲ Up or ▼ Down button to select the number for each
digit and use the ENT button or the ESC button to move the cursor position right or left. Once
you've finished, move the cursor to “OK” and press the ENT button.
To input the desired quantity, do the following:
Make sure the cursor is located at the first position (First blinking position):
Press the ▼ Down button repeatedly until “0” is displayed.
Press the ENT button once to move the cursor to the next position.
Press the ▼ Down button repeatedly until “0” is displayed.
Press the ENT button once to move the cursor to the next position.
Press the ▼ Down button repeatedly until “2” is displayed.
Press the ENT button once to move the cursor to the next position.
Press the ▼ Down button repeatedly until “1” is displayed.
With “0021” displayed, press the ENT button once and the cursor moves to “OK”.
Press the ENT button once more to submit your counter value and start duplication.
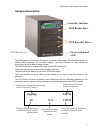
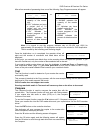
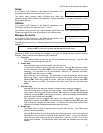
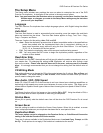
Using the Premium & Premium Pro Series Duplicator
Copy
This process will copy your master disc on to several blank discs
simultaneously.
Use the ▼▲ buttons to navigate to the 1. Copy Menu.
Insert your blank discs in the recorder drives. If your Counter
setting is ON, you will see the Counter Selection menu:
Follow the instructions shown in Setting Counters (above) to continue. Once the counters have
been set, press the ENT button to confirm.
If your Hard Drive is set as the Source Drive, scroll through the masters available on the hard
drive by using the ▼▲ buttons until the correct master is displayed. Press the ENT button.
As the blank discs are recognized, the number detected will
increase. Press the ENT button to start the duplication. If you
have Autostart set, duplication will begin either once all recorders
have been found to contain blank media or until the Autostart time
interval passes.