


DVD Premium & Premium Pro Series
19
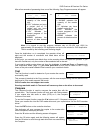
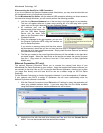
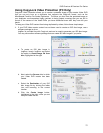
4. Select the correct
hard drive and click
the Connect button.
5. The Duplicator drive mount will appear on your desktop and the Disconnect
button will become active. Open the mounted drive in Finder.
6. Once connected, you can copy your .iso files, .vcp files, .nrg files, or folders
into the \dup directory directly through finder or using drag-and-drop.
You can also delete or rename the files and folders in the dup directory
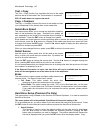
7. When you are done, simply click the Disconnect button in CopyConnect for Mac to
disconnect from the Duplicator hard drive.
8. Files placed in the correct locations will be available from the hard drive after the External
Connection is turned OFF.
PC USB Connection
The Microboards Pro Series allows you to create or copy ISO disc images or .lsi LightScribe
print images directly from your PC into the Duplicator\dup directory on the Pro Series Duplicator
hard drive. Files copied will be available as hard drive partitions that can be selected as the
duplication source once the External Connection setting is OFF.
To connect the drive directly to your PC using the USB connection, follow the steps
below:
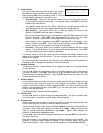
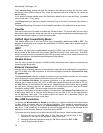
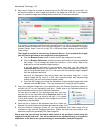
1. Plug the flat end of the USB cable to your PC and the square end to the
connection on the back of the duplicator, shown to the right.
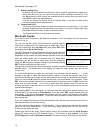
2. Change the External Connection setting in the Setup menu from OFF to ON.
3. The drive will appear shortly after the setting is changed.
4. Once the Duplication drive is available, you can copy your .iso files into the \dup
directory. Only .iso, .vcp, and .nrg format images are supported. You can also copy
directories over, with the contents of that directory available on the hard drive for
duplication.
5. Files placed in the correct location on the hard drive will be available from the hard drive
after the drive is disconnected from the PC and the External Connection is turned OFF.