


DVD Premium & Premium Pro Series
13
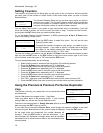
Load Partition[231GB]
Load- New Partition
2. Load Partition
Use this function when you want to add a new master
disc partition to your hard drive from the reader drive.
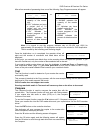
After pressing ENT when the display reads 2. Load Partition, you will be asked which
partition naming method you would like to use.
• Auto Generate: This option will add the master as a new partition with the name
of the partition created automatically. If using this option, press ENT to load the
master to the new partition.
The partition name will start with “NEW-“ followed by a 4-digit number, which will
auto-increment with each new master added using this naming method.
• New Partition: This option allows you to manually specify the name of the
partition. Press ENT when this option is displayed.
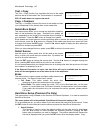
Enter in the partition name of up to 14 characters, using the ▼▲ buttons to change
the first character. Press ENT when the character you want is in the cursor
position. To leave a position blank, press ENT when the space is empty.
After entering in all 14 characters, press ENT to highlight OK on the display. If the
name is correct, press ENT. If you need to make changes, press the ESC button
until the cursor is on the character that needs to be changed.
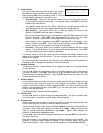
• Overwrite: This option allows you to replace a previous partition with the current
master. Use the ▼▲ buttons to scroll through the existing partitions. Press ENT
when the partition you want to replace is displayed.
You will be asked to verify the name one last time before the master inserted in the
reader drive is copied to the hard drive. The copy progress and partition name will be
shown on the display.
Once the master disc is copied to the hard drive, the reader drive will be ejected and
the partition will be available for duplication from the hard drive.
3. Rename Partition
The Rename Partition function allows you to change the name of an existing partition
on the hard drive.
Use the ▼▲ buttons to move through the list of partitions until you get to the partition
you want to rename. Press ENT, then use the ▼, ▲, and ENT buttons as in the Load
Partition function to change the name. Press the ENT button when the cursor is on OK
to save the new partition name.
4. Delete Partition
Use the Delete Partition function to remove a master partition that is no longer in use or
if you need to clear hard drive space for new partitions to be added. Use the ▼▲
buttons to select the partition to delete, then press ENT. You will be asked to confirm
deletion of the selected partition; press ENT if you are sure you want to remove the
partition from the hard drive.
The Delete Partition function cannot be undone.
5. Partition Info
Use the ▼▲ buttons to scroll through the loaded partitions. The type of master used,
size of the data in the partition, and the name will be displayed.
6. Display Order
Use the Display Order function to change the order in which the saved partitions are
shown when using any function in which you select a partition.
There are three Display Order options available: Default, which shows the partitions in
the order in which they were copied to the hard drive; Alpha – (Asc), which sets the
order to normal ascending alphabetical; and Alpha – (Dec), which displays the
partitions in descending alphabetical order.
Use the ▼▲ buttons to scroll through the three options, pressing ENT when the option
you want is showing.
Note that numbers in the partition names are sorted as characters, not numbers. For
example, a partition named 10.iso will appear in the list before 2.iso if the Display
Order is set to Alpha – (Asc); a way to avoid this would be to rename 2.iso to 02.iso.