22
ALARM RECORDING
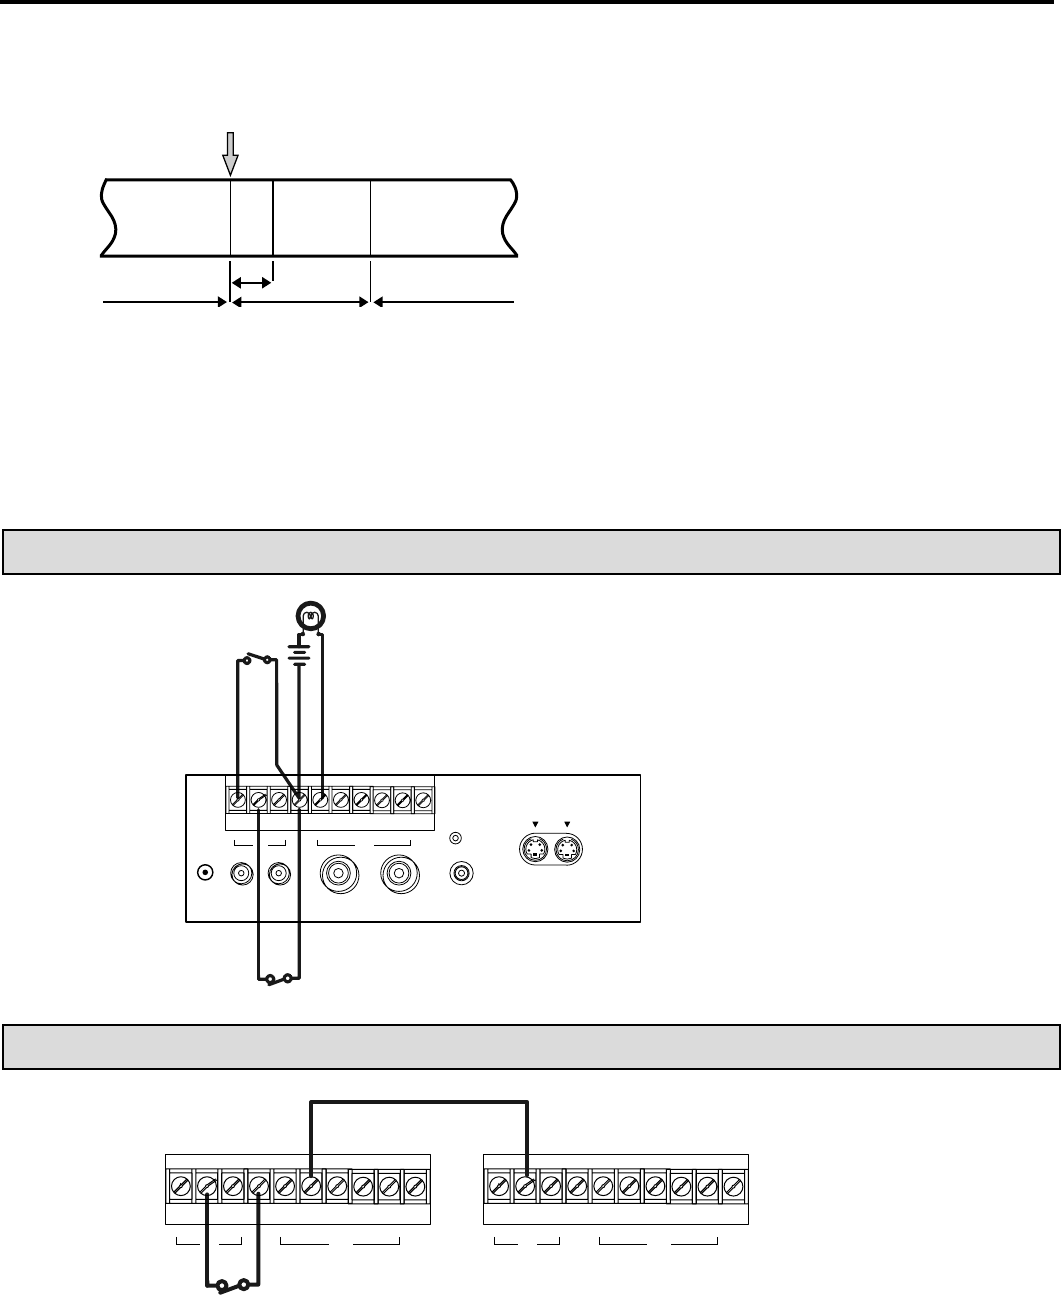
• It is possible to switch to the alarm recording by ap-
plying the set signal from the alarm sensor during re-
cording in 3H,L12H, L24H, 48H - 960H or 0H mode.
• Set the alarm recording mode and alarm recording period with the “RECORDING SET UP” menu. (See page 10.)
• The index signal is automatically recorded when an alarm recording begins. (INDEX indicator flashes on the fluorescent display.)
• To record the index signal, the first 15 seconds of the alarm recording are in 3H mode.
• While the index signal is being recorded (for 15 seconds), if another set signal is applied to the SET IN terminal, it will not trigger a
new alarm recording.
ALARM RECORDING CONNECTION
External alarm lamp
or buzzer
Alarm reset switch
• The alarm can be confirmed from a distance by
connecting the ALM (ALARM) OUT terminal to
an existing alarm system panel or other external
devices such as a buzzer.
EXTERNAL TIME CLOCK ADJUSTMENT
If the “ALARM REC DURATION” of the “RECORDING SET UP” menu is set to other than “MAN1”, the on-screen clock can be reset to
the nearest hour, by applying a signal to the RST (RESET) IN terminal. For example, if the current time is 11:29:59, it will be reset to
11:00:00; and if the current time is 11:30:00, it will be reset to 12:00:00.
*1: When connecting the MODE terminal of the 1st VCR with RST (RESET) IN terminal of the 2nd VCR and if the “MODE OUT” of the
“REAR TERMINAL” menu is set to “CLOCK ADJ”, the on-screen clock of the 2nd VCR will automatically be adjusted to that of the 1st
VCR.
Alarm set
switch
It is possible to switch from all recording modes to the 3H - L24H recording mode by applying an alarm signal to
the SET IN terminal on the rear panel.
ALARM SET INPUT
3H - 960H, 0H
RECORDING
3H - 960H, 0H
RECORDING
3H
RECORD-
ING
3H - L24H
RECORDING
15sec
NORMAL mode
NORMAL mode
ALARM mode
VIDEO
OUTIN
IN
OUTMIC
AUDIO
RESET
REMOTE
SET RST
IN
REC GND ALM MODE CLK CALL
OUT
IN OUT
S-VIDEO
SET RST
IN
REC GND ALM MODE CLK CALL
OUT
SET RST
IN
REC GND ALM MODE CLK CALL
OUT
1st VCR 2nd VCR
*1


