4. TV Operation and Features 27
Note: To operate other audio/video devices:
• See Appendix D, “Programming the Remote
Control.”
• See chapter 6, “NetCommand,” for NetCommand
IR “Learning” of device keys.
• For HDMI devices compatible with the TV’s
NetCommand for HDMI feature, see below.
ChannelView™ Channel Listings
ChannelView shows memorized channels on
ANT 1
and
ANT 2
. It displays channel names and program
information as sent by broadcasters or your local cable
service provider and may be incomplete
.
No program
information is displayed for analog channels. An analog
channel name is displayed only if you assigned a name
in the Setup > Edit menu.
T
o receive ChannelView updates, set the Energy Mode
to Fast Power On and leave the TV powered off for a
while each day.
Using ChannelView
Feature Press Key
See ChannelView listings
from ANT 1 or ANT 2.
Press
GUIDE.
Close ChannelView Press
GUIDE
or
EXIT.
Scan channels one by one.
Press and hold or .
Scan channels quickly.
Press and hold
PAGE
/
.
Jump to listings for a spe-
cific channel.
1. Enter the channel
number (see numbers
in upper left.
2. Press
ENTER
.
See more of the program
description.
Press
INFO
.
Move navigation to the
program guide.
Press .
Move navigation to the
channel guide.
Press .
Tune to the highlighted
channel.
Press
ENTER
.
Record/Playback Keys
Use any of these methods to enable the recording and
playback commands:
• Program the remote control for your DVR, VCR, or
DVD player/recorder and set the slide switch to
VCR
,
DVD
,
CABLE/SAT
, or
AUDIO
as appropriate.
• Y and 734 series TVs: Perform NetCommand IR
“learning” for the device.
• Check HDMI devices for compatibility with the TV’s
NetCommand for HDMI feature (see below).
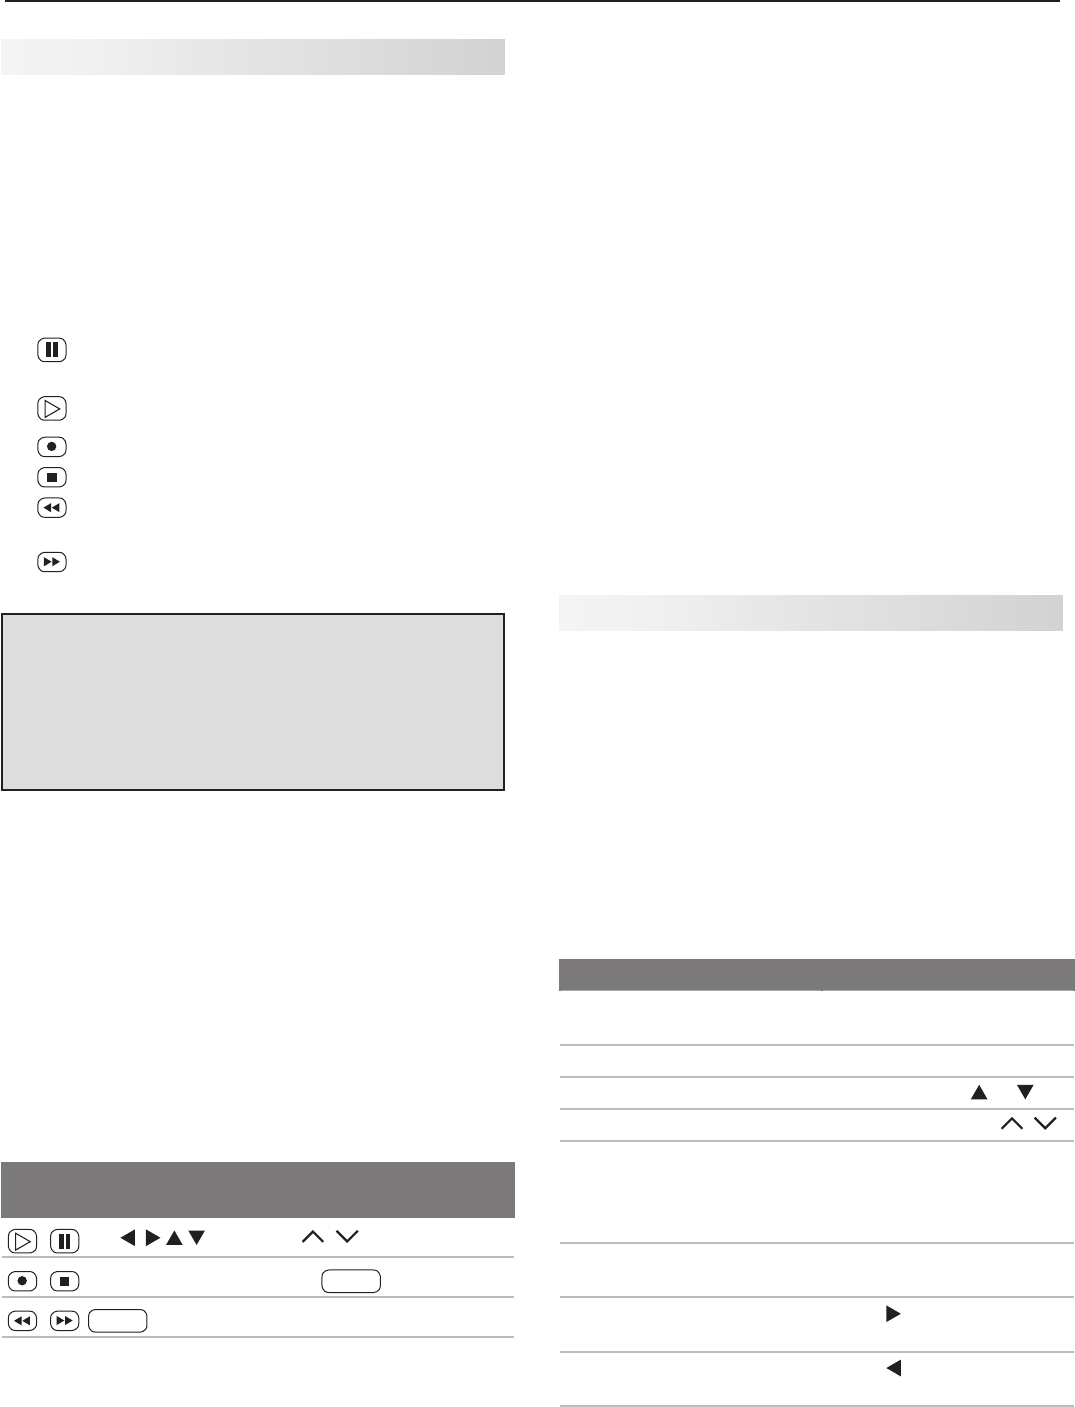
23. (
PAUSE
): Pauses a VCR, DVR, or DVD. See
above for use during TV viewing.
24. (
PLAY
): Plays a VCR, DVR, or DVD.
25. (
RECORD
):
Records with a VCR or DVR.
26. (
STOP
): Stops play of a VCR, DVR, or DVD.
27. (
REVERSE
): Rewinds a VCR. Reverse scans a
DVR or DVD.
28. (
FORWARD
): Fast forwards a VCR. Forward
scans a DVR or DVD.
Remote Control, continued
Care of the Remote Control
• Use only alkaline batteries.
• Be within 20 feet of the equipment.
• Do not press two or more buttons at the same time
unless instructed to do so.
• Do not allow unit to get wet or become heated.
• Avoid dropping on hard surfaces.
• Do not use harsh chemicals to clean. Use only a
soft, lightly moistened cloth.
• Do not mix old and new batteries.
Resetting the Remote Control
If the slide switch is set to
TV
and the TV does not
respond properly, reset the remote control.
1. Press and hold
POWER
for several seconds until the
button blinks twice and goes off.
2. Release the
POWER
button.
3. Press keys
0 0 9 3 5
and the
POWER
button will blink
twice when you finish entering the code. While
entering the code, pause for a moment between
each key press to ensure it is recognized.
Low-Battery Indicator
If you press a key and the
POWER
key blinks five times,
replace the remote control’s batteries.
NetCommand for HDMI Devices
The TV’s remote may operate some functions of
compatible HDMI devices able to receive commands
through the HDMI cable. Test your equipment with the
TV’s remote to find out which commands are sup-
ported. See below for commands that may be avail-
able, depending on the individual device.
Press
PLAY
on the device itself to:
• Turn on the TV if not already on
• Switch to the device (no need to display the Input
Selection menu)
• Begin play of the device
VCR, DVD, and DVR functions that may be available:
Record/
Playback
Menu
Navigation
Channel Tuning Other
CH
/
GUIDE
ENTER
Digits
0–9
,
—
CANCEL
F1
(content)
—
CANCEL
(to cancel)
ENTER MENU
