


60 6. NetCommand
Performthissetupto:
• OperatetheA/Vreceiver’spowerandvolume
functionswiththeTV’sremotecontrol.
• EnabletheA/Vreceivertoswitchautomatically
tothecorrectaudioinputwhenyouselecta
deviceintheTV’sInput Selectionmenu.
TosetupcontrolofanA/Vreceiveryouneed:
• TheremotecontrolsforboththeTVandthe
A/Vreceiver.
• TheIRemittercablesuppliedwiththeTV.
Note: Tosetupcontrolofotherdevicetypes,see
“InitialNetCommandSetupforMostDevices”
earlierinthischapter.
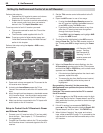
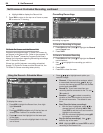
PerformthissetupusingtheInputs > AVRscreen,
shownbelow.
1
3
4
2
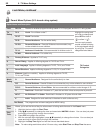
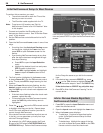
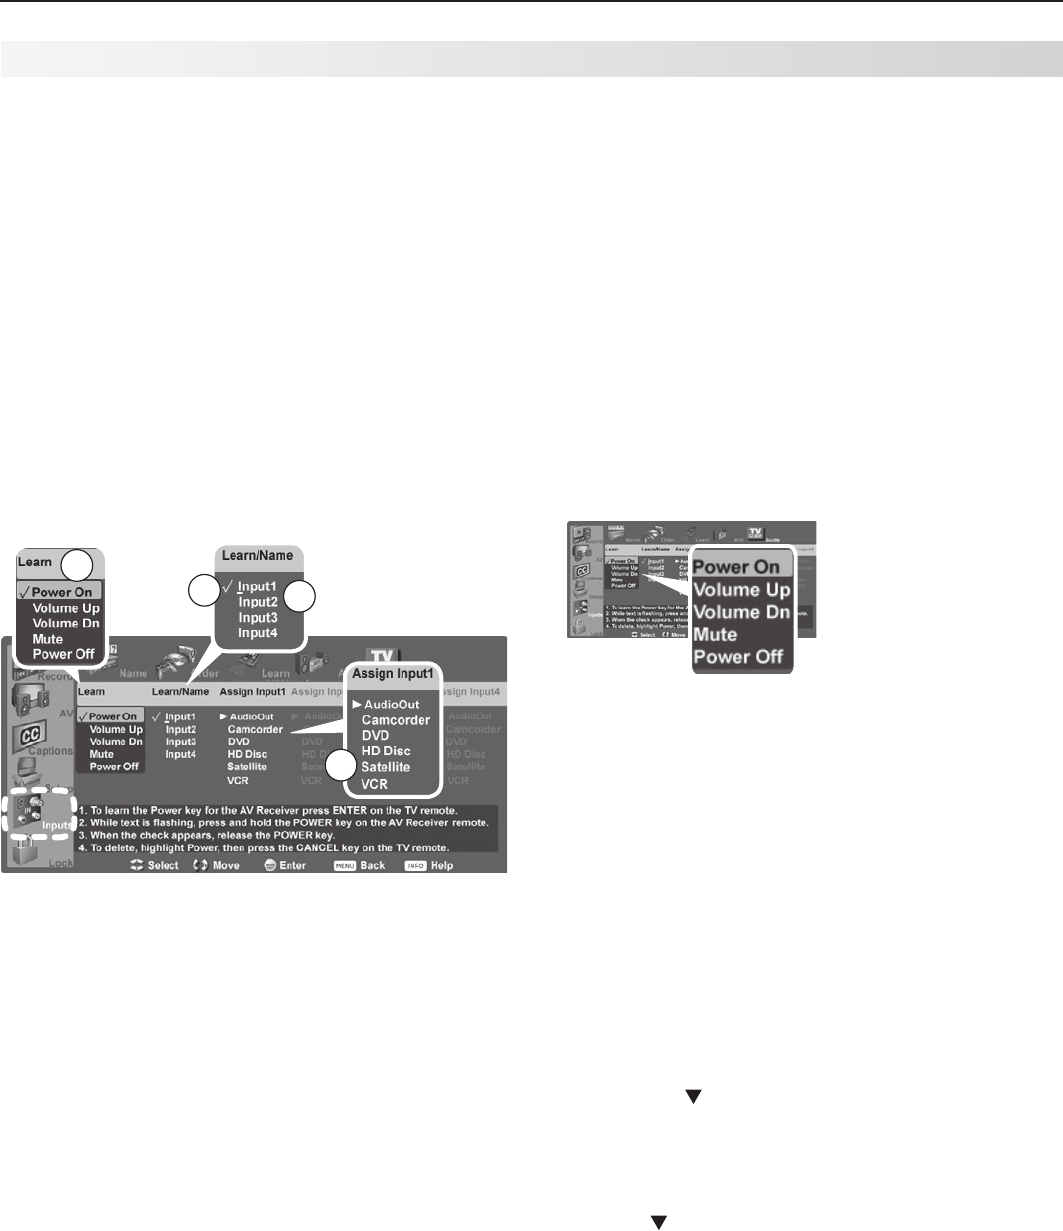
AVR screen overview
1. Powerandvolume
commands the TV can send to the
A/V receiver when “learned”
2.
A check under
Learn/Name
means the TV has
“learned” the command to switch the A/V receiver to the
input.
3.
Input1 through Input4 are temporary placeholder names
for A/V receiver inputs. Use this screen to assign mean-
ingful names , e.g., the name of the A/V receiver input.
4. Match up devices connected to the TV inputs with
audio inputs on the A/V receiver.
3. SettheTV’sremotecontrolslideswitchtothe
TV
position.
4. OpentheAVRscreeninoneoftwoways:
• IfusingtheAuto Output Sensingscreenfor
theA/Vreceiver,highlighttheLearniconand
press
ENTER
toopentheAVRscreen.
• IfperformingNetCommandsetupatanytime
aftertheA/Vreceiverhasbeenrecognized
throughAutoInputSensing:
Press
MENU
,highlightInputs,andhighlightAVR
toopentheAVRscreen.
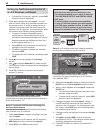
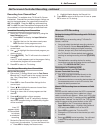
5. ThefirstfunctionhighlightedintheAVRscreenis
alwaysPower On.AimtheTV’sremotecontrolat
theTVandpress
ENTER
tobeginlearningforPower
On.
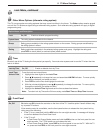
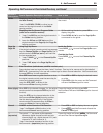
A/V Receiver (AVR)
screen. Perform
NetCommand IR
“learning” for A/V
receiver power and
volume keys.
6. WhenthePower Ontextstartsflashing,aimthe
A/V receiver’sremotecontrolattheTVandpress
andholdthe
POWER
or
POWER ON
keyuntilacheckmark
appearsnexttoPower On.
• Ifthetextstopsflashingbeforethecheckmark
appears,repeatthisstep.
• ToremovethekeyfromNetCommandcontrol,
pressthe
CANCEL
keywhilethekeynameis
highlighted.
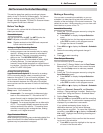
By completing “learning” for the power key,
NetCommand now operates the power function for
the A/V receiver.
Point the TV’s remote control at the TV to control
the A/V receiver.
7. Pressthe keyontheTV’sremotecontroltohigh-
lightotherkeysinthelist.Repeatsteps5and6for
eachadditionalfunctionyouwishtocontrolthrough
NetCommand.
8. IftheA/Vreceiverhasaseparate
POWER OFF
key,
press ontheTV’sremotetohighlightPower Off.
Repeatsteps5and6to“learn”the
POWER OFF
key.
9. Whenfinished“learning”thepowerandvolume
keys,eitherpress
EXIT
towatchTVorproceedtothe
nextsectiontocontinueNetCommandsetupofthe
A/Vreceiver.
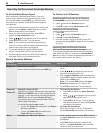
Setup to Control the A/V Receiver’s Power
and Volume Functions
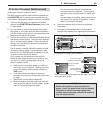
1. ConnectyourA/VreceivertotheTVandanyaddi-
tionaldevices.Seechapter3,“TVConnections,”
forsuggestions.
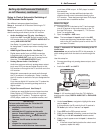
2. ConnecttheIRemittercabletotheTVandposition
theIRemitterwhereitcansendsignalstotheA/V
receiver.
Setting Up NetCommand Control of an A/V Receiver