


13
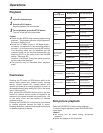
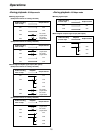
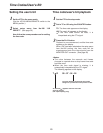
Stop mode
CH1
AUDIO OUT
25
CH1
ST
CH2
AUDIO MON SELECT
CH 3
·
4
50Mbps
CH2
REC
INPUT SELECT
ON
OFF
C
B
POWER
EJECT
LOCAL
MENU
ANALOG
SDI
OFF
REC INHIBIT
ON
REMOTE
PB
PULL
FOR VAR
PLAY
PAUSE/STILL
REC TAPE
EE
SET
DATA
jiMODEMENU UP
DOWNPAGE
REW STOP FF
SEARCH
RESET
COUNTER
50
1
CH1
AUDIO OUT
25
CH1
ST
CH2
AUDIO MON SELECT
CH 3
·
4
50Mbps
CH2
REC
INPUT SELECT
ON
OFF
C
B
POWER
EJECT
LOCAL
MENU
ANALOG
SDI
OFF
REC INHIBIT
ON
REMOTE
PB
PULL
FOR VAR
PLAY
PAUSE/STILL
REC TAPE
EE
SET
DATA
jiMODEMENU UP
DOWNPAGE
REW STOP FF
SEARCH
RESET
COUNTER
50
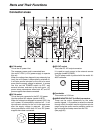
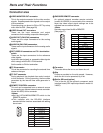
Operations
<Precaution for setting STILL TIMER>
O
At times when, for instance, the same part of the
same tape is repeatedly used, the cumulative
standby time in the same position will be increased.
In order to protect the tape, make the standby time
in the same position as short as possible.
1 2
3
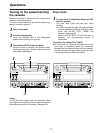
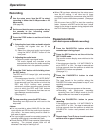
Turn on the power.
1
The stop mode is established when the STOP
button is pressed.
The stop lamp lights, and the tape stops
traveling.
O
In order to protect the tape, the tape protection
mode is established after the time set in setup
menu item No.400 “STILL TIMER” has
elapsed. (See page 32)
When the STOP, REW, FF or PLAY button is
pressed, the corresponding mode is
established.
1
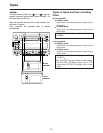
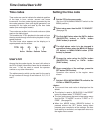
Insert the cassette tape.
Insert the cassette tape at the designated
position without forcing it in any way.
2
Check that the STOP lamp has lighted.
When the tape is inserted, the cylinder starts
rotating automatically, the tape is loaded, and the
stop mode is established.
3
<Note>
The STOP button flashes when no reference video
input signals are supplied if ON has been selected as
the setup menu item No.104 setting. (See page 30)
Before proceeding to operate the unit, check that it
has been connected properly.
This unit must be placed on a level surface before any
attempt is made to operate it.
Turning on the power/inserting
the cassette