7
>
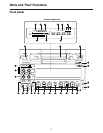
INPUT SELECT button and lamp
This button is used to select the input signals.
Each time it is pressed, ANALOG and SDI signals
are selected alternately.
<Note>
It is not possible to select ANALOG for the video
signals and SDI for the audio signals or vice versa:
the same setting must be used for both sets of
signals.
ANALOG:
This is selected when analog composite
video signals and analog audio signals
are input. When it is selected, the
ANALOG lamp lights.
The ANALOG lamp flashes when this
setting is selected but no analog
composite video signals are input.
SDI:
SDI input signals can be selected when
the optional SDI input/output board has
been installed. When it is selected, the
SDI lamp lights. The SDI lamp flashes
when this setting is selected but no SDI
signals are input.
?
Audio signal CH1 and CH2 recording level controls
These controls are used to adjust the recording
levels of the CH1 and CH2 audio signals.
They use a “pull to vary level” system which means
that the levels can be adjusted after they have been
pulled up. The default signal levels apply when
they are pushed down.
@
Audio signal CH1 and CH2 playback level controls
These controls are used to adjust the playback
levels of the CH1 and CH2 audio signals.
They use a “pull to vary level” system which means
that the levels can be adjusted after they have been
pulled up. The default signal levels apply when
they are pushed down.
<Note>
The cue audio signal level cannot be adjusted.
A
CH3 and CH4 lamp
This lamp lights when TR3/4 is selected as the
setup menu item No.711 setting in the 50 Mbps
mode. It also lights in the E-E mode when the
optional SDI input/output board has been installed,
SDI input is selected, and CH3/4 is selected as the
setup menu item No.712 setting. (During playback,
the lamp is lighted by the No.712 setting.)
(See page 37)
B
50 Mbps lamp
This lamp lights when the 50 Mbps mode has been
established.
C
Headphones jack
When a pair of stereo headphones are connected
to this jack, the sound of the recording or playback
can be monitored through the headphones.
D
Volume control
This control is used to adjust the headphone
volume.
E
Audio monitor selector switch
This switch is used to select the audio monitor
output and headphone output channels.
CH1:
The CH1 sound is output through both the left
and right channels.
ST:
The sound selected by the settings of setup
menu items No.708 and No.709 is output.
CH2:
The CH2 sound is output through both the left
and right channels.
F
REW button
This button is pressed to rewind the tape. The
playback pictures can be monitored when the
TAPE/EE switch
M
is set to TAPE.
Pressing the REW button while in the search mode
(search still, forward search, forward search still,
reverse search still) causes operation to switch to
reverse search, and reverse playback occurs at the
speed selected using setting No. 100 on the setup
menu. (See pages 15 and 30.)
Pressing the REW button while in the slow mode
(slow still, forward slow, forward slow still) causes
operation to switch to reverse linear 0.3
a
playback.
(See page 16.)
Noise will appear during linear 0.3
a
playback: this
is normal and not indicative of malfunctioning.
G
STOP button
This button is pressed to stop the tape travel. The
playback pictures can be monitored when the
TAPE/EE switch
M
is set to TAPE.
The tape drum continues to rotate even in the stop
mode, and the tape remains in close contact with
the drum.
When the stop mode continues beyond the
prescribed period of time, the unit is automatically
set to the STANDBY OFF (HALF LOADING) mode
in order to protect the tape.
The stop mode is established immediately after a
cassette has been inserted into the unit.
Parts and Their Functions


