


26
Chapter 3—Customizing the remote control
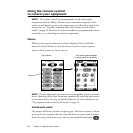
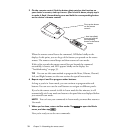
Channel, Left and Right Buttons, as well as the buttons on the display. (If
you’re not sure what a button is supposed to do, refer to Chapter 8, “Command
Reference.”)
If the remote control operates the device correctly, you don’t need to do
anything else. However, if some functions fail or are missing from the remote
control, you will need to teach the remote control those functions.
3 Teach the remote control the commands for operating your
components.
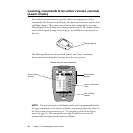
Using your existing remote controls, and working in Learn mode, assign the
correct commands to the buttons on the remote control. For instructions, refer
to “Learning commands from other remote controls (Learn mode)” on page 30.
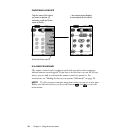
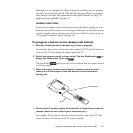
4 Add any commands you need that don’t already appear in the remote
control.
To do this, assign commands to “empty” buttons (
template buttons
); for
instructions, see “To program a template button” on page 36. Then label the
buttons appropriately; see “To relabel a button” on page 41.
5 (Optional) Refine your configuration.
6 (Optional) Create macros to make your life easier.
A
macro
is a sequence of commands executed by a single button. For
information about recording macros, see Chapter 4, “Creating Macros.”
NOTE
While customizing the remote control you use special
modes
that are
available from the
Mode menu
. When you’re done customizing the remote
control you can protect your work from accidental changes by hiding the Mode
menu. (You can easily enable it again when you want to do more customizing.)
For more about modes, including how to hide the Mode menu, see
“Understanding modes” on page 28.
To: Refer to:
Rearrange the Device menu page 44
Relabel devices or buttons page 41
Delete devices you don’t need from
the Device menu
page 47
Delete buttons you don’t need from
the display
page 46