


Getting started
04
22
En
Note
• If the unit does not operate properly, or there is
no key operation from the unit and/or the
remote control: Static electricity, etc., may affect
the operation. Disconnect the AC power cord once,
then connect it again.
Chapter 4
Getting started
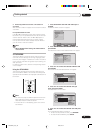
Auto clock setting
Preparation:
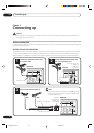
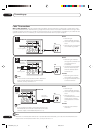
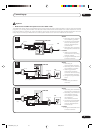
You must connect the antenna or cable before connect-
ing the AC cord to the power source.
Wait 30 minutes with the power turned off, after the
antenna or cable is connected, for the auto clock
feature to activate.
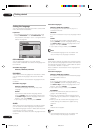
After the clock is set automatically, you may have to set
the time zone and daylight saving time. (See page 26.)
Press STANDBY/ON to turn on the DVD/VCR after the
auto clock operation completed.
• When shipped from the factory, the “AUTO CLOCK”
option is set to “ON” position.
• If you turn the DVD/VCR on during auto clock
setting, the clock is not set.
•After a power failure or disconnection of the power
plug, the clock setting will be lost. In this case, wait
30 minutes before turning the DVD/VCR on.
•With cable box connection, if the auto clock setting
is unsuccessful, select the PBS channel carrying
the XDS information, then turn the DVD/VCR off.
After 30 minutes, turn the DVD/VCR on.
• If the clock is not set automatically, set the clock
manually. (See page 26.)
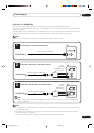
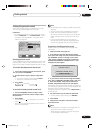
Setting the video channel
To view playback of a recorded tape or DVD disc, or
to watch a program selected by the VCR’s channel
selector, the TV must be set to channel 3 or 4 (video
channel).
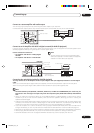
When a TV is connected with the 75 Ω coaxial cable
only:
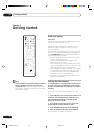
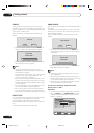
1Press and hold 3 or 4 on the remote control for 3
seconds in the standby mode to select CH 3 or 4.
The selected channel number will flash on the
display for about 4 seconds.
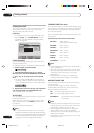
2Turn ON the TV and set to CH 3 or 4 to corre-
spond with the channel selected in step 1.
3Press STANDBY/ON to turn on the DVD/VCR.
4Press TV/VIDEO to select the VIDEO position.
The TV indicator will appear in the display.
2G00201B_En_22_32 8/4/05, 10:5422