


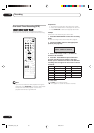


Recording
06
59
En
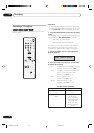
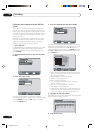
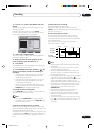
7 Press TIMER REC. The timer indicator “ ” will
appear on the display and the unit stands by for
recording.
• If the program is DVD recording only, the unit will
change to VCR mode automatically. (The DVD
mode cannot be selected.)
• If the program is VCR recording only, the unit will
change to DVD mode automatically. (The VCR
mode cannot be selected.)
• If the programs are DVD and VCR recording, the
unit will turn off. If you want to use the unit, press
TIMER REC again to deactivate the timer.
To extend the timer recording time
Press TIMER REC while it is timer recording. (You may
also use normal recording or OTR).
Note
• If you press STANDBY/ON and it goes into the
STANDBY mode, if you then press TIMER REC, the
timer recording will end.
Checking or changing the timer recording
When you want to check the selected timer recording,
follow the steps 1 and 2 of “Setting timer recording” and
display the TIMER REC SET screen.
To change the timer recording, select the program to be
changed and press ENTER. The changing method is the
same as that for the recording a program for the first time.
Cancelling the timer recording
Display the TIMER REC SET screen.
Select the program you want to cancel and press
CANCEL, then the selected program will be erased from
the timer recording list.
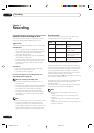
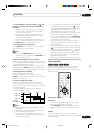
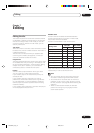
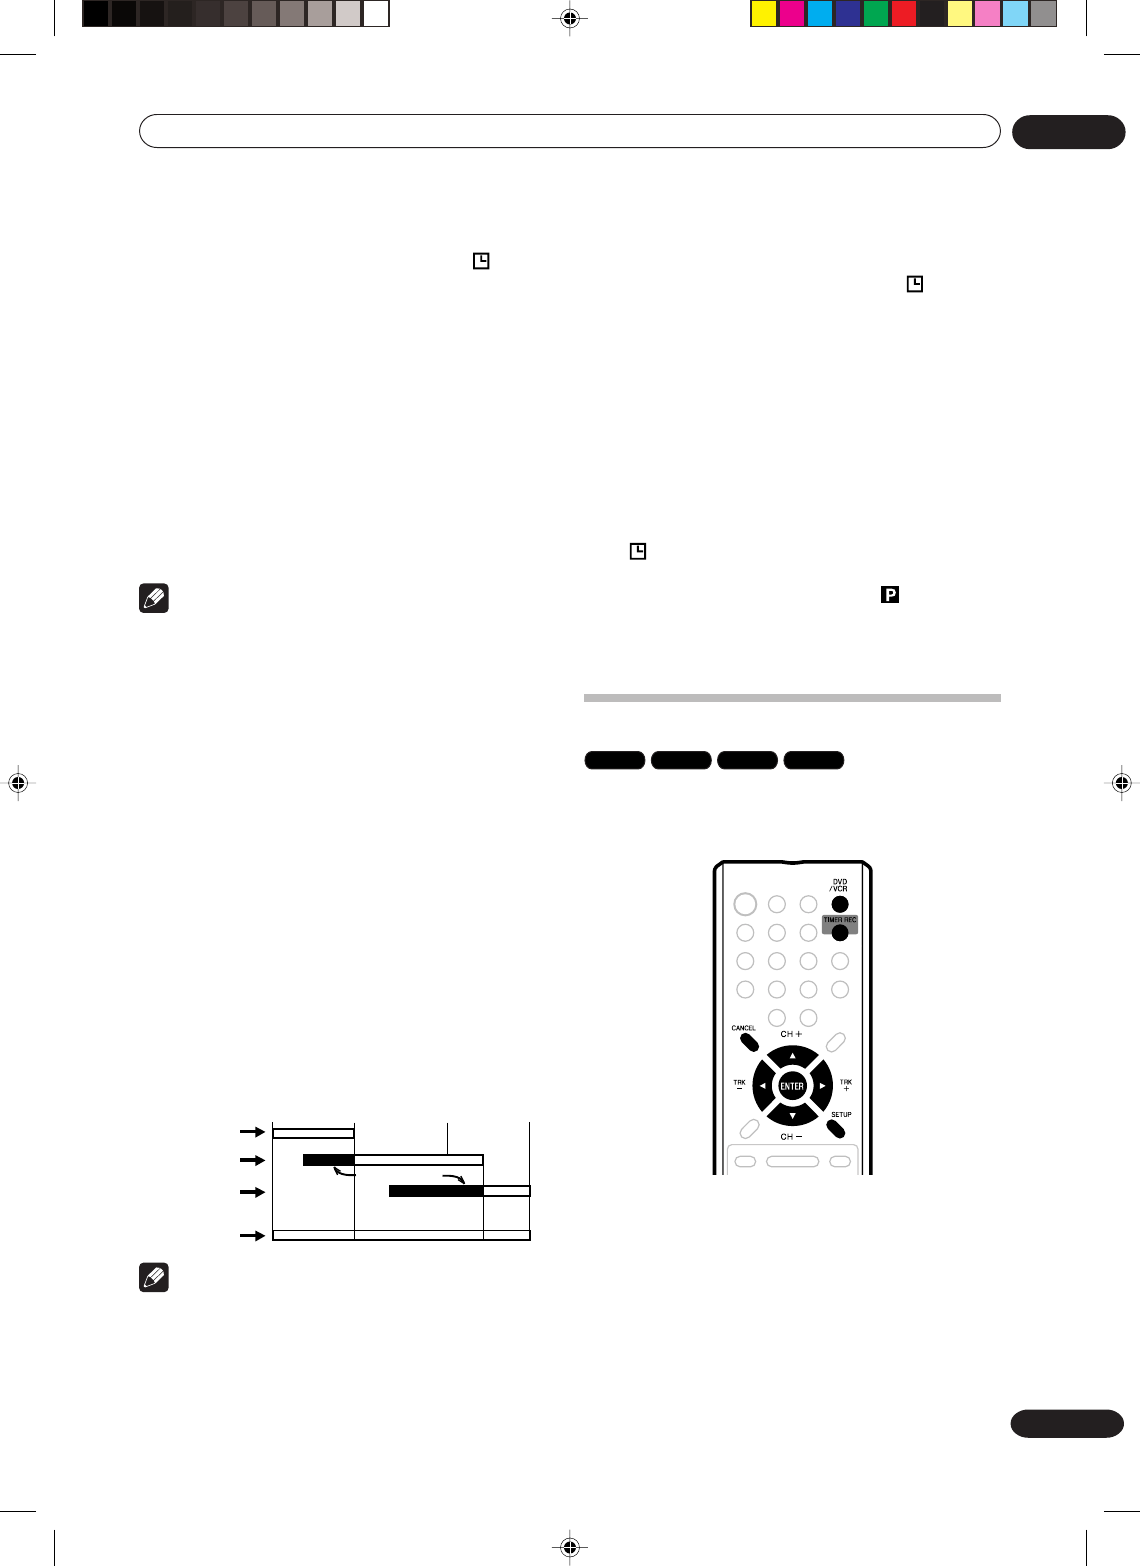
In case timer programs-overlap
Do not overlap timer programs as portions of the
conflicting programs will be lost. The first recording
time has priority over the next recording time as shown
in the diagram below.
In this case, the next recording time is delayed a
maximum of about 1 minute.
8 : 00
11 : 00
9 : 00
10 : 00
Program 1
Prog.1
Deleted Parts
Non Recorded Portion Parts
Prog.2 Prog.3
Program 2
Program 3
Recording
Control Settings
Note
•Recording starts a few seconds before the preset
starting time.
•You cannot use the timer recording for the both
DVD and VCR at the same time.
•You can playback the DVD during the VCR timer
recording, and you can playback the VCR during
the DVD timer recording.
• If a recordable tape is not inserted or no disc space
is available, the timer record indicator “
” flashes,
and “TIMER RECORDING ERROR. PLEASE CHECK
THE DISC OR TAPE.” appears on the screen.
Replace the tape or disc to allow recording.
• If you perform any operation during timer recording,
the power will not go OFF when timer recording
finishes. To turn the power OFF, press
STANDBY/ON.
•From about 2 minutes before timer recording starts,
some operations cannot be done.
• If you set recording to start less than 2 minutes
ahead of time, the power will not turn OFF after
recording finishes.
• If the recording media fills up during timer recording,
“
” will flash and the power will not turn OFF. Also,
any timer recording scheduled for later is cancelled.
• When the PROGRESSIVE indicator “ ” appears in
the display window (progressive scanning mode)
and the VCR mode is selected, you cannot display
the PlusCode input screen.
Switch to the DVD mode when entering PlusCode.
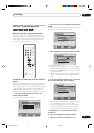
Timer recording
VR mode
Video mode
DVD-R
VCR
The timer recording system allows you to select the
date, time and channel and record the desired pro-
grams. Up to 12 timer programs within a month can be
stored in this unit.
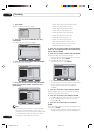
Setting timer recording
Preparation:
•Turn ON the TV and set to the video input mode.
• Load a recordable DVD or video tape.
•Press DVD/VCR to select the appropriate mode.
• Confirm that the clock is indicating the correct
time.
Example:
Set the recording mode to LP; the TV program is on
channel 12 starting at 8:00 PM and stopping at 9:30 PM
on a date of 20th.
2G00201B_En_52_62 8/4/05, 10:5759