Page 42
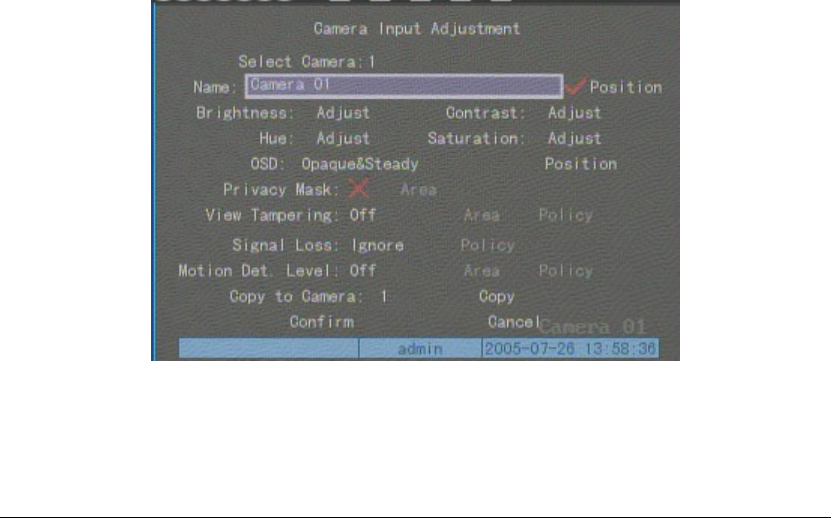
Display mode:There are several display modes:Opaque&Steady, Transparent&Steady,
Transparent&Flashing, Opaque&Flashing,
Move “Active Frame” to “OSD” item, you can select one mode.
Display position and format:Move “Active Frame” to “Position” button on the right side of
“OSD”, press 【ENTER】to enter into setup image, you can find there are 22*18 (for NTSC,
22*15) small panes, and OSD position is in red. You can use【È】【Ç】【Æ】【Å】keys to move
the OSD position.
Press【EDIT】key to select OSD format. There are following OSD formats:
MM DD YYYY W hh:mm:ss (default)
MM DD YYYY hh:mm: ss
DD MM YYYY hh:mm:ss
YYYY MM DD W hh:mm:ss
YYYY MM DD hh:mm:ss
Here YYYY means year, MM means month, DD means day, W means weekday, hh menas
hour, mm means minute and ss means second.
Press【ENTER】 to save and return “Image” menu or perss to【ESC】abort modification.
Copy parameters:After you setup the properties of one camera, you can copy it’s parameter
to any other camera or all cameras.
After you save the modification, you can find the modification will be taken into effective.
You can perss “Cancel” button or【ESC】key to abort.
Camera Name
In “Image Setup” menu, you can define name for each camera. Please note that camera’s
name can not be copied.
The steps of camera name setup:
Step 1:Select one camera.
Step 2:Move “Active Frame” to camera name edit box, press【EDIT】key to enter into edit
status, you can input digital number, uppercase and lowercase characters (refer to
