


Setup and Connections
9
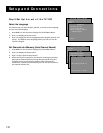
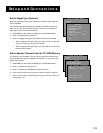
If you move or if any of your information
changes:
1. Return to the GUIDE Plus+ setup and
reinitialize the setup to indicate that
you are no longer using a cable box.
(You must clear the previous channel
lock before re-setting the TV/VCR.)
2. Press MENU on the remote to
display the TV/VCR Main Menu.
3. Press 5, then 1 to initiate Auto Channel
Search.
4. When the Auto Channel Search is
complete, press MENU.
5. Press 6, then 1 to create a new setup.
(See “Step 8: Set Up the GUIDE Plus+
System,” at left, for more details.)
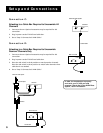
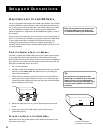
Step 6: Plug in the TV/VCR
Plug the power cord into the wall outlet, matching the wide blade of
the plug with the wide slot in the outlet. Be sure to insert the plug
completely.
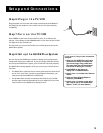
Step 7: Turn on the TV/VCR
Press POWER on the front of the TV/VCR or press TV or VCR on the
remote. The indicator in the POWER button on the front of the TV/VCR
will light when the TV/VCR is on.
The first time you turn on the TV/VCR, you will be asked to set up the
GUIDE Plus+ system.
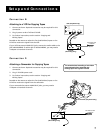
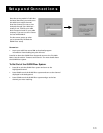
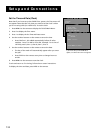
Step 8: Set up the GUIDE PIUS+ System
You can set up the GUIDE Plus+ system to display your local program
listings and control your cable box. If you are using a cable box and do
not set up the GUIDE Plus+ system, your TV/VCR will not work properly.
The GUIDE Plus+ Setup appears when you turn on your TV/VCR for the
first time.
• The GUIDE Plus+ system is the on-screen guide that lists what shows
are on TV in your area. In order to get program information, you
need to set up the GUIDE Plus+ information.
• The G-LINK cable must be connected to the back of your TV/VCR,
and the other end must be attached to your cable box (if you have
one) in order for the GUIDE Plus+ Setup to work.