


Chapter 4: Basic operation
38 truVision DVR 31 User Manual
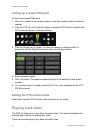
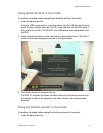
If using a USB memory drive, insert the device into the USB port on the front
panel. If using a digital video disc (DVD), insert the disc into the DVD drive. If
both media are found in the DVR 31, the USB device takes precedence over
the DVD.
2. Press the Archive button on the front panel, or remote control, or click Archive
in the mouse toolbar.
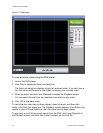
3. Press Enter to display the Archive screen.
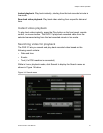
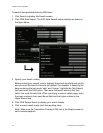
4. Select the cameras you want for archive.
5. Specify a date and time range you want for archive.
6. Select a data type.
Use the Data Type option to select one of the following:
Normal. Archive normal video only.
Event. Archive event video only.
Both. Archive both normal and event video types.
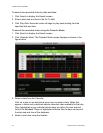
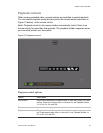
7. Select the events you want to archive, if required.
a. Select the Choose Events option.
This option is only enabled if you select Event as the data type. A list of
events displays on the Event List screen.
b. Click an event in this screen to be archived.
You can click additional events you want to archive.
Note: When archiving a motion event, the DVR archives the motion event for
the selected camera as well as post-event video from all other cameras. The
duration of the post-event video is based on the value you specified on the
Post-Alarm Seconds option in the Alarms screen.
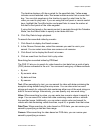
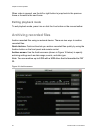
8. Select a file format.
Use the Format option to specify whether to export to an original, DRV or AVI
file type. Selecting the original format results in faster archiving of large
amounts of video compared to the DRV format.
Although selecting the original format results in faster archiving, you cannot
select which camera to archive. The system archives all the data in the DVR.
In addition, when specifying a time range to archive, selecting the original file
format results in the exporting of video clips that include the specified time
range, but may not be contained in a single file.