Configuration
The Configuration section offers access to all unit configuration options including Network,
Telnet/HTTP, Serial Ports, Outlets, Groups, Users, FTP, Proxy/SNTP and SNMP. This section is
available to administrative level users only.
System
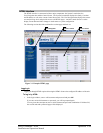
The System configuration page is used for reference of system information such as Ethernet NIC Serial
Number, Ethernet MAC address and system firmware and hardware revisions as well as assignment and
maintenance of the system location and tower descriptive names.
For description names, up to 24 alphanumeric and other typeable characters (ASCII 33 to 126 decimal –
spaces and colon characters are not allowed) are allowed.
NOTE: Spaces may be used for the location description only.
Creating a descriptive system location name:
Enter a descriptive name and press Apply.
Creating a descriptive unit name:
Click on the Tower Names link.
On the subsequent Tower Names page, enter a descriptive name and press Apply.
Creating a descriptive input feed name:
Click on the Input Feed Names link.
On the subsequent Input Feed Names page, enter a descriptive name and press Apply.
Creating a descriptive outlet name:
Click on the Outlet Names link which will open the Outlets configuration page. See Outlets on page
16 for additional information on creating descriptive outlet names.
Creating a descriptive Pass-Thru port name:
Click on the Serial Port Names link which will open the Serial Ports configuration page. See Creating
a descriptive Pass-Thru port name: on page 14 for additional information on creating descriptive Pass-
Thru port names.
Network
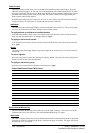
The Network configuration page is used for maintenance of the network interface. From this page an
administrator may configure the IP address, subnet mask and gateway address as well as view the link
status, speed and duplex value.
The Sentry is configured with the following network defaults to allow unit configuration out-of-the-box
through either Telnet or HTML:
• IP address: 192.168.1.254
• Subnet Mask: 255.255.255.0
• Gateway: 192.168.1.1
The initial local PC network connection must be configured as noted below:
NOTE: Contact your system administrator for instructions in reconfiguring the network connection. Reconfiguration of
your network connection may require a restart to take effect.
• IP address: 192.168.1.x (where x is 2-253)
• Subnet Mask: 255.255.255.0
NOTE: The unit must be restarted after network configuration changes. See Performing a warm boot: on page 19.
Setting the IP address, subnet mask or gateway:
In the appropriate field, enter the IP address, subnet mask or gateway address and press Apply.
Sentry Commander - PT40 Operations • 13
Installation and Operations Manual


