


27
5
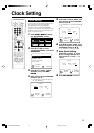
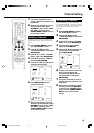
Press \ / |
to select “DATE”, then
enter the date using the Number
buttons or '/".
• For example, for 1st April press 0 1 0
4.
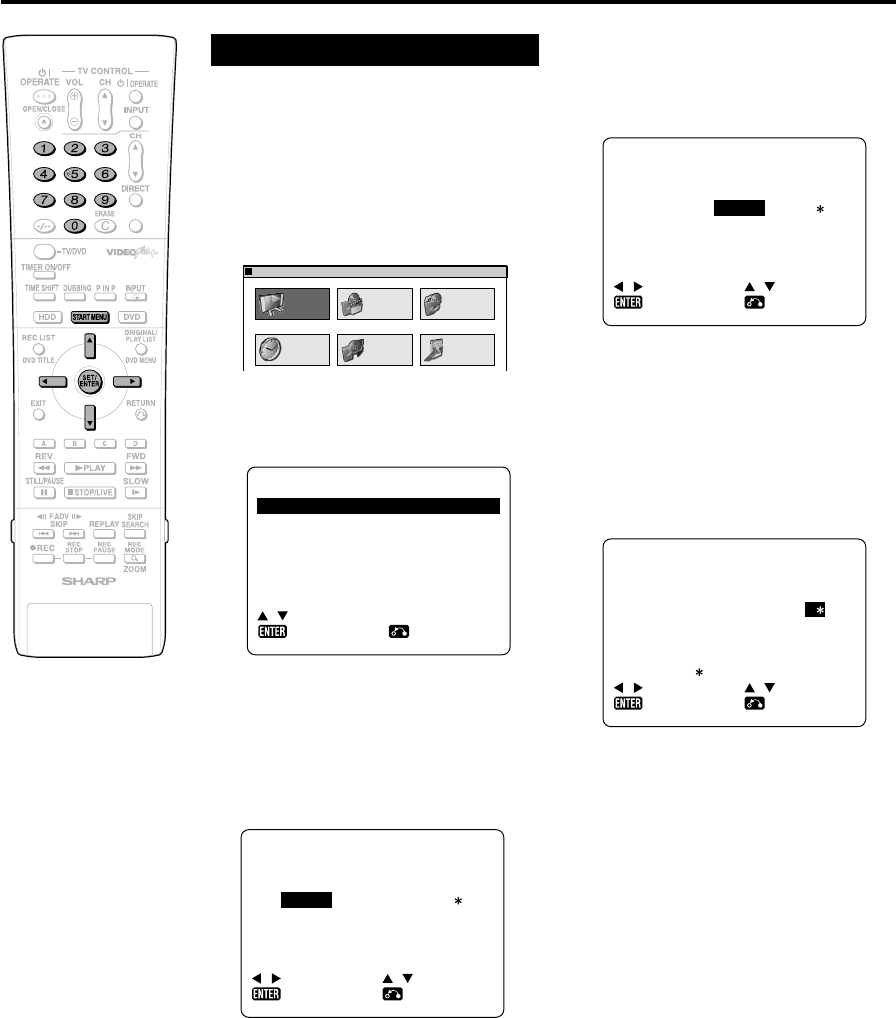
Clock Setting
Clock Setting
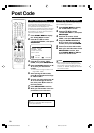
VIDEO Plus
+
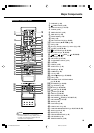
MODE SETT I NG
MANUAL TUN I NG
CHANNEL SORT
CLOCK SETT ING
POST CODE
:SELECT
:RETURN:ENTER
3
Press '/" to select “CLOCK
SETTING”, then press SET/
ENTER.
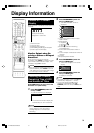
4
Enter the time using the Number
buttons or '/".
• If the minutes or hours are less than
10, enter leading 0.
CLOCK
TIME DATE
15:06 1/01
:SELECT
YEAR
04
:RETURN
:CHANGE
:ENTER
CLOCK
TIME DATE
20:30 1/04
DATE :DAY /MONTH
:SELECT
YEAR
04
:RETURN
:CHANGE
:ENTER
CLOCK
TIME DATE
20:30 1/04
ADJUST :AUTO
:SELECT
YEAR
05
-
:OFF
:RETURN
:CHANGE
:ENTER
6
Press
\/|
to select “YEAR”. Enter
the last two digits of the year using
the Number buttons or
'/" .
• For example, for 2005 press 0 5.
7
Auto Clock Setting
Press \ / |
to select “
∗∗
∗∗
∗”. Press
'/" to change between auto
clock on/off (“
∗∗
∗∗
∗” is “ON”, “–” is
“OFF”).
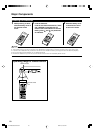
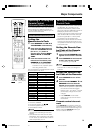
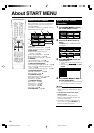
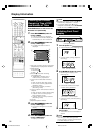
1
Press START MENU to display
the “START MENU” screen.
REC LIST
TIMER
PROGRAM/
CHECK
INITIALIZE/
FINALIZE
OTHER
SETTINGS 1
EDIT/
ERASE
DUBBING
DISPLAYS LIST OF RECORDED TITLES FOR PLAYBACK
START MENU
[
REC LIST
]
82:0121/52
2
Press '/"/ \/| to select
“OTHER SETTINGS 2”, then press
SET/ENTER.
The clock will normally be set using the VPS/
PDC information when your Recorder
automatically tunes in the broadcast
channels. If for any reason the VPS/PDC
signals are not present, your Recorder will not
be able to set the clock. This procedure will
allow you to set the clock.
8
Press SET/ENTER to confirm.
DV-HR350H/300H-026-033 2004.4.8, 10:37 AM27