


102
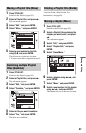
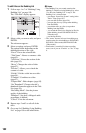
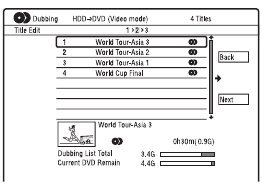
To edit titles on the Dubbing List
1 Follow steps 1 to 7 of “Dubbing Using
Dubbing List” on page 100.
The “Title Edit” display appears.
2 Select a title you want to edit, and press
ENTER.
The sub-menu appears.
3 Select an option, and press ENTER.
The options differ depending on the
dubbing direction or disc type.
“Erase”: Erases the selected title.
“Title Name”: Names or renames a title
(page 42).
“A-B Erase”: Erases the section of the
title (page 93).
“Move”: Changes the order of titles
(page 97).
“Preview”: Allows you to check the
content of a title.
“Divide”: Divides a title into two titles
(page 94).
“Combine”: Combines two titles
(page 97).
“Chapter Edit”: Edits chapters (page 95).
“Set Thumbnail”: Changes the title’s
thumbnail frame that appears in the Title
List (page 39).
“Recording Mode”: Sets the picture
quality of the dubbing.
“Bilingual”: Sets how a bilingual audio
programme is dubbed.
“Cancel”: Exits the sub-menu.
4 Repeat steps 2 and 3 to edit all of the
titles.
5 Go to step 8 of “Dubbing Using Dubbing
List” on page 100 to dub edited titles.
b Notes
• The Dubbing List you created remains after
dubbing. To edit the existing Dubbing List, select
“Use Previous Dubbing List” in step 4. The
Dubbing List is cleared when:
– you change “Input Line System” setting in the
“Basic” setup (page 130).
– you reset the recorder (page 158).
– you open the disc tray (except when dubbing
from the HDD).
– you edit the titles on a disc (except when
dubbing from the HDD).
– you switch the Title List to Original or Playlist
(when dubbing from DVD-RWs/DVD-Rs in
VR mode only).
– you finalise the disc.
• The “seams” that are left over from editing may
remain on the disc after dubbing to DVD+RWs/
DVD-RWs (Video mode)/DVD+Rs/DVD-Rs
(Video mode).
• Finalisation is cancelled if a timer recording
starts, even if you set “Finalise” to “Yes” in step
9.