10
4 Click [Next].
Follow the on-screen instructions and
proceed with the installation.
When the installation is complete,
“AX1400 Remote Editor 1.0 Setup”
automatically quits.
Tip
If the installation screen is hidden behind
other windows
If “AX1400 Remote Editor 1.0 Setup”
disappears behind other screen while
installing, press the [Tab] key several times
while pressing down the [Alt] key to bring
up “AX1400 Remote Editor 1.0 Setup”
again.
Installing the USB driver
You need to install the USB driver before
connecting the supplied Dedicated USB
cable to your PC and the Remote
Commander.
Follow the instructions below to install.
Notes
•Without batteries in the Remote Commander,
the USB connection cannot be detected by the
PC even if the Dedicated USB cable is
connected.
• Make sure to install the batteries before
installing the USB driver. If the USB driver
installation is interrupted by mistake, install
it again from the beginning.
• Do not simply copy the USB driver in the
supplied CD-ROM to the PC. You need to
install it properly for it to work.
• Administrator privileges are required for
installation on PCs running Windows 2000 or
Windows XP.
• On Windows 2000 or Windows XP, you need
to install the driver for each port to which the
Remote Commander will be connected.
• Depending on the PC, various messages
other than those mentioned in this manual
may appear during the USB driver
installation. Just follow the on-screen
instructions of these messages to install.
For Windows XP users
1 Close all software running on
Windows.
2 Insert the supplied CD-ROM into
the CD-ROM drive of the PC.
After a moment, “RM-AX1400 Install
CD Menu” appears.
3 Click [Exit] to close “RM-AX1400
Install CD Menu.”
4 Connect the PC and the Remote
Commander using the supplied
Dedicated USB cable (page 11).
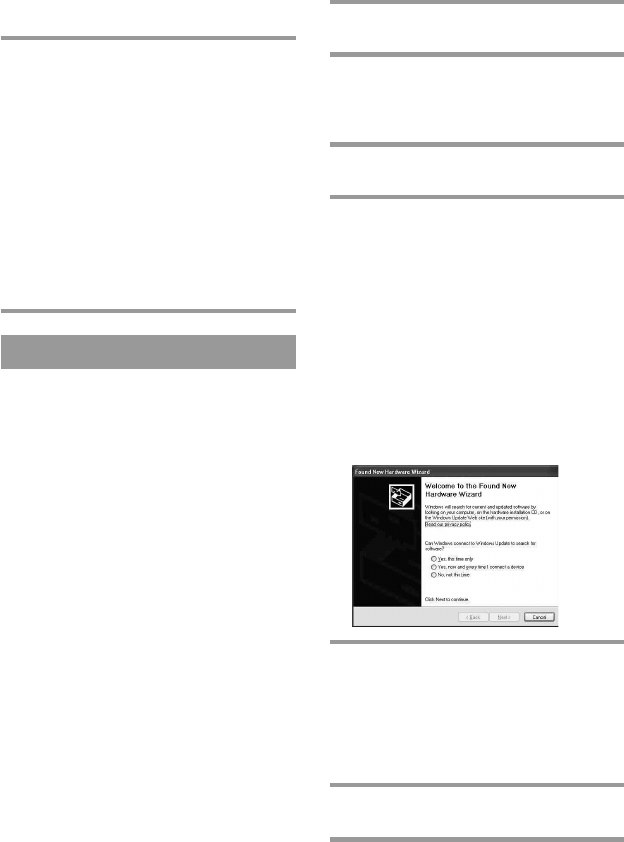
“Found New Hardware” appears in
the Notification Area in the lower
right-hand of the display. After a
moment, “Found New Hardware
Wizard” appears.
Tip
If the following confirmation message
“Can Windows connect to Windows
Update to search for software?” appears,
select [No, not this time], then click
[Next].
5 Select “Install the software
automatically [Recommended]”,
then click [Next].
Installing of the USB driver starts.
“Completing the Found New
Hardware Wizard” appears when the
installation is complete.
6 Click [Finish].
Installing of the USB driver finishes.
Setting up for your PC (continued)


