


23
9.6. Focus Speed Settings
Camera focus speed can be set. (Refer to p. 48; Focus Speed.)
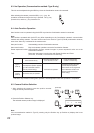
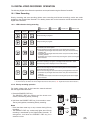
9.7. Utilization of the Abbreviation Number Function
By pressing the SET key after entering the preprogrammed abbreviation number using the ten-key numerical
pad, or by simply pressing the function key, the following camera operations can be performed:
(Refer to p. 34; Abbreviation (Function programming).) (Refer to p. 41; Abbreviation.)
• Display of the set camera image (DVR No., Camera No. and Position No.) on the monitor.
• Display of Digital Video Recorder number on the monitor.
• Auto-focus operation.
• Auto function operation.
• Camera’s auxiliary contact control.
• Electronic zooming.
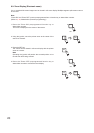
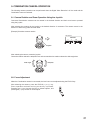
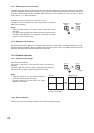
9.8. Combination Camera Menu Display
The Combination Camera's menu screen can be displayed to perform preset position programming and other
settings. For details, please refer to the instruction manual enclosed with the camera.
Note
The menu screen can be displayed for the following camera model: C-CC501, C-CC504, C-CC514, C-CC551,
C-CC554, C-CC564, C-CC714 and C-CC764.
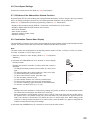
1. Select the camera for menu display. (Refer to p. 13; Equipment
Selection.)
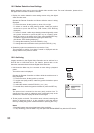
2. Hold down the CAM MENU key for 2 seconds or more to display
the menu screen.
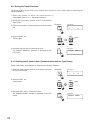
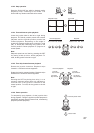
Operate the Remote Controller as follows while the camera is
displayed:
• To change the setting contents, tilt the joystick up, down, left or
right.
• To select the setting item, tilt the joystick up, down, left or right.
• To set the setting item, press the SET key.
• To return to the previous screen, press the C key.
• To clear numbers, press the C key.
• To enter camera numbers, use a ten-key numerical pad.
• To enter position numbers, use a ten-key numerical pad.
• To set zoom, rotate the joystick clockwise or counterclockwise.
• To set focus, use the FOCUS (+) or (
-
) key.
Notes
• Settings cannot be cancelled or confirmed by rotating the joystick clockwise or counterclockwise while
the camera menu is displayed. Use either the C or Set key.
• When the camera’s communication system is set to Type B, if the cursor does not stop at each item in
the camera menu, but instead moves past, press the SHIFT key and operate the joystick while the
SHIFT key indicator is illuminated. This allows the cursor to stop at each item. When setting preset
positions or storing camera movement for a trace function, press the SHIFT key again to extinguish the
indicator first before performing such settings.
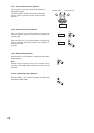
3. Hold down the CAM MENU key for 2 seconds or more to exit the menu screen.
CAM
CAM MENU
C A M
C A M E R A M E N U
P R E S E T
I D S E T T I N G
C A M E R A S E T T I N G
A U T O M O D E
A L A R M
A U X
T I M E R
M A N U A L
M A I N T E N A N C E