36
Notes:
1. Alternatively, you can press the “V.FORMAT” button on the remote control to change the output format as
described on page 45.
2. You can also press “A.RATIO” button on the remote control to change the aspect ratio as described on
page 46
3. “AUTO - 1080i” means that the receiver is in auto-switching mode and the current video format as sent by
the broadcaster is 1080i. Likewise for “AUTO - 720p”, “AUTO - 576p” and “AUTO – 576i”
4. If, for purposes other than personal viewing, you display a program in a different aspect ratio from its
original setting, you may infringe on the copyrights that the program may be under.
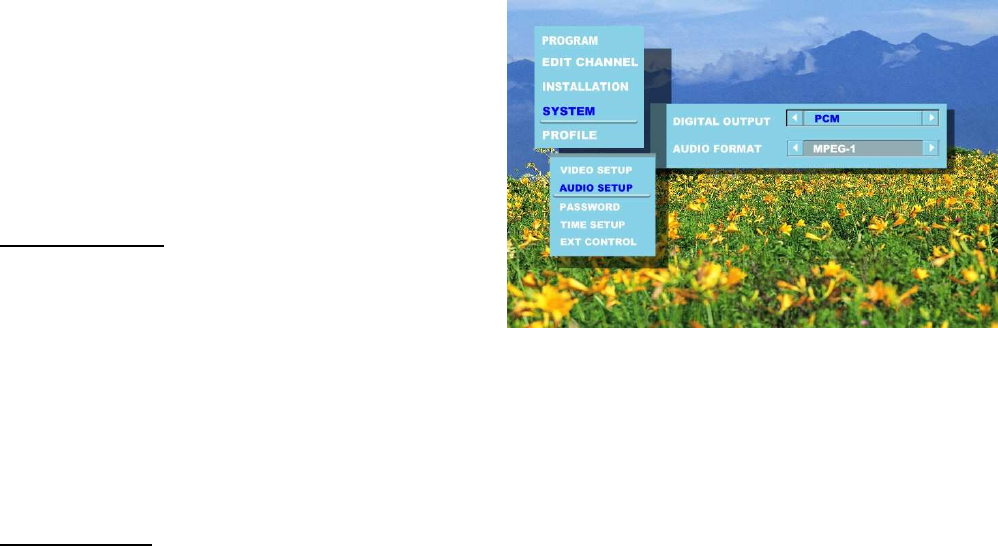
AUDIO SETUP
1.
Highlight “AUDIO SETUP” and press the “ENTER”
button.
2.
Use the “▲” and “▼” buttons to select between
“AUDIO FORMAT” and “DIGITAL OUTPUT”.
3.
Press the “ENTER” button to confirm your choice.
DIGITAL OUTPUT
If the broadcasted program contains more than one
type of digital audio output, use the “◄” and “►”
buttons to switch between the available options “PCM”
and “Dolby Digital”.
Note: You need to connect the receiver to an amplifier
with Dolby® Digital decoding capability via
“DIGITAL AUDIO” optical port or coaxial port
when “Dolby Digital” option is selected (Refer to
page 21 for the connection details). Otherwise,
you may encounter softer audio from TV.
AUDIO FORMAT
Use the “▲” and “▼” buttons to select the preferred
audio format present in the program you are watching.
Note: Alternately, you can pop up the AUDIO
SELECTION window by pressing the AUDIO
button on the remote control. Refer to AUDIO
on page 47.
PASSWORD
1.
Highlight “PASSWORD” and R -
3etczPV14D“RB4PV43VO heeett.n Aed“DIGR”
