68
Object Search Filter Information
1
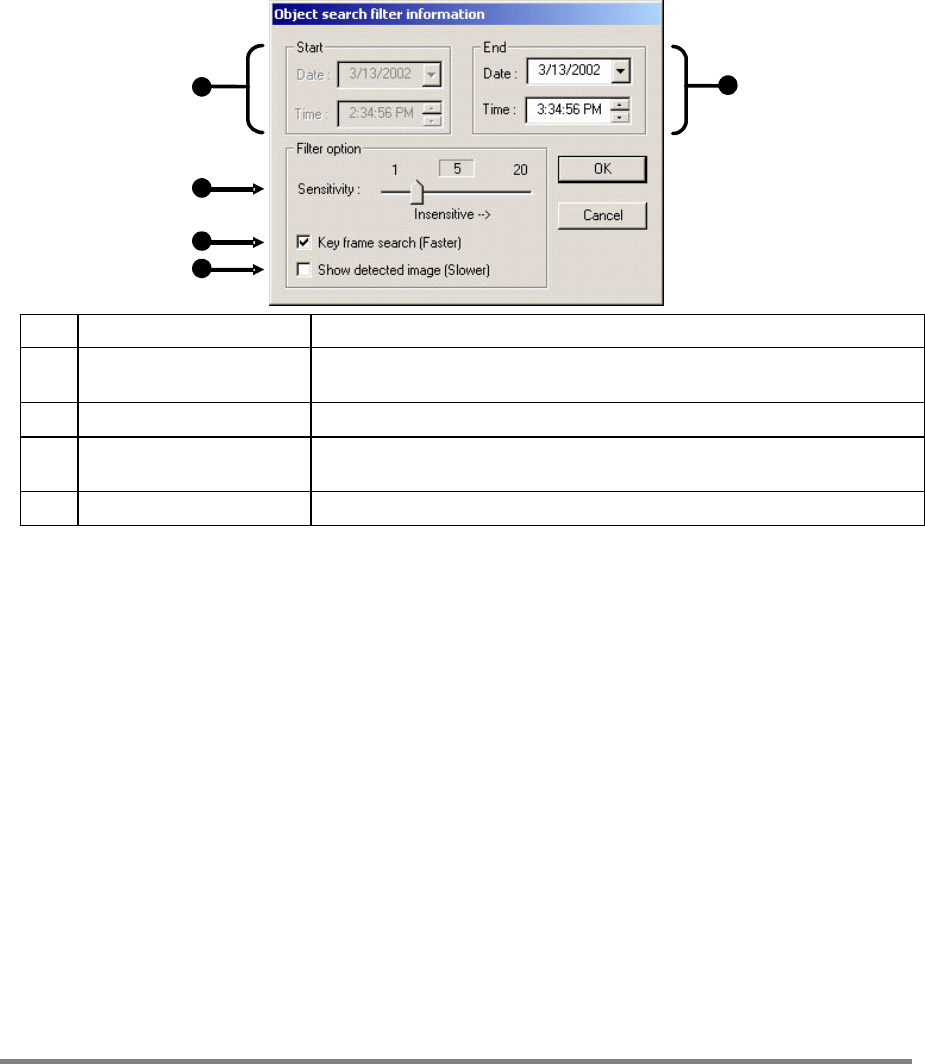
1 Start Displays the time and date of the initial key frame.
2 Sensitivity Used to control sensitivity of the motion to be detected. Poor lighting conditions can often
be interpreted as motion; the sensitivity setting can compensate for this.
3 Key Frame Search Searches by key frame.
4 Show Detected Image Displays the results as they are found. Using this option slows the search process slightly
and therefore may not be ideal when searching large periods of time.
5 End Used to designate an end time. (Default is 1 hour.)
Performing an Object Search
1. Perform a Basic Search
2. Select a single camera, either by turning off all cameras but one or by double-clicking a displayed image.
3. Select the Object Search Button.
4. Create a motion region box on the image by clicking inside the image and holding down the left mouse button while dragging the
pointer. When the desired shape is created, let go of the mouse button. Only one motion region box can be created. To delete
the motion region box, click the Clear Selection Button.
5. Click the Start Search Button. The Object Filter Search information should open.
6. Select an end time. One hour is the default setting.
7. Adjust the sensitivity if necessary.
8. Click OK to begin the search. When results are found, they will be displayed in the column to the right. If no results are found,
the search will end and “No Images Found” will display in the column. Click Stop to stop a search.
9. When the search has ended, double-click on one of the results. Use the up and down arrows to scroll through the results quickly.
10. When the desired image is found, select Apply to Main Search to use the play controls.
AUDIO PLAYBACK
Audio is played back at 48,000Hz. To play audio with the video:
1. Select a single camera by turning off all cameras but one using the Camera Select Buttons. The audio buttons will be
displayed.
2. Select a single audio channel to play. When an audio channel is selected, the Time Sync Button will be automatically selected.
3. Click Play.
