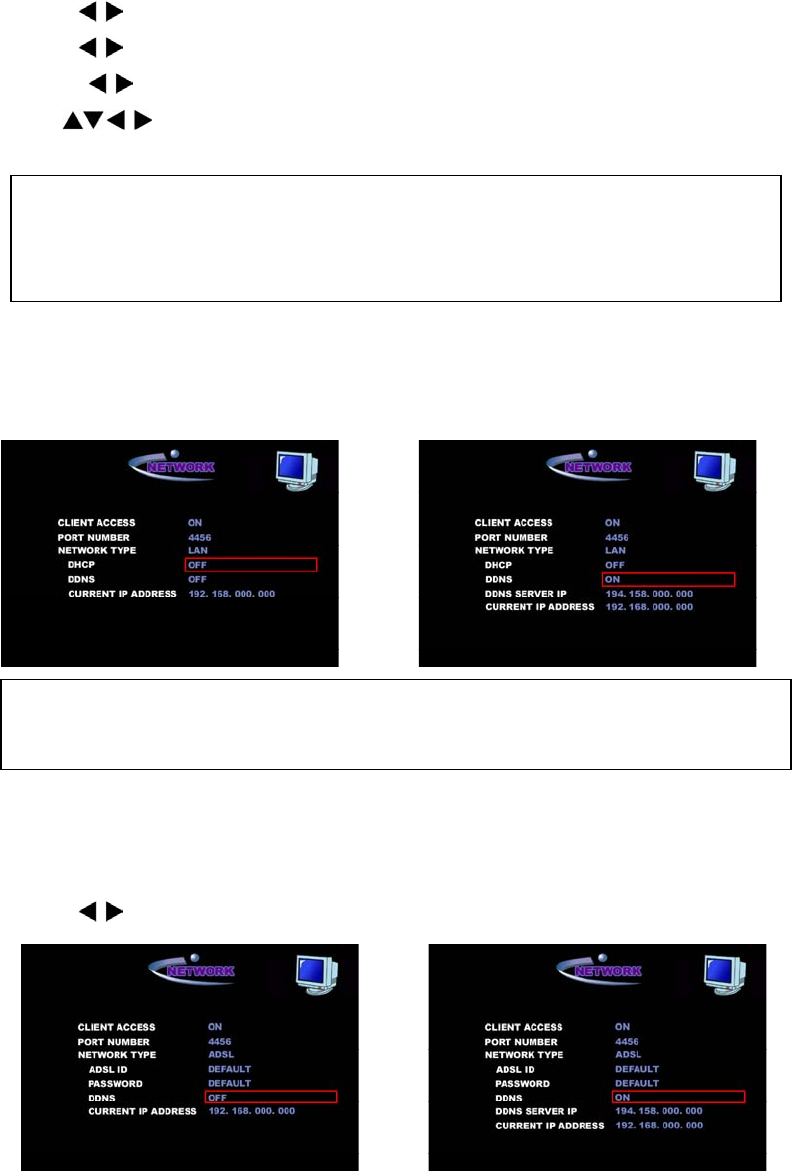
1. Press
buttons to set network type to <LAN>.
2. Press buttons to set DHCP to <ON>.
3. Press buttons to set DDNS to <ON>.
4. Use
buttons to edit DDNS SERVER IP Address. And press SEL button to
apply the changed DDNS SERVER IP address.
NOTE
To use DDNS function, the DVR Serial number and Domain Name should be registered at
DDNS Server.
5. When DVR is rebooted, the newly assigned IP address appears in the CURRENT IP
ADDRESS field.
For setting a mail address that will receive the assigned IP addresses that are frequentl
y
changed, please refer to “4-5-5. SEND MAIL (IP ADDRESS Mailing).”
4-7-4. ADSL
Users connected to ADSL network, which uses dynamic IP addresses, should follow the setup
description below.
1. Press buttons to set network type to <ADSL>.
2. Place the cursor on “default” in the SERVICE ID field and press SEL button to type the
ADSL service ID. Then the keyboard will appear.
42


