46
POSITIONER CONTROLS & INDICATORS
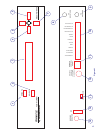
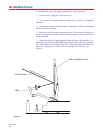
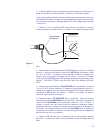
Positioner front and back panel wiring and controls.
See Figure 41. The call-outs explain panel controls,
indicators and wire connections. If you need information
on system installation, refer to the Installation Manual.
1. SELECT A: Selects command/option displayed on
top line of display.
2. SELECT B: Selects command/option displayed on
bottom line of display.
3. DISPLAY: Liquid Crystal Display (LCD).
4. LEFT: Left arrow button, when pressed moves
cursor left, or moves antenna left if in manual movement.
5. UP: Up arrow button, when pressed, causes screen/
letter to scroll up or antenna to raise if in manual
movement.
6. RIGHT: Right arrow button, when pressed, moves
cursor to move right, or moves antenna to right if in
manual movement.
7. DOWN: Down arrow button, when pressed causes
screen/letter to scroll down or antenna to lower if in
manual movement.
POSITIONER CONTROLS & INDICATORS
8. TO RECEIVER: 75 ohm connection to satellite
receiver. There is +13 to +17 VDC present on the center
conductor of this jack (used to power LNBF).
9. TO ANTENNA: 75 ohm satellite signal input from
the LNBF on the antenna. There is +13 to +17 VDC
present on the center conductor of this jack (used to
power LNBF).
10. Control Wires: These 13 wires control the mount.
There are various DC voltages present on these wires.
11. REMOTE CONTROL PANEL: This modular
telephone type plug connects the positioner to the
optional remote control wall plate (optional).
12. AC POWER CORD: Connect to 110 VAC outlet.
13. 46 CM - 60 CM: Selects what size antenna the
positioner is controlling (46cm = 18", 60cm = 24").
Switch was removed 2/16/98.
14. IGN: Ignition switch signal connection (optional).
15. WARNING INDICATOR: This jack connects the
positioner to the Warning Device.
Rev. 2/98


