GLID 104
To set the System Set-Up Mode, press the UP and DN keys
simultaneously and turn the power switch from OFF to ON.
Functions are selectable by pressing either the DN or UP keys.
Individual settings are explained later at each function. In this
mode, servos are not activated, but operating signals are
transmitting (only when the Tx module is in place). However, use
extra caution not to interfere with other frequencies. By pressing
the DN and UP keys simultaneously, you can return to the normal
display, which allows the servos to again operate.
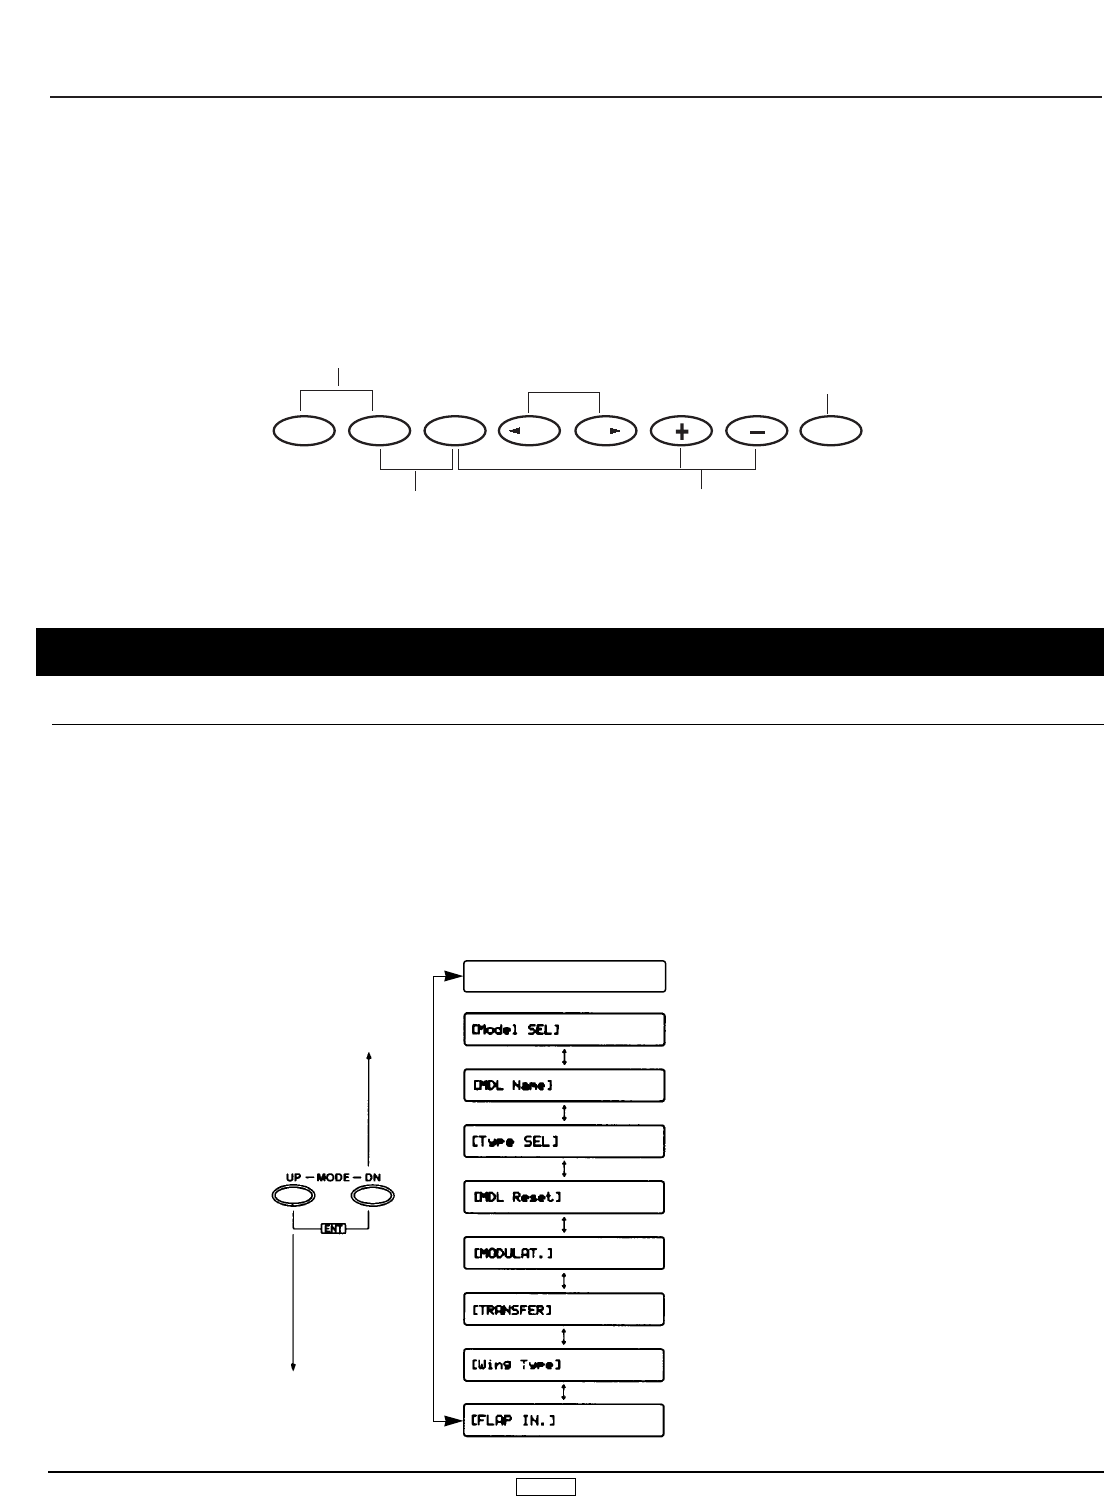
3.1 System Set-Up Mode
3. System Set-Up Mode Functions
Pg. 106 Information Display
Pg. 106 Model Select And Copy Function
Pg. 107 Model Name Input
Pg. 108 Model Type Selection Function
Pg. 108 Data Reset
Pg. 109 Modulation Selection
Pg. 110 Model Data Transfer
Pg. 112 Wing Type Selection
Pg. 112 Flap Channel Input Selection
SYSTEM SET-UP MODE
[INFO-DISP]
↕
2.2 Normal Display, cont.
From the Normal Display, the following inputs can be made:
When setting various functions with the buttons shown below,
start either in the Function Mode or the System Set-Up Mode.
Use either the UP
or DN key to scroll
through the menu
and access the
applicable function