34
Attention:
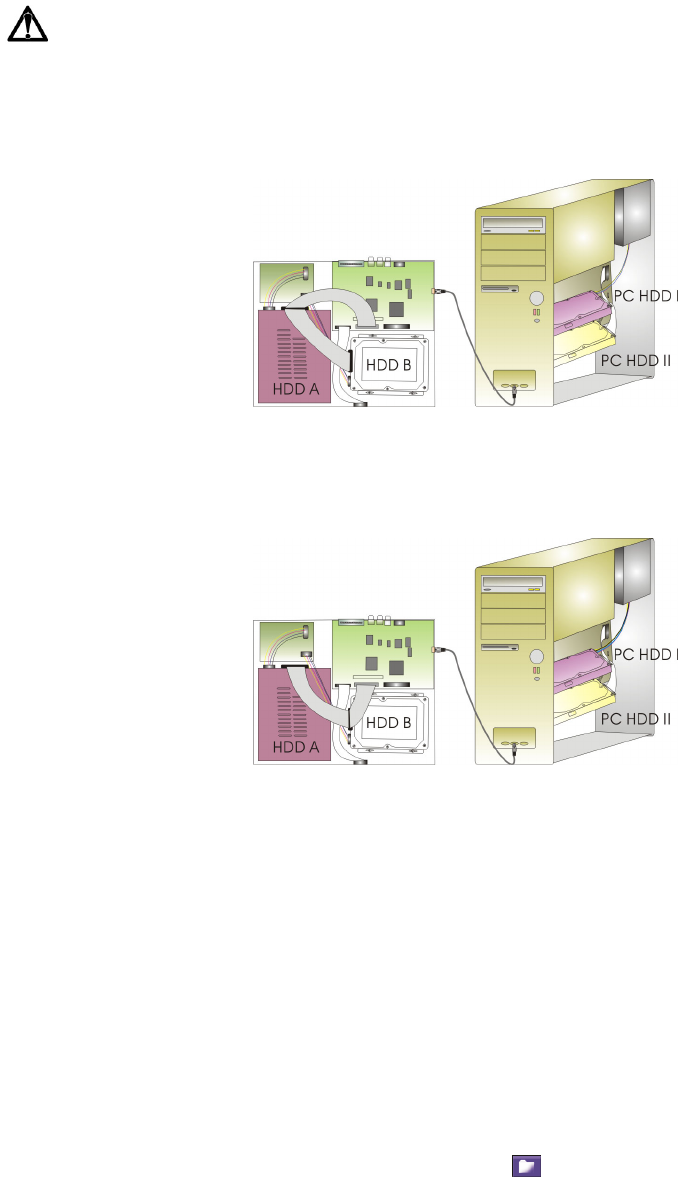
When you want to read the data in the HDD A via a USB cable directly without
removing the hard disk, follow the following picture to connect the hard disks in the
DVR.
When you need to read HDD B via a USB cable. Please plug the middle connector
of IDE cable in HDD B and the other connector to HDD A as the following picture.
Without removing the hard disk, your PC can read the data in HDD B.
Use the playback application to play the video data by PC.
4.2.1 Channel Selection
This determines which of the cameras will be displayed on the surveillance screen.
Choose an appointed channel to display the surveillance screen by clicking the
channel icon. Click once to show a full-screen display. To show a quad screen, click
the same icon again.
4.2.2 Video Playback List
After selecting the appointed hard drive, click to select an event and click OK to
play back the appointed surveillance.
When you click the Event List icon, it pops-up an event table as the following
illustration shows. You will see the table shows Record mode, Start time and End
time of each event. Record Mode can be “T”, “M” or “S”. “T” represents Total
Recording, which means the camera keeps on recording continually. “M” means
Motion Recording, which means the recording starts once the camera detects
motion. “S” represents Sensor Recording, which means the camera records when


