


Section 4
Familiarization
Page 4 - 12 EchoStar DVR-7000 Viaccess
© 2002 EchoStar International Corporation
All rights reserved
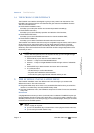
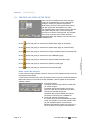
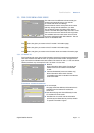
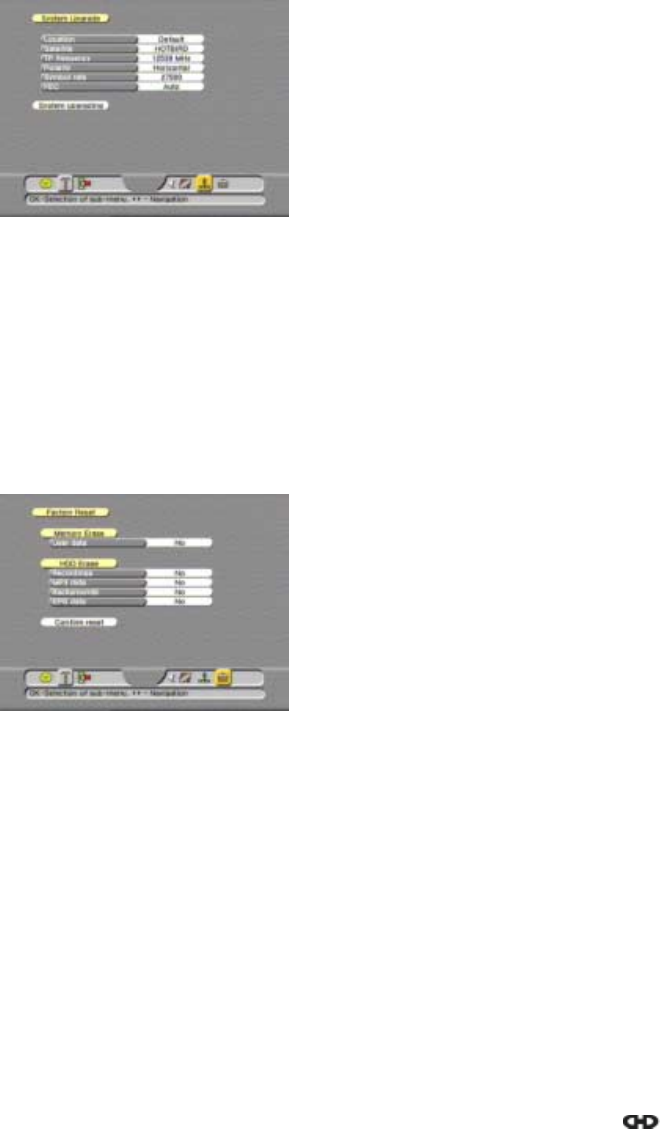
2.2.6. SYSTEM UPGRADE PAGE
This menu page allows you to upgrade the receiver’s software. EchoStar provides software
updates Over-The-Air (OTA) which means that you can upgrade your system via the satellite.
If you are not able to receive the satellite/transponder, you always can upgrade the software
through the SERIAL PORT (RS232) at the rear of the receiver and the downloaded software
from the EchoStar website.
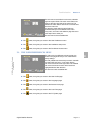
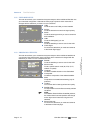
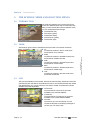
2.2.7. FACTORY RESET
The Factory Reset menu gives you the possibility to reset the receiver to the initial factory
settings. The memory erase option restores the factory settings over your personal settings.
All customized data like parental lock and favorites will be replaced with the factory settings.
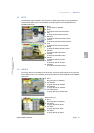
■ Location
To select the default or user defined satellite where
you want to download from.
■ Satellite
To set the satellite where you want to download
from.
■ TP frequency
To set the transponder where you want to
download from.
■ Polarity
To set the correct polarity for the transponder.
■ Symbol rate
To set the correct symbol rate for the transponder.
■ FEC
To set the correct Forward Error Correction for the
transponder
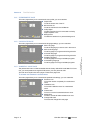
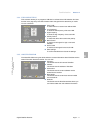
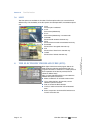
■ Memory Erase - User Data
To instruct the receiver to delete all personal
settings and replace them with the factory settings,
the PIN code is reset to the factory default 0000.
■ HDD Erase - Recordings
To instruct the receiver to delete (only) all TV and
Radio recordings from the hard disk.
■ HDD Erase - MP3 Songs
To instruct the receiver to delete (only) all
MP3 songs from the hard disk.
■ HDD Erase - Backgrounds
To instruct the receiver to delete (only) all the
personal backgrounds from the hard disk.
■ HDD Erase - EPG Data
To instruct the receiver to delete (only) all
scheduled EPG data from the hard disk.
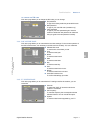
■ Confirm Reset
With this field you can confirm the selections made
and execute the selected procedure.
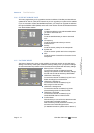
After the memory erase procedure is finished, you
are taken to the initial setup procedure.
(for detailed instructions, please refer to section 4).