27
Figure 29
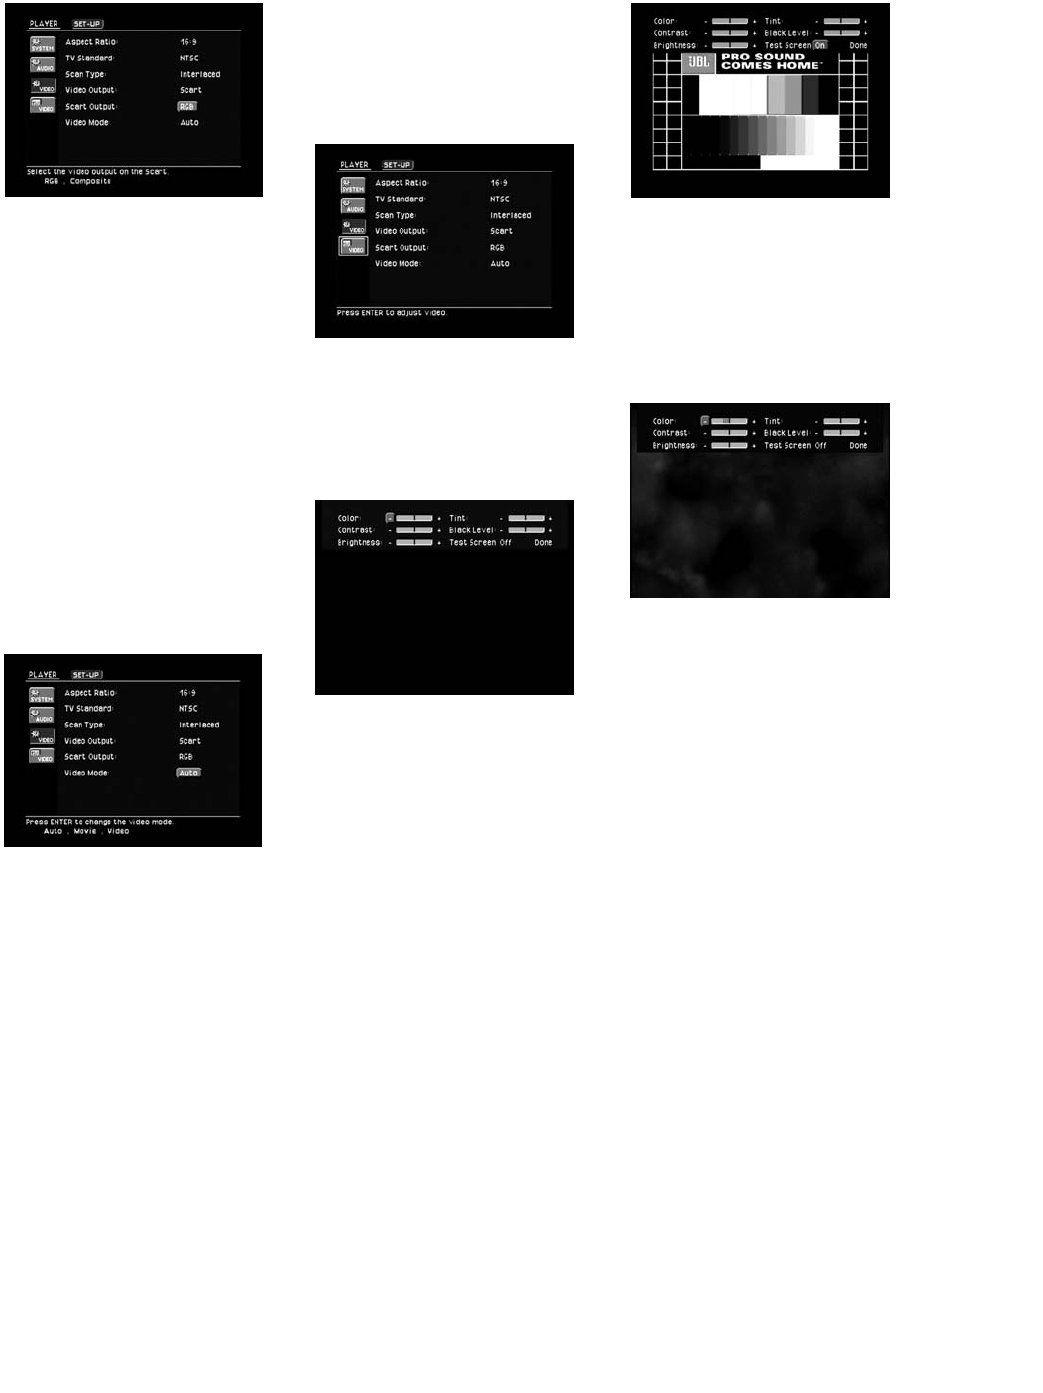
The Video Mode setting only affects
the Component Video Outputs ∞.
This setting allows the user to com-
pensate for errors in the disc authoring
where proper maintenance of frame
rate was not carried out in the film-
to-video conversion process.
The DVD280’s advanced adaptive
interlacer will handle most of these
types of problems, and it is therefore
recommended that you select the
Auto mode as a default. However, if
you observe problems with vertical
resolution on a specific disc, experi-
ment by selecting the Movie mode for
programs originally created on film,
or the Video mode for programs origi-
nating on video (see Figure 30).
Figure 30
You are now almost finished configuring
the DVD280. The only step left is to
make any video adjustments to opti-
mize the appearance of your display.
Video Adjustments Submenu
The Video Adjustments submenu
enables you to adjust the color, tint,
contrast, brightness and black level
of the picture. The DVD280 includes a
video test screen and the capability
of adjusting the player’s video output
for optimal performance of your video
display. However, it is strongly rec-
ommended that you first make the
adjustments described on page 28
using the controls on your video dis-
play monitor or TV with the DVD280’s
video adjustments set at the midpoint.
Move the cursor to the Video
Adjustments submenu icon on the left
side of the screen, which shows a
set of slide controls, and select it by
pressing the Enter Button i.
(See Figure 31).
Figure 31
Unlike the other submenus, the video
adjustments will appear only in the
upper portion of your screen, and this
submenu is not part of the main OSD
menu system (see Figure 32).
Figure 32
If the test screen is enabled, it will
also appear. Select the Test Screen
setting on the bottom row of the
Video Adjustments Submenu to turn
the DVD280’s built-in video color-bar
screen on or off. When the test screen
is enabled, the Video Adjustments
Submenu will disappear from the
screen after 5 seconds, allowing
you to make adjustments using the
controls on your video display, or to
clearly view adjustments made using
the Video Adjustments Submenu.
Press any key to return the submenu
to the screen and continue making
adjustments (see Figure 33). If you
wish to access other portions of the
on-screen menu system, you will
need to press the Setup Button T
again.
Figure 33
You may make video adjustments by
selecting either the – or + symbol
next to each parameter’s temperature
bar and clicking on it repeatedly.
Stripes will appear to the left or right
of the center stripe to reflect your
changes (see Figure 34).
Figure 34
When adjusting the Black Level set-
ting, note that the only adjustments
available are to have the setting
either at the midpoint, which provides
a full “0 to 100” black level setting, or
“full,” which complies with standards
for video with what is called “setup,”
or at a “7.5 to 100” black level setting.
Follow the procedure on page 28 to
adjust your video display and maxi-
mize your enjoyment of the DVD280’s
high-performance video processing
circuits.
DVD280 OM 7/12/04 4:41 PM Page 27
