


•••••••••••••••••••••••••••••••••••••••••••••••••••••••••••••••••••••••••••••••••••••••••••••••••••••••••••••••••••••••••••••••••••••••••••
8
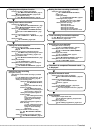
Flowchart
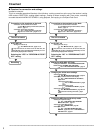
■ Flowchart for connection and settings
Installation example :
This is an example operational flowchart of the following : making connections at the rear of the terminal ; setting
HDD mode to PARTITION ; making default settings ; making an Alarm recording with Timer mode ; searching
recorded data with ALARM LIST SEARCH ; using playback, and copying to a Compact Flash Card.
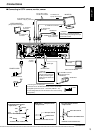
Connection to the terminals on the back
• Connection to the terminals on the back.
See “■ Connecting to CCTV camera, monitor,
sensor”, page 15.
• Connection to the alarm recording.
See “n Alarm Recording Connection”,
page 16 and “n Rear View” , pages 13,14.
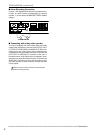
The unit is booted
AUTO SET UP
• Setting the auto set up.
See “■ AUTO SET UP”, pages 17,18.
Only when the unit is turned on for the first time, the
<AUTO SET UP> screen is displayed automatically. It is not
automatically displayed after next time.
Selecting the “YES” in “PERFORM AUTO SET
UP?” setting.
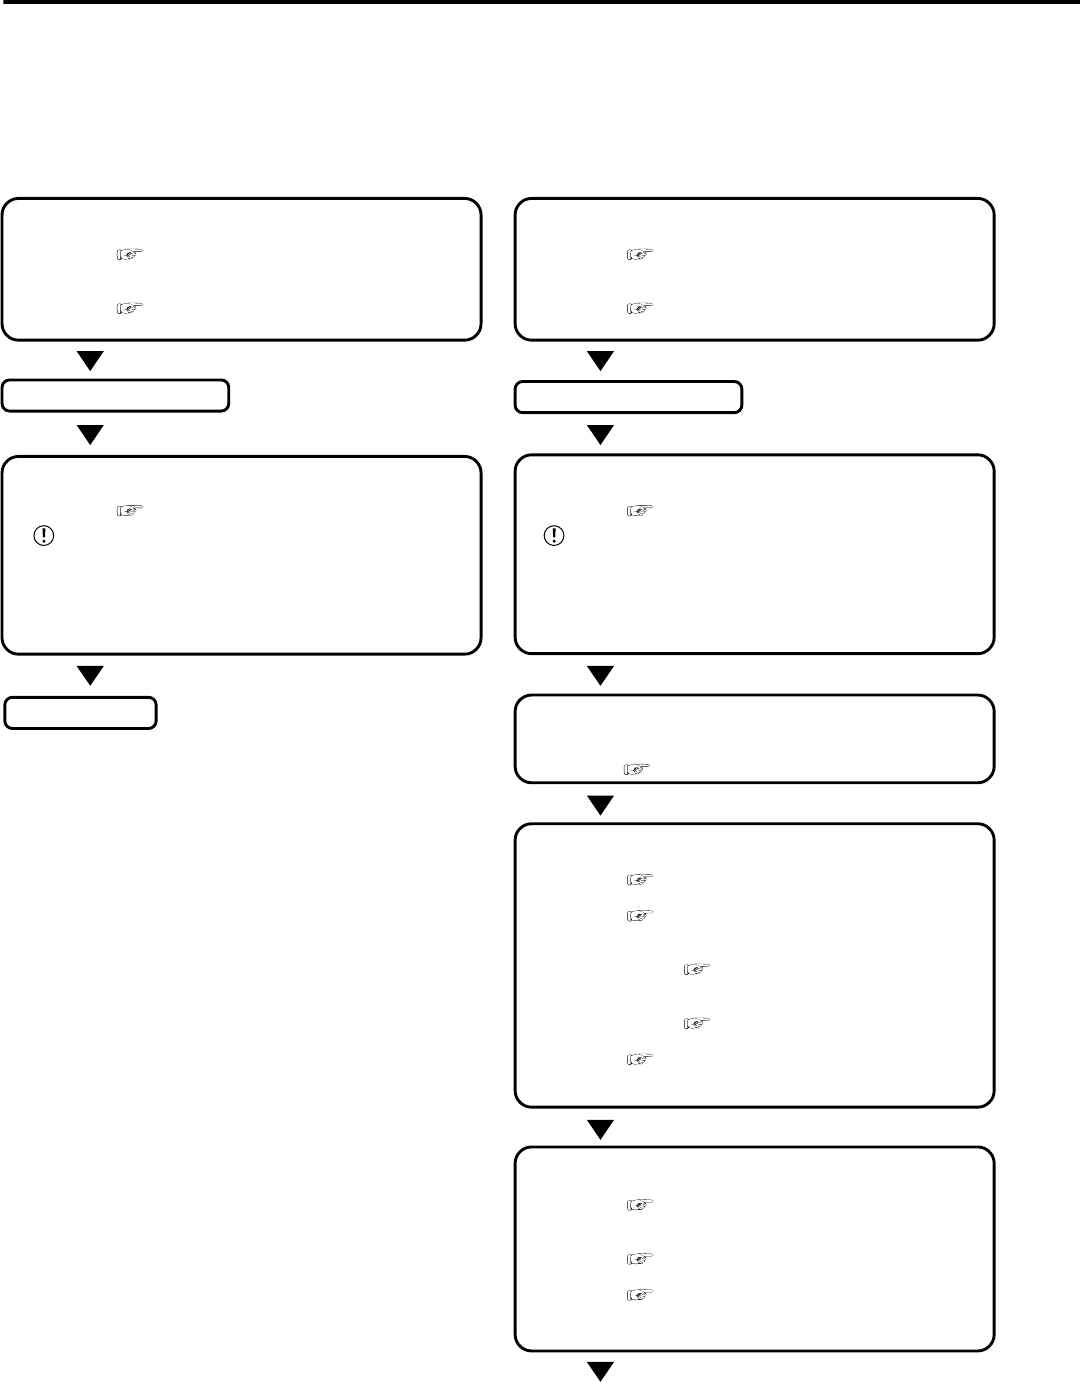
Recording
Connection to the terminals on the back
• Connection to the terminals on the back.
See “■ Connecting to CCTV camera, monitor,
sensor”, page 15.
• Connection to the alarm recording.
See “n Alarm Recording Connection”,
page 16 and “n Rear View” , pages 13,14.
The unit is booted
AUTO SET UP
• Setting the auto set up.
See “■ AUTO SET UP”, pages 17,18.
Only when the unit is turned on for the first time, the
<AUTO SET UP> screen is displayed automatically. It is not
automatically displayed after next time.
Selecting the “NO” in “PERFORM AUTO SET
UP?” setting.
Making the HDD REC SETTING
• Setting the PARTITION. “♦ PARTITION/PARTITION SIZE”
default settings “NORMAL”
} }
} }
} “PARTITION”.
See “♦ PARTITION/PARTITION SIZE”, page 75.
Changing the initial menu settings
• Setting the language.
See “■ LANGUAGE SELECTION”, page 25.
• Setting the present time and screen display.
See “<TIME DATE/DISPLAY SETTINGS>”,
pages 32-34.
• Setting the present time.
See “♦ TIME DATE ADJUST”, pages
20,21.
• Setting the display mode.
See “■ DISPLAY MODE”, page 32.
• Setting the audio recording.
See “■ AUDIO RECORDING”, page 48 and
“■ Continuous recording time table”, pages
83,84.
Setting the HDD (hard disk drive) mode
• Setting the repeat recording.
See “♦ HDD REPEAT REC MAIN/HDD
REPEAT REC SUB”, page 47.
• Setting the remain HDD capacity.
See “♦ REMAIN HDD”, page 50.
• Setting the call out.
See “• HDD MAIN REMAIN/HDD SUB
REMAIN”, pages 50,51 and “• HDD MAIN FULL/
HDD SUB FULL”, page 51.