56
Configuring the DVD receiver—Continued
Speakers Output Balance
Here you can adjust the output balance of speakers.
The balance can be adjusted from “L + 12” to “R + 12”
in 1 steps.
Note:
When the listening mode is set to “Direct” or “Pure
Audio”, no effect will be produced.
Correcting Sound and Picture Sync
When using progressive scanning on your DVD receiver,
you may find that the picture and sound are out of sync.
With this setting, you can correct this by delaying the
audio signals.
• You can set it from 0 to 100 milliseconds (msec) in 20
millisecond steps.
• The setting is available for each input source other
than FM and AM.
Note:
When the listening mode is set to “Direct” or “Pure
Audio”, no effect will be produced.
Late Night Function (Dolby Digital only)
With the Late Night function, you can reduce the
dynamic range of Dolby Digital material so that you can
still hear quiet parts even when listening at low volume
levels—ideal for watching movies late at night when you
don’t want to disturb anyone.
Off: Late Night function off (default).
Low: Small reduction in dynamic range.
High: Big reduction in dynamic range.
Notes:
• Depending on the design of the contents, there are
some materials that will show no effect even when the
Late Night mode is operating.
• The Late Night function resets to the default when the
DVD receiver is set to Standby.
Display Brightness
You can adjust the brightness of the display.
1: Normal + INPUT selector and MASTER
VOLUME light on.
2: Normal + INPUT selector and MASTER
VOLUME light off.
3: Dim + INPUT selector and MASTER VOL-
UME light off.
4: Dimmer + INPUT selector and MASTER
VOLUME light off.
Lock Setup
With this preference, you can protect your settings by
locking the setup menus.
When the setup menus are locked, you cannot change
any setting.
Locked: Setup menus locked.
Unlocked: Setup menus not locked.
Enabling/Disabling the Subwoofer
This section explains how to specify enabling/disabling
the subwoofer.
Ye s: Select if a subwoofer is connected.
No: Select if no subwoofer is connected.
Front Speakers Size
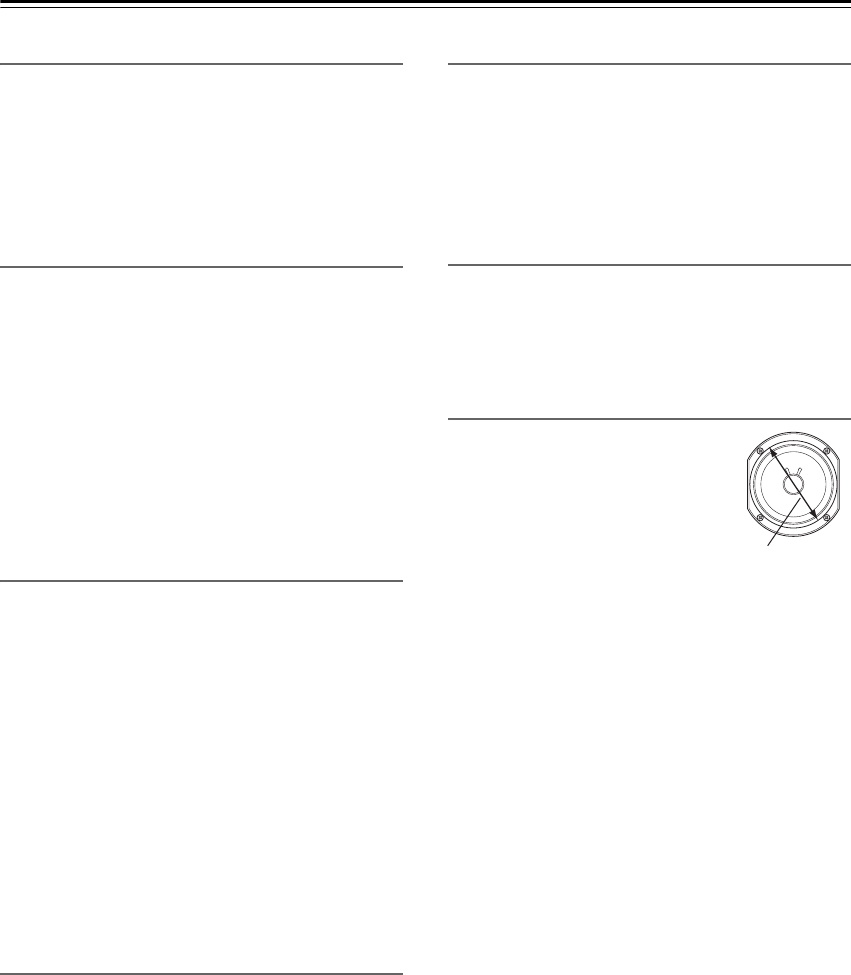
This section explains how to specify
front speakers sizes.
For speakers with a cone diameter
larger than 16 cm, specify “Large”.
For those with a smaller diameter,
specify “Small”. The crossover fre-
quency can be changed on page 57.
Small: Select if the front speakers are small.
Large: Select if the front speakers are large.
Notes:
• If the “Enabling/Disabling the Subwoofer” the above
is set to “No”, this setting is fixed at “Large”.
• When the listening mode is set to “Direct” or “Pure
Audio”, no effect will be produced.
Cone diameter


