14
Getting to Know the DV-CP802—Continued
G Power cord (21)
Connect the power cord to a suitable wall outlet.
H OPTICAL DIGITAL AUDIO OUTPUT (20)
This optical digital audio output can be connected to
an optical digital audio input on a hi-fi amp, AV
receiver, or surround sound decoder (Dolby Digital,
DTS). The Digital Out/Digital1 setting on page 50
is used to configure this output.
I
COAXIAL DIGITAL AUDIO OUTPUT (20)
This coaxial digital audio output can be connected
to a coaxial digital audio input on a hi-fi amp, AV
receiver, or surround sound decoder (Dolby Digital,
DTS). The Digital Out/Digital2 setting on page 51
is used to configure this output.
J REMOTE CONTROL (20)
These (Remote Interactive) connectors can be
connected to the connectors on your other
Onkyo AV components for interactive control.
To use you must make an analog audio connec-
tion (RCA) between the DV-CP802 and your
Onkyo AV receiver, even if they are connected dig-
itally.
For detailed information, refer to the pages in parenthe-
sis.
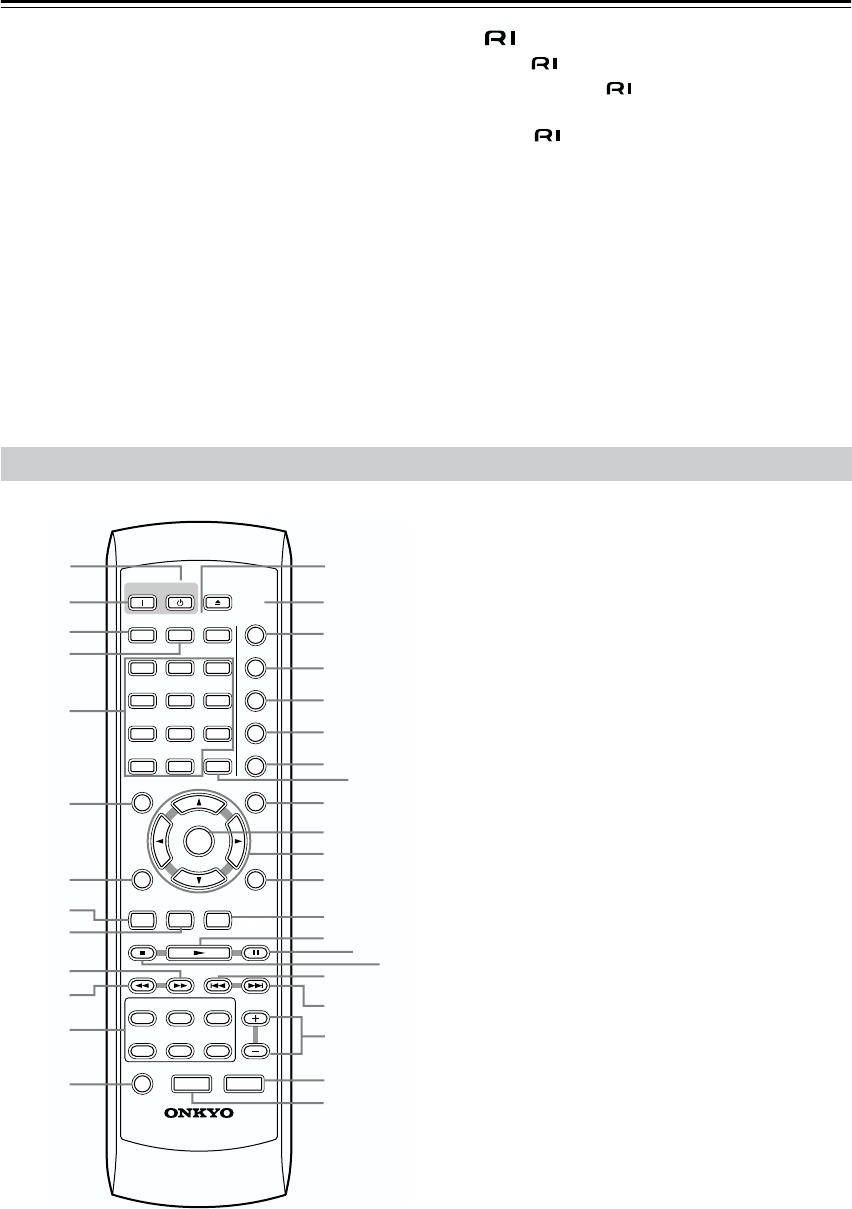
A STANDBY button (21)
This button is used to set the DV-CP802 to Standby.
B ON button (21)
This button is used to turn on the DV-CP802.
Don’t turn on the DV-CP802 until you’ve com-
pleted and double checked all of your connections
(page 17).
C SEARCH button (27, 30, 35)
This button is used to search for titles, chapters,
groups, tracks, and specific points in time.
D LAST M button (42)
This button is used with the Last Memory function.
E Number buttons (27, 30, 35)
These buttons are used to enter title, chapter, group,
and track numbers and to enter times for locating
specific points in time.
To enter a single-digit number, simply press the cor-
responding button. To enter a double-digit number,
enter the numbers in order from left-to-right (e.g., to
enter 14, press [1] then [4].
The [+10] button is used to enter multiples of ten
(i.e., 10, 20, 30, and so on). For example, to enter
the number 25, press the [+10] button twice fol-
lowed by the [5] button.
F TOP MENU button (26)
This button is used to select the top menu.
G RETURN button (48)
This button is used to return to the previously dis-
played onscreen setup menu.
Remote Controller
ON STANDBY
SEARCH LAST M
MEMORY
CHAIN MODE
REPEAT
A
-
B
RANDOM
DISPLAY
MENU
SETUP
TOP MENU
RETURN
AUDIO ANGLE SUBTITLE ZOOM
DISC
1
DISC
2
DISC
3
DISC
4
DISC
5
DISC
6
DISC SKIP
DIMMER
RC-542DV
STEP/SLOW
CLEAR
OPEN/
CLOSE
PROGRESSIVE
ENTER
+
10
0
123
456
789
1
N
O
P
Q
R
S
T
U
V
W
X
Y
Z
a
b
d
e
f
g
h
2
3
5
6
7
M
L
8
9
J
K
4
c


