


21
Turning On the DV-CP802 & First Time Setup
Before connecting the power cord, connect all of your
AV components (see pages 17 to 20).
Don’t forget to turn on your TV or projector and select
the video input to which the DV-CP802 is connected.
If you’re using a hi-fi amp, AV receiver, or surround
sound decoder for audio playback, turn that on as well
and select the audio input to which the DV-CP802 is
connected.
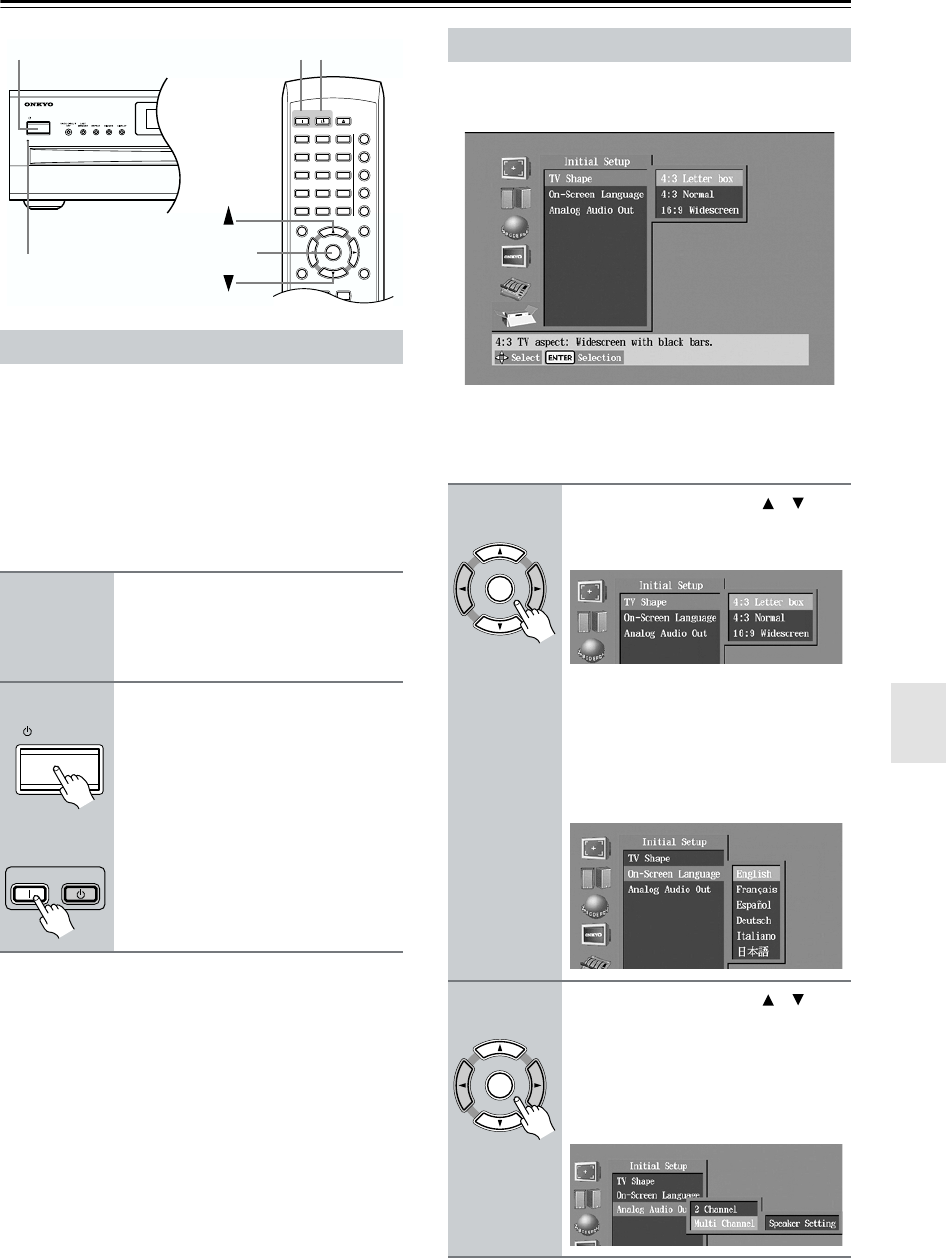
The very first time you turn on the DV-CP802, the Initial
Setup menu appears onscreen.
Here you need to make a few settings to get the
DV-CP802 up and running. You can change these set-
tings later (see page 46).
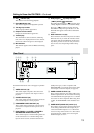
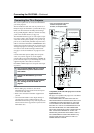
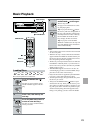
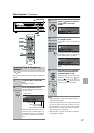
Turning On the DV-CP802
1
Connect the power cord to a suit-
able wall outlet.
The DV-CP802 enters Standby mode,
and the STANDBY indicator comes on.
2
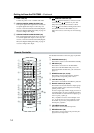
To turn on the DV-CP802, press
the [STANDBY/ON] button (or the
remote controller’s [ON] button).
The DV-CP802 comes on, the display
lights up, and the STANDBY indicator
goes off.
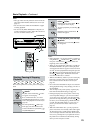
To turn off the DV-CP802, press the
[STANDBY/ON] button (or the remote
controller’s [STANDBY] button). The
DV-CP802 enters Standby mode and
the STANDBY indicator comes on.
STANDBY/ON
STANDBY
ON STANDBY
SEARCH LAST M
MEMORY
CHAIN MODE
REPEAT
A
-
B
RANDOM
DISPLAY
MENU
SETUP
TOP MENU
RETURN
AUDIO ANGLE SUBTITLE
CLEAR
OPEN/
CLOSE
ENTER
+
10
0
123
456
789
STANDBY
indicator
STANDBY/ON
STANDBY
ON
ENTER
ON STANDBY
STANDBY/ON
Remote controller
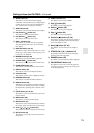
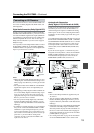
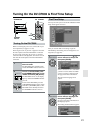
First Time Setup
1
Use the Up and Down [ ]/[ ] but-
tons to select a TV shape, and
then press [ENTER].
Select 4:3 Letter box or 4:3 Normal if
you have a 4:3 TV. Select 16:9 Wide-
screen if you have a widescreen TV.
See page 48 for more information.
The On-Screen Language menu
appears.
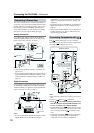
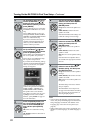
2
Use the Up and Down [ ]/[ ] but-
tons to select a language, and
then press [ENTER].
See page 56 for more information on
the language options.
The Analog Audio Out menu appears.
ENTER
Remote controller
ENTER
Remote controller