50
Configuring the DV-CP802—Continued
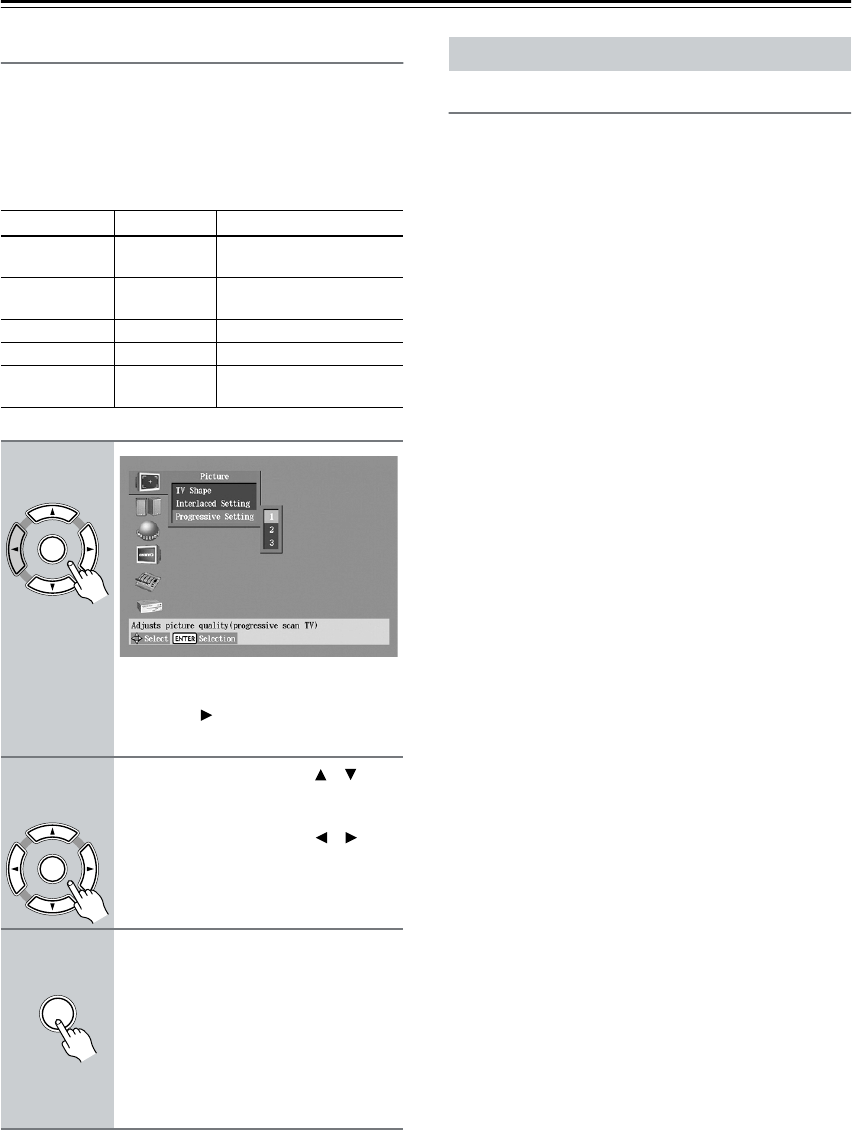
Progressive Setting
With this setting you can adjust various picture parame-
ters for progressive scanning. There are three setup
memories (1, 2, 3) for storing your favorite settings. You
could, for example, use one for daytime viewing (e.g.,
sun shining through window) and one for nighttime
viewing (e.g., curtains drawn, lights down).
Notes:
• These settings are used only when the Progressive
function is on.
Digital Out/Digital1 (optical output)
With these settings you can determine how the
DV-CP802 outputs digital audio from its OPTICAL
DIGITAL AUDIO OUTPUT. The options you choose
will depend on the type of component that you connect.
■ Dolby Digital Out
With this setting you can configure the OPTICAL DIG-
ITAL AUDIO OUTPUT to output Dolby Digital audio
as it is or to downmix it into 2-channel PCM.
Dolby Digital (default)
Choose this option if you’re connecting a component
with a built-in Dolby Digital decoder.
Dolby Digital > PCM
Choose this option if you’re connecting a stereo hi-fi
amp with a digital input, an AV receiver with a built-
in Dolby Pro Logic decoder, or an external D/A con-
verter.
■ DTS Out
With this setting you can configure the OPTICAL DIG-
ITAL AUDIO OUTPUT to output DTS audio as it is or
to downmix it into 2-channel PCM.
DTS (default)
Choose this option if you’re connecting a component
with a built-in DTS decoder.
DTS > PCM
Choose this option if you’re connecting a stereo hi-fi
amp with a digital input or an external D/A con-
verter.
■ MPEG Out
With this setting you can configure the OPTICAL DIG-
ITAL AUDIO OUTPUT to output MPEG audio as it is
or to downmix it into 2-channel PCM.
MPEG
Choose this option if you’re connecting a component
with a built-in MPEG decoder.
MPEG > PCM (default)
Choose this option if you’re connecting a stereo hi-fi
amp with a digital input or an external D/A con-
verter.
Parameter Range Description
Contrast –7...0...+7
Adjusts the picture
contrast.
Brightness –7...0...+7
Adjusts the picture
brightness.
Color –7...0...+7 Adjusts the picture color.
Tint –7...0...+7 Adjusts the picture tint.
Sharpness 0...+7
Adjusts the picture
sharpness.
1
Select Progressive Setting 1, 2,
or 3, and then press the [ENTER]
or Right [ ] button.
The parameters appear onscreen.
2
Use the Up and Down [ ]/[ ] but-
tons to select the parameters,
press the [ENTER] button, and
use the Left and Right [ ]/[ ] but-
tons to set them.
3
When you’ve finished, press the
[ENTER] button.
The settings are stored.
Use the same procedure to set the other
parameters, pressing the [ENTER] but-
ton when you’ve set each one.
Press the [SETUP] button to exit the
onscreen setup menu.
ENTER
Remote controller
Remote controller
ENTER
Remote controller
ENTER
Audio Menu


