


20
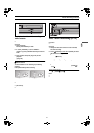
Manual Recording
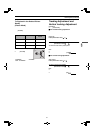
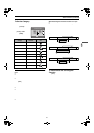
Tape Speeds:
There are three tape speeds.
SP: You can record the length shown on the tape.
EP: Three times the length of SP mode.
VP: Five times the length of SP mode.
≥To have a longer recording duration, select “EP” or “VP”.
≥If the image quality is important to you or if you wish to store the
video cassette for a long period, select “SP”.
≥This unit can play tapes recorded with LP mode on other
equipment (“LP” lights on the display).
VP mode:
≥“VP” flashes in the unit’s display for 8 seconds after recording
has started.
≥A cassette recorded in VP mode by this unit cannot be
played back by other VCRs. It is recommended to
distinguish it from other cassettes by indicating “VP” on the
cassette label, etc.
≥It takes more time for automatic tracking to work when playing
tapes recorded with VP mode, and it may not work at all with
some tapes. Do tracking manually if this is the case (lpage 19).
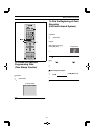
Preparations
≥Confirm that the TV is on and the unit viewing channel is
selected.
≥Switch [VCR/TV/DVD] to “VCR”.
≥Check that the clock is set to the correct time. If it has not been
set, refer to page 28.
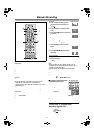
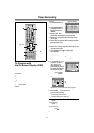
Operations
1
Insert a video cassette tape with
an intact erasure prevention tab.
≥If it has already been inserted, press
[VCRÍ] to turn the unit on.
2
Press [VCR/TV] to select the VCR
mode.
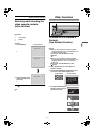
3
Press [CH]
IJ
buttons to select the
TV station.
≥If you press and hold down these buttons,
the channels changes quickly.
≥You can also select the channels with the
numeric buttons.
Example: “5”; [0]l[5]
“15”; [1]l[5]
“125”; [100]l[2]l[5]
4
Press [SPEED] to select the tape
speed.
Each time you press the button:
SP>EP>VP
5
Press [REC¥] (¥REC/OTR) to start
recording.
To stop recording.
Press [∫].
To Interrupt Recording
Press [;/D] during recording.
Press it again to continue recording.
Note:
≥Even if the tape you use is labeled “S-VHS”, it is not
possible to record in the S-VHS system with this unit. It
records in normal VHS system.
≥You cannot play VP recordings on other equipment.
≥You cannot change channels while recording. You can change
channels while in the pause mode.
≥Recording pause stops after 5 minutes, and returns to the stop
mode.
≥When a video cassette with a broken off erasure prevention tab is
inserted, the “ ” indication will flash to indicate that recording
is not possible even if [REC¥] (¥REC/OTR) is pressed.
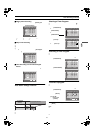
ªTo Display the Approximate
Remaining Tape Time
1) Select “TAPE SELECT” from the on
screen display and select the
corresponding video cassette tape
length (lpage 30).
2) Press [DISPLAY].
The display changes as follows each time [DISPLAY] is pressed.
Clock>Counter>Remaining Tape Time>Clock
≥The remaining tape time may not be displayed correctly
depending on the tape used.
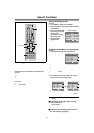
To View One TV Program while
Recording Another One
1) Refer to steps 1-5 of the manual recording operation.
2) Press [VCR/TV] to select the TV mode.
3) Switch [VCR/TV/DVD] to “TV”.
4) Press [CH]IJ or the numeric buttons to select the TV
program that you wish to view.
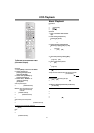
VCR/DVD/TV
VCR/DVD
REC CHECK
REC
CH
VOLUME
TV
TV
VCR DVD
123
789
0
100
4
5
6
SLOW/SEARCH
NAVI
TOP MENU
MENU
RETURN
PROG/CHECK
QUICK REPLAY
DISPLAY
JET REW
TIMER
ENTER
PLAY
LIST
INDEX/SKIP
OUTPUT
TRACKING/V-LOCK
AV
DIRECT
NAVIGATOR
CANCEL/RESET
MUSIC w/ PICTURE
SEARCH PICTURE SPEED
AUDIO
POSITION MEMORY
VCR/TV
SET UPA-B REPEATREPEAT
PLAY MODE
A.SRD CINEMA
SUBTITLE
ANGLE
CH
VCR/TV/DVD
REC
VCR
VCR/DVD
OUTPUT
VCR/TV
SPEED
DISPLAY
VCR/
DVD
Numeric
buttons
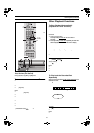
Display Symbols
VCR
SP
REC
REMAIN
END :MENU
SELECT : s/r:
OPTION 1/2
OSD ≥ON OFF
TAPE SELECT
T120 ≥T160 T180
BLUE BACK ≥ON OFF
JET NAVIGATOR ≥ON ≥OFF
DELETE NAVIDATA ≥NO YES
JET SEARCH x27 ≥x35
On Screen Display