64 Pelco Manual C681M-D (2/02)
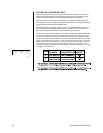
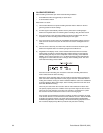
4. Turn the JOG dial to move the cursor beside TIME DATE SEARCH, and then turn the
SHUTTLE ring to the right. The Time Date Search menu appears and the month num-
ber starts flashing.
NOTE:
If the PRE A-REC field in the A-Rec/M-Det Setting menu has been set to
SHORT, MEDIUM, or LONG, the menu cannot be accessed.
To exit the Time Date Search menu without activating the search, press the SEARCH
button on the front of the unit.
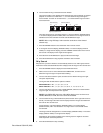
5. Turn the JOG dial to set the month. Turn the SHUTTLE ring to the right. The next item
starts flashing.
6. Repeat step 3 to set the date, year, hour, 10-minutes digit, minute digit, 10-seconds
digit, and second digit . The option OFF starts flashing.
7. Turn the JOG dial to select ON
.
8. Turn the SHUTTLE ring to the right. The time date search starts and pauses the play-
back display at the specified time point (or the nearest point from the specified time).
The searched image appears in a 9-camera display (DX3009 models) or 16-camera
display (DX3016 models) if ALL was selected or on a single screen if an individual
camera was selected. The PLAY and PAUSE buttons light.
If there is no recording or no data that is recorded on the date you have set, the time-date
search will not be activated and the month number will start flashing again.
If there is no data that is recorded at the time you have set, the image that is recorded
at the nearest time from the time you have set will be displayed on the paused screen.
The time date search function may not work correctly depending on the condition of
the recording.
To change the 9-camera display (DX3009 models) or 16-camera display (DX3016
models) to a single camera, press the CAMERA number button on the front of the
recorder.
9. Press the PLAY or PAUSE button to play back the searched image.
10. Press the STOP button to stop playback and exit the search function.
Index Search
During alarm recording, an index signal is automatically written onto the hard disk. Index
search is a process of retrieving still frames using their associated index signal.
The index count can be set, as desired, up to 99.
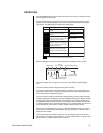
1. Press the SEARCH button to display the Search Selection menu.
2. Make sure the cursor is next to SELECTION CAMERA NO., and then turn the
SHUTTLE ring to the right. The option starts flashing.
3. Turn the JOG dial to select the option, and then turn the SHUTTLE ring to the right.
The option stops flashing.
Turning the JOG dial switches the options as follows:
DX3009 Models – ALL, 1, 2, 3, 4, 5, 6, 7, 8, 9
DX3016 Models – ALL, 1, 2, 3, 4, 5, 6, 7, 8, 9, 10, 11, 12, 13, 14, 15, 16
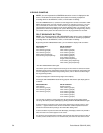
4. Turn the JOG dial to move the cursor to INDEX SEARCH, and then turn the
SHUTTLE ring to the right. The Index Search menu appears.
NOTE:
If the PRE A-REC field in the A-Rec/M-Det Setting menu has been set to
SHORT, MEDIUM, or LONG, the menu cannot be accessed.
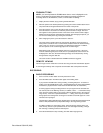
5. Turn the JOG dial to display the desired index count.


