


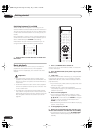
Controls and displays
03
18
En
Chapter 3
Controls and displays
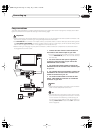
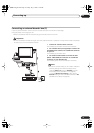
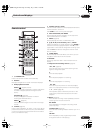
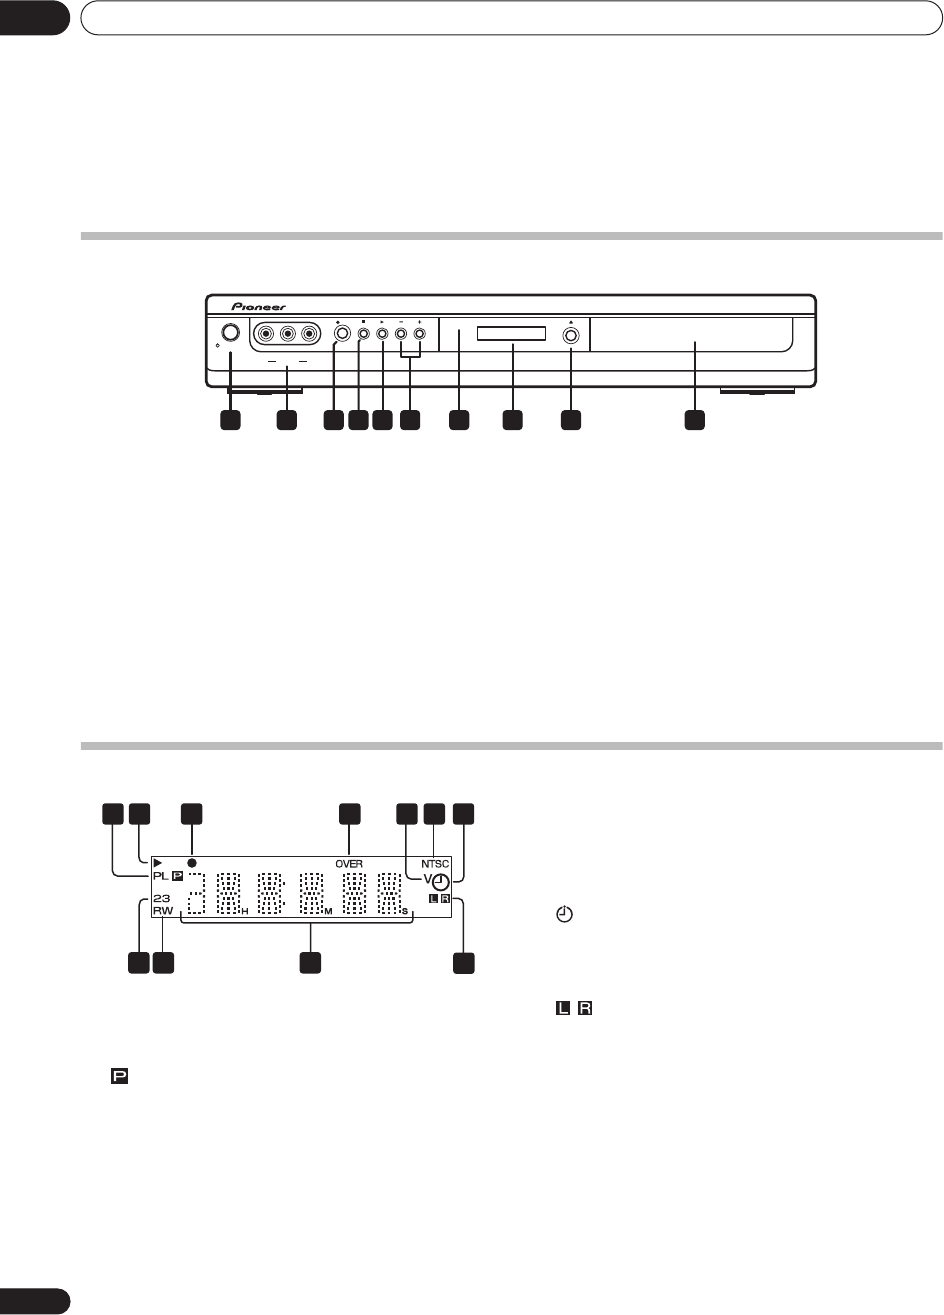
Front panel
1
STANDBY/ON
Press to switch the recorder on/into standby.
2 Front panel inputs
(page 9)
Audio/video inputs, convenient for connecting a video
camera.
3
ì
REC
Press to start recording.
4
Press to stop playback or recording.
5
Press to start or restart playback (press while playing to
pause playback).
6 +/–
(page 23, 25)
Use to change TV channels, skip chapters/tracks, etc.
7 IR remote sensor
(page 6)
8 Front panel display
See below for details.
9 OPEN/CLOSE
Press to open/close the disc tray.
10 Disc tray
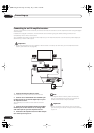
Display
1PL
Lights when a PlayList is playing (only applicable to
some VR mode discs recorded on other recorders).
(page 55)
Lights when the component video output is set to
progressive scan.
2
Lights during playback; blinks when paused.
3
ì
Lights during recording; blinks when recording is
paused.
4 OVER
Lights when the analog audio input level is too high.
5V
Lights when an unfinalized Video mode disc is loaded.
6 NTSC
Lights when playing an NTSC disc.
7
(page 38)
Lights when a timer recording has been set. (Indicator
blinks if the timer has been set but there isn’t a
recordable disc loaded.)
8
(page 56)
Indicates which channels of a bilingual broadcast are
recorded.
9 Character display
Shows disc time information, channel number,
messages, and so on.
10 R / RW
Indicates the type of recordable DVD loaded: DVD-R or
DVD-RW.
11 2 3
(page 52)
Shows the remote control mode (if nothing is displayed,
the remote control mode is 1).
STANDBY/ON
REC
VIDEO
INPUT 2
L(MONO) AUDIO R
1 2 3 4 5 876 9 10
9
21
11
75
8
10
3 4 6
DVR-230_UK.book Page 18 Friday, July 1, 2005 11:52 AM