


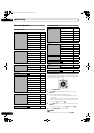
42
En
Tuner Setup
09
Selecting digital closed captions
Use the following procedure to select digital closed captions:
Service 1 to 6.
1 Press HOME MENU.
2 Select “Tuner Setup”. ( / then ENTER)
3 Select “Closed Captions”. ( / then ENTER)
4 Select “Digital Settings”. ( / then ENTER)
5 Select “Digital Service”. ( / then ENTER)
6 Select the desired closed caption. ( / then ENTER)
• The factory default is “Service 1”.
7 Press HOME MENU to exit the menu.
NOTE
• When available, the Primary Caption Service is usually
offered for Service 1, and the Secondary Language Service is
usually offered for Service 2.
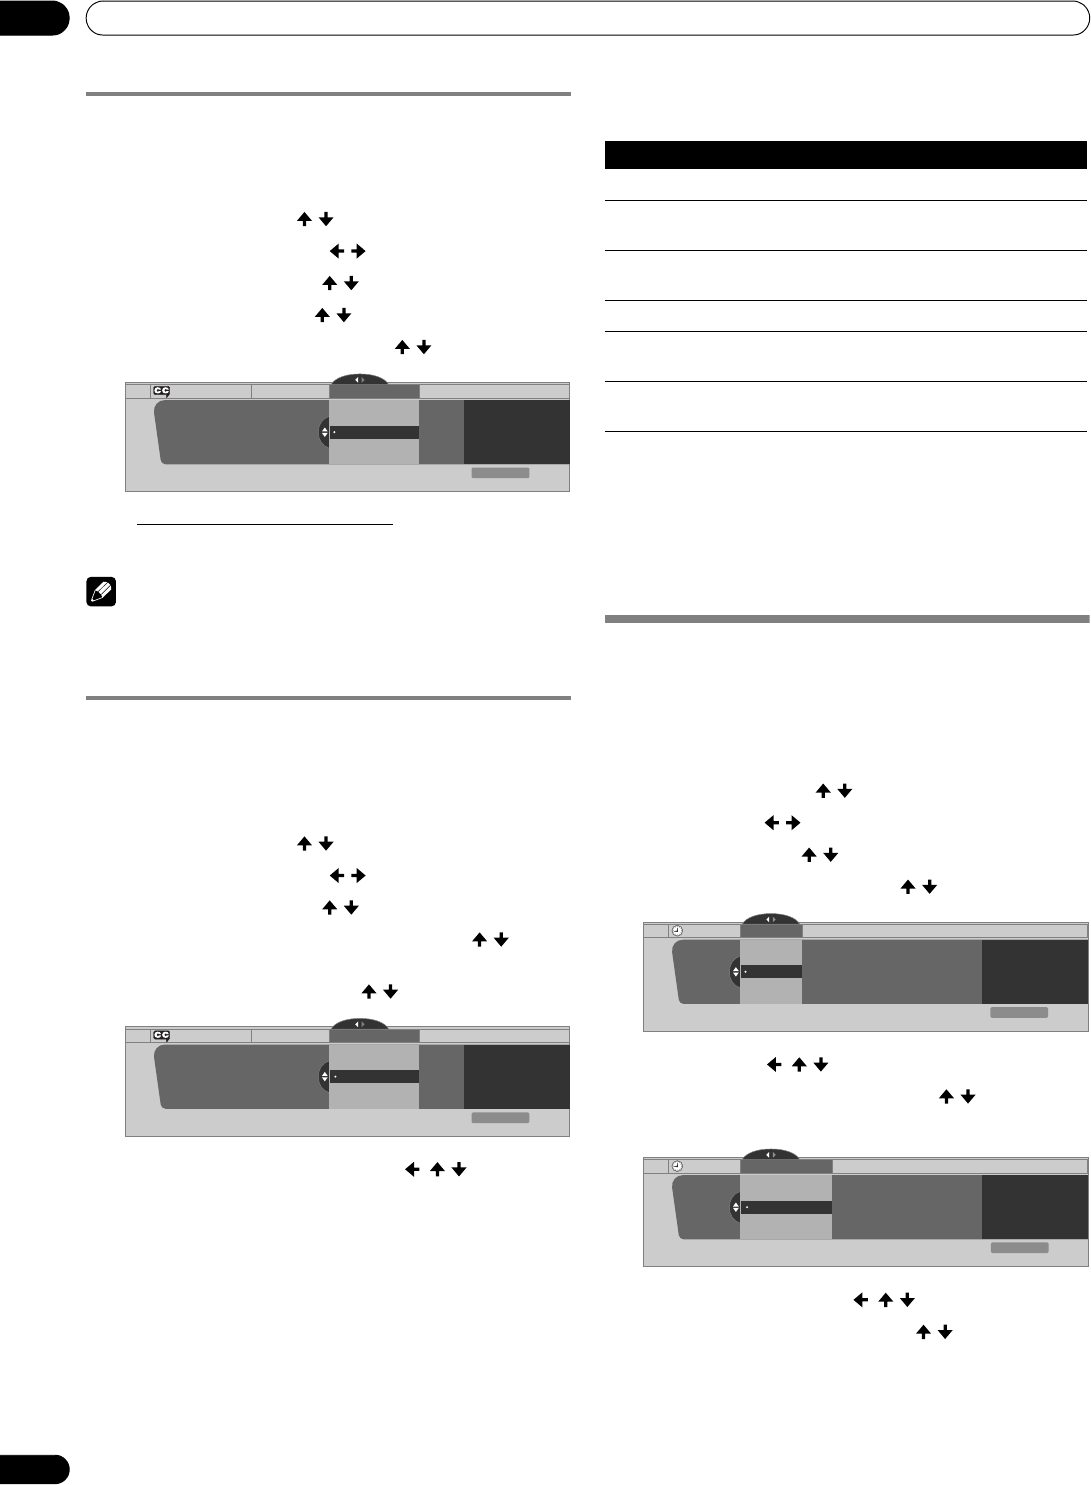
Selecting digital closed caption parameters
Use the following procedure to change digital closed captions
parameters such as font size, font type, foreground and
background colors.
1 Press HOME MENU.
2 Select “Tuner Setup”. ( / then ENTER)
3 Select “Closed Captions”. ( / then ENTER)
4 Select “Digital Settings”. ( / then ENTER)
5 Select “Font Size”, “Font”, or any other item. ( / then
ENTER)
6 Select the desired parameter. ( / then ENTER)
7 Repeat steps 5 and 6 as necessary. ( , / )
8 Press HOME MENU to exit the menu.
The following table shows the available parameters for each
item.
1
Font 1 (monospaced with serifs)/ Font 2 (proportionally spaced with serifs)/
Font 3 (monospaced without serifs)/ Font 4 (proportionally spaced without ser-
ifs)/ Font 5 (casual font)/ Font 6 (cursive font)/ Font 7 (small capitals font)
With “Auto” selected, parameters specified by the provider are
used. If not specified by the provider, the bolded default
parameters are used. Selected parameters override any other
parameters, including those from the provider.
Clock Setting
With “Auto Set” selected for Clock Setting, the system acquires
and sets the time automatically. You can also manually set the
time. If power is lost (unplugged or power outage), the set time
is cleared.
1 Press HOME MENU.
2 Select “Tuner Setup”. ( / then ENTER)
3 Select “Clock”. ( / then ENTER)
4 Select “Time Zone”. ( / then ENTER)
5 Select a time zone for your area. ( / then ENTER)
6 Select “D.S.T.”. ( , / , then ENTER)
7 Select “Applies” or “Does Not Apply”. ( / then ENTER)
• Set this option if your area uses Daylight Savings Time.
8 Select “Auto/Manual Set”. ( , / , then ENTER)
9 Select “Auto Set” or “Manual Set”. ( / then ENTER)
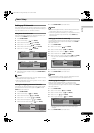
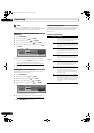
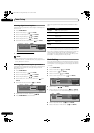
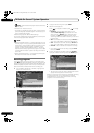
Digital Settings
Digital Settings Digital Service
xxxxxxxxxxxxxxxxxxxxx
xxxxxxxxxxxxxxxxxxxxx
xxxxxxxxxxxxxxxxxxxxx
Closed Captions
Digital Service
Service 3
Service 4
Service 5
Service 2
Service 1
Exit
Home Menu
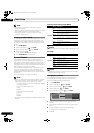
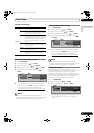
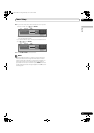
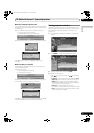
Digital Settings
Digital Settings Font Size
xxxxxxxxxxxxxxxxxxxxx
xxxxxxxxxxxxxxxxxxxxx
xxxxxxxxxxxxxxxxxxxxx
Closed Captions
Font Size
Small
Standard
Large
Exit
Home Menu
Item Selection
Font Size Auto/ Large/ Standard/ Small
Font
1
Auto/ Font 1/ Font 2/ Font 3/ Font 4/ Font 5/ Font 6/
Font 7
Font Color Auto/ Black/ White/ Red/ Green/ Blue/ Yellow/
Magenta/ Cyan
Font Opacity Auto/ Solid/ Transparent/ Translucent/Flashing
Background
Color
Auto/ Black/ White/ Red/ Green/ Blue/ Yellow/
Magenta/ Cyan
Background
Opacity
Auto/ Solid/ Transparent/ Translucent
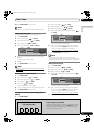
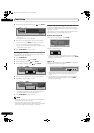
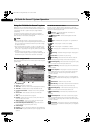
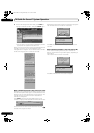
Clock
Time Zone
Atlantic
Eastern
Time Zone
xxxxxxxxxxxxxxxxxxxxx
xxxxxxxxxxxxxxxxxxxxx
xxxxxxxxxxxxxxxxxxxxx
Central
Mountain
Exit
Home Menu
Current Time:
9:55 pm EDT
Monday
05/17/04
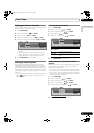
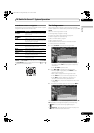
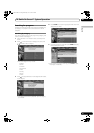
Clock
Daylight Savings Time
Applies
D.S.T.
xxxxxxxxxxxxxxxxxxxxx
xxxxxxxxxxxxxxxxxxxxx
xxxxxxxxxxxxxxxxxxxxx
Does Not Apply
Exit
Home Menu
Current Time:
9:56 pm EDT
Monday
05/17/04
PDP_PRO1140HD.book Page 42 Monday, June 5, 2006 5:22 PM