


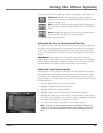

64 Chapter 5
Using the Menu System
Chapter 5 65
Using the Menu System
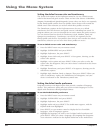
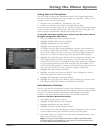
Setting the Local Time options
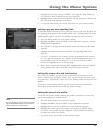
The Local Time setting (in the Installation section of the System Setup menu)
lets you set how the following two time settings are controlled – either by you
("locally") or by your service provider:
• the time zone your DIRECTV
®
HD Receiver uses, and
• whether your HD Receiver observes Daylight Savings Time.
If you turn the Local Time setting on, you set the time zone and decide whether
or not to observe Daylight Savings Time. With the Local Time setting off, your
service provider automatically controls these settings for you.
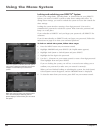
To turn the Local Time Setting on or off, set your Time Zone and set
Daylight Savings Time observance:
1. Press the MENU button on your remote control.
2. Highlight SYSTEM SETUP and press SELECT.
3. Highlight Installation and press SELECT.
4. Highlight Local Time and press SELECT.
5. To change the Local Time setting, highlight it using the arrow buttons on
your remote control and press SELECT. A list appears where you can turn
the local time setting on (you set the time zone and daylight savings time
observance), or off (your program provider controls the time settings).
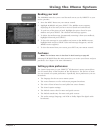
6. Highlight On or Off, then press SELECT. The list disappears, and the Local
Time Setting menu item reects your choice. If you turn the Local Time
Setting off, the Time Zone and Daylight Savings Time options are controlled
by your program provider; these menu items become unavailable. If you
turn the Local Time Setting on, continue with the following steps to set your
time zone and whether you wish to observe daylight savings time.
7. Highlight Time Zone and press SELECT.
8. Highlight your time zone and press SELECT. The list disappears, and the
Time Zone menu item reects your choice.
9. Highlight DST Observation and press SELECT.
10. Highlight On or Off, then press SELECT. The list disappears, and the status
line indicates either DST in effect or Standard time in effect.
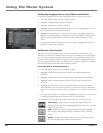
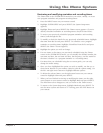
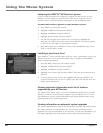
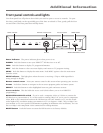
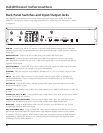
Auto Resolution Detection
If you've used the DVI connection to connect your HD Receiver to your monitor,
your HD Receiver can automatically detect the highest resolution setting available
on some TVs and HD monitors and adjust its output signal to match that
resolution. The Auto Resolution feature may not work with all monitors.
To turn on the Auto Resolution feature:
1. Press MENU on the remote control.
2. Highlight SYSTEM SETUP and press SELECT.
3. Highlight Installation and press SELECT.
4. Highlight Auto Resol. Setup and press SELECT.
5. Choose Auto to turn Auto Resolution on. Choose Manual to leave it off and
set the resolution using the resolution switch on the front panel.
6. Press PREV when you’re nished to return to the Installation menu. Press
EXIT to exit the menu system.
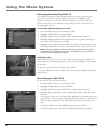
Note: Turning on the Auto Resolution feature disables the RESOLUTION
SETTING switch on the HD Receiver's front panel. Turn off Auto Resolution
to use the RESOLUTION SETTING switch.