


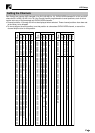


VCR Setup
35
GB
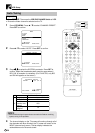
Setting the Clock
When you use the Product for the first time or after a power failure of
more than 60 minutes the clock has to be reset. Apply power to the
Product to switch it on. Then perform the following procedure.
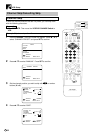
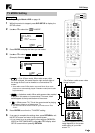
Initial Setting of Clock
1 First set the language and system setting. (See page 21.) Then
press SET.
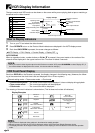
2 Press ' / " to select whether the clock should show 12-hour AM/
PM time or 24-hour time and press
||
||
|.
:SELECT :CHANGE
24H 0:00 1/01 00
CLOCK
SET:ENTER MENU:EXIT
MODE TIME DATE YEAR
MODE:24H/12H
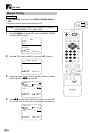
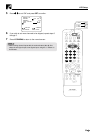
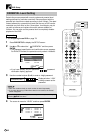
3 Set the present time with the number buttons (0 to 9) or ' / " on
the Remote and press
||
||
|. (First set the “hour” digits and the
“minute”. If there is only one “hour” or one “minute” digit, enter a 0
first.)
24H 10:28 1/01 00
CLOCK
MODE TIME DATE YEAR
:SELECT :CHANGE
SET:ENTER MENU:EXIT
• If 12H mode is selected, set the AM or PM indicator.
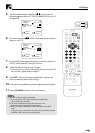
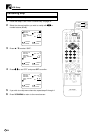
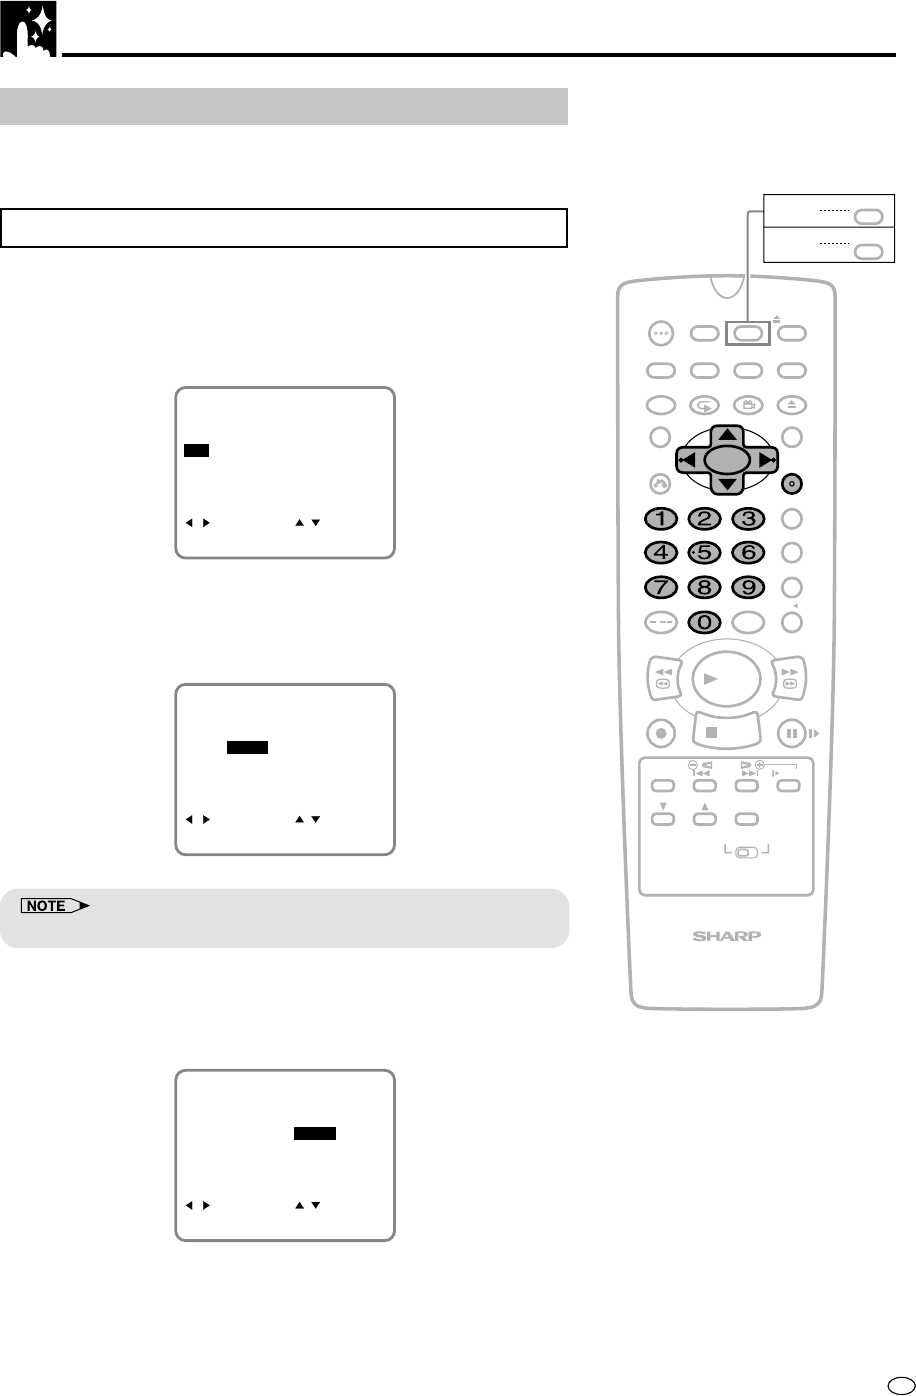
4 Set the date with the number buttons (0 to 9) or ' / " on the
Remote and press
||
||
|. (First set the “day” digits and then the
“month”. If there is only one “day” or one “month” digit, enter a 0
first.)
24H 10:28 15/12 00
CLOCK
MODE TIME DATE YEAR
:SELECT :CHANGE
SET:ENTER MENU:EXIT
DATE :DAY/MONTH
/
PLAY
STOP
OPEN/
CLOSE
OPERATE
VCR/DVD
SELECTOR
VCR MENU
DVD SETUP
TAPE
SPEED
ON
SCREEN
TIMER
ON/OFF
TITLE
DVD MENU
DISPLAY
EJECT
FUNCTION
CONTROL
PROG/
REPEAT
CLEAR
RETURN
REV FWD
SET
ENTER
ZERO BACK
SKIP SEARCH
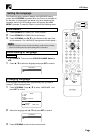
VCR DVDAM/PM
INPUT SELECT
PAUSE/STILL
REC
VCR/DVD COMBINATION
SLOW
CH
VCR DVD
SKIP
DPSS
AUDIO
OUTPUT
ANGLE
PROG
DV- NC70
DV- NC70X
G-CODE
DV- NC70W