


GB
36
VCR Setup
/
PLAY
STOP
OPEN/
CLOSE
OPERATE
VCR/DVD
SELECTOR
VCR MENU
DVD SETUP
TAPE
SPEED
ON
SCREEN
TIMER
ON/OFF
TITLE
DVD MENU
DISPLAY
EJECT
FUNCTION
CONTROL
PROG/
REPEAT
CLEAR
RETURN
REV FWD
SET
ENTER
ZERO BACK
SKIP SEARCH
VCR DVDAM/PM
INPUT SELECT
PAUSE/STILL
REC
VCR/DVD COMBINATION
SLOW
CH
VCR DVD
SKIP
DPSS
AUDIO
OUTPUT
ANGLE
PROG
DV- NC70
DV- NC70X
G-CODE
DV- NC70W
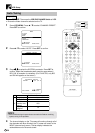
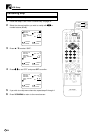
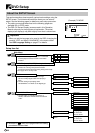
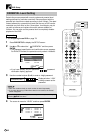
5 Set the year digits with the number buttons (0 to 9) or ' / " on
the Remote. (If there is only one “year” digit, enter a 0 first.)
SELECT : CHANGE:
24H 10:28 15/12 00
CLOCK
ENTER :SET EXIT :MENU
MODE TIME DATE YEAR
6 Press SET to return to the normal screen.
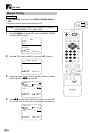
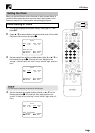
Changing the Clock Setting
1 If the clock has already been set previously and you want to
change it, select “CLOCK” from the MENU, and then follow the
steps 1 to 6 from “Initial Setting of Clock” on pages 35 and 36.
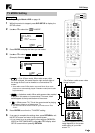
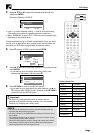
2 Press VCR MENU. Press ' / " to select “CLOCK” and press
SET to confirm. Press VCR MENU to return to the normal screen.
MODE
MENU
CHANNEL PRESET
CLOCK
LANGUAGE
TIMER
G-CODE
SET:ENTER MENU:EXIT
:SELECT
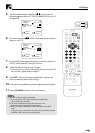
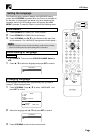
• If the precise clock time is required (within a second), do not press
SET until the exact start of the minute after setting the year (after
completing step 5). The clock will start operation as soon as SET is
pressed.
• If you prefer the clock display time in the 12-hour AM/PM system,
select “12H” in step 2. In this case, when you set the present time
using the number buttons, first press AM/PM on the Remote to select
AM or PM, and then set the present time.