English
21
Basic Setup
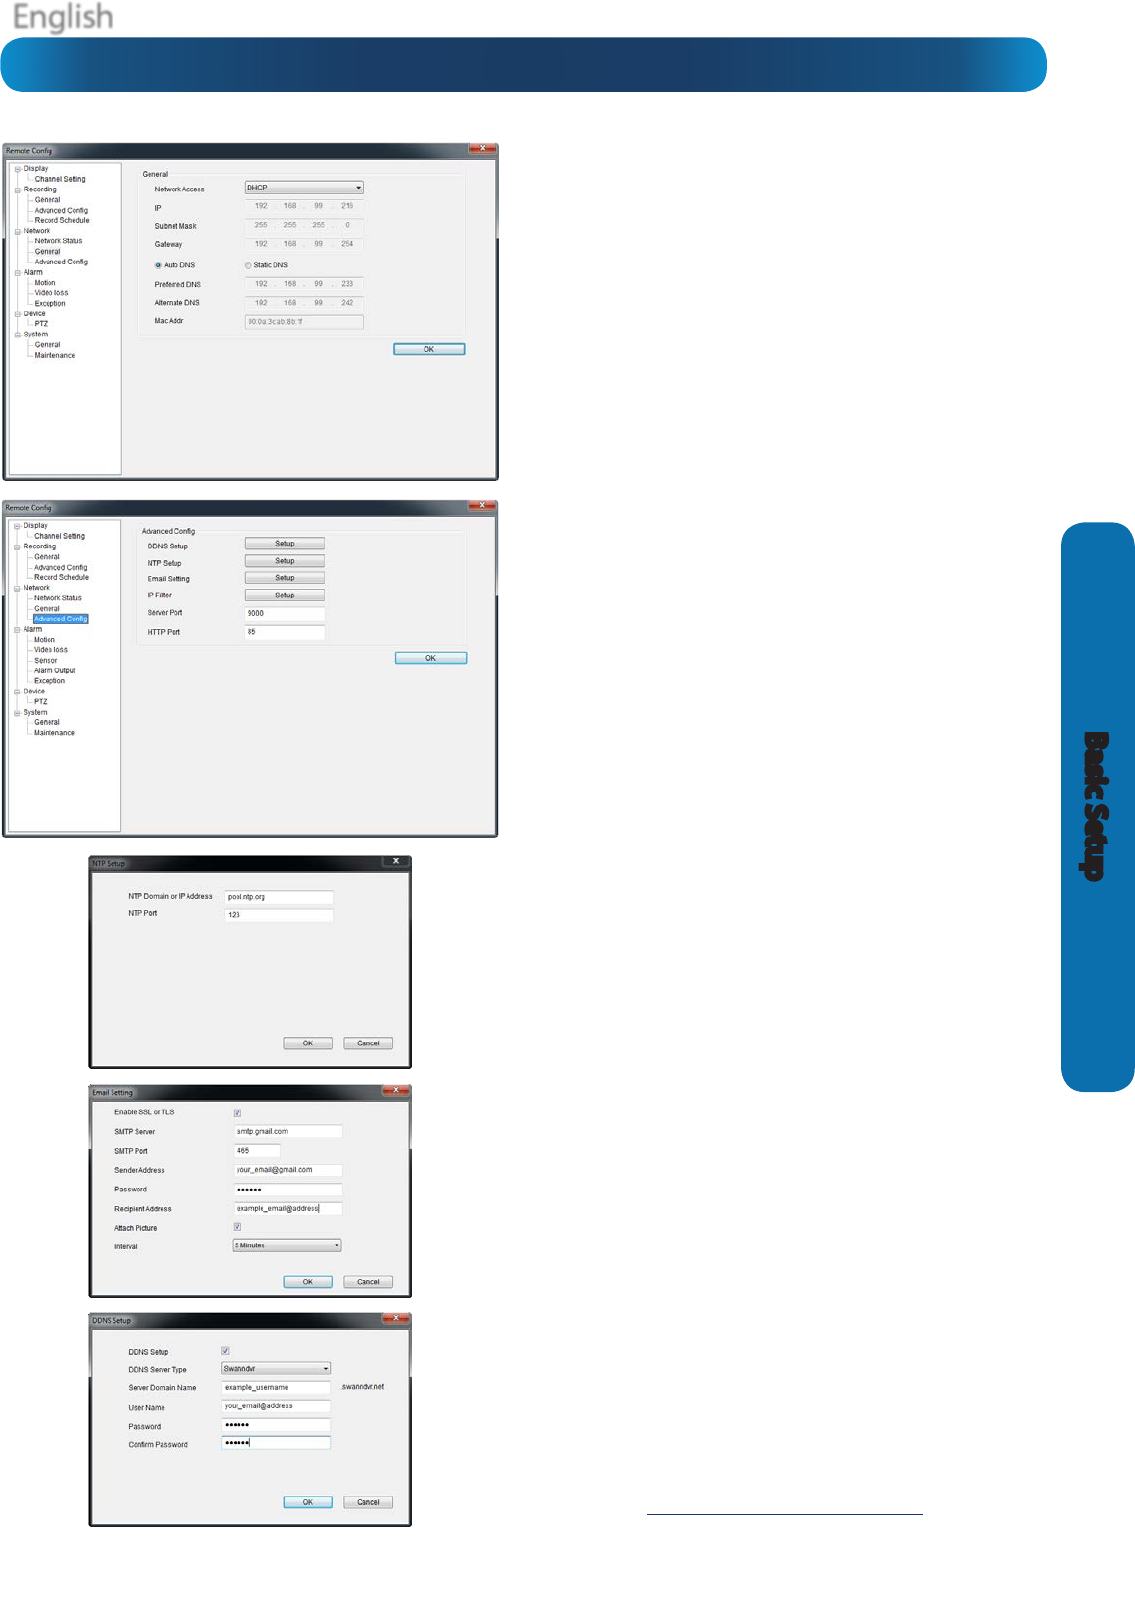
Network: General (see page 37)
Be careful adjusting settings here - if the DVR can’t access the
network anymore, you won’t be able to congure it remotely!
Network Access: How your network is addressed - either DHCP
or STATIC IP addressing.
Subnet Mask: A required additional piece of IP addressing
information.
Gateway: The way “out” of your network, to the Internet.
Auto DNS / Static DNS: Whether the DVR will automatically
select a DNS server, or use one you assign.
Preferred / Alternate DNS: The DVR has two DNS servers,
essentially a primary and a backup.
MAC Address: The Media Access Control address. For some
advanced networking, it can help to know this value.
Network: Advanced Cong (see page 38)
DDNS Setup: Opens the DDNS setup window (below).
NTP Setup: Opens the Network Time Protocol setup window
(see below).
Email Setting: Opens the Email Setup window (see below).
Server Port: One of the two ports the DVR needs to
communicate over your network. Ensure nothing else uses this
port. The default value is 9000. This is the port number you’ll
use when logging in over the Internet from the MyDVR software
or remote access from a mobile device.
HTTP Port: The second of two ports the DVR needs to
communicate over your network. Ensure nothing else uses this
port. The default value is 85.
• NTP Setup (see page 39)
NTP Domain or IP Address: The server you intend to use to
access the current date and time. The default is pool.ntp.org.
NTP Port: The port that the NTP server uses. The default for
pool.ntp.org is 123.
• Email Setting (see page 41)
Operates in the same way as the email setup menu in the DVR
menu. Rather than attempt to summarize here, it’s easier to
simply turn to page 41 to learn more.
• DDNS Setup (see page 39)
Where you can congure a Dynamic DNS server to track the
“position” of your DVR over the Internet. Check out page 39
for more information on DDNS servers.
We recommend using SWANNDVR as your DNS service.
This is a free service for Swann DVR owners, which we directly
support.
To create an account with SWANNDVR, go to:
http://www.swanndvr.com/
and click the Registration button. Follow the prompts to create
your account.


