EnglishEnglish
32
Advanced Conguration
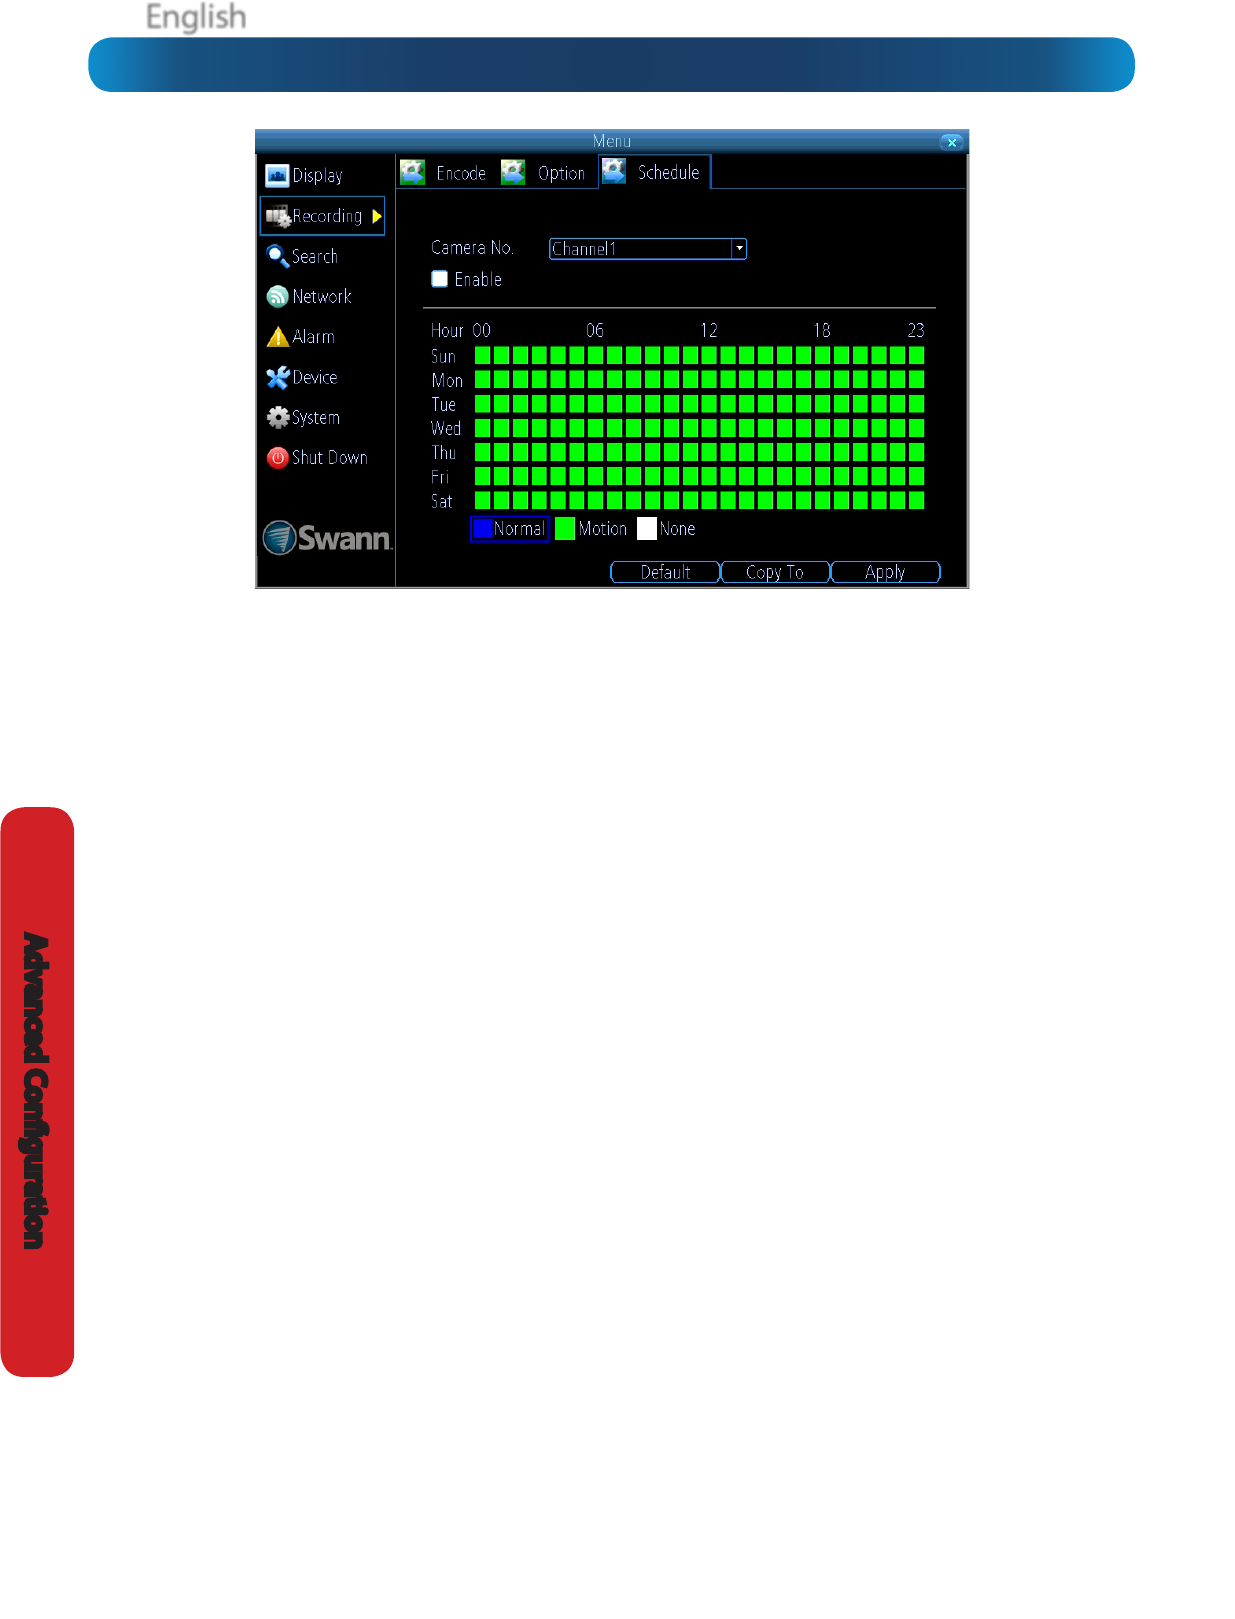
Recording: Schedule
Important Guidelines
The schedule presented on-screen applies to one channel on
one specic day of the week only.
Use the Copy To functions to quickly assign identical schedule
layouts to multiple days/channels at once.
Be careful when programming your schedule. It’s one of the
most important aspects of setting up your DVR, and if it’s
wrong in any way, it could lead to disastrous complications
later.
Copy To (Channel): Located at the base of the screen, with
Default on one side and Apply on the other. This will allow
you to copy the schedule from the channel you’re editing to
another channel or channels.
Recording Modes:
There are two types of recording to choose from.
Normal: The DVR will constantly record for any period where
Normal is selected. You won’t miss anything, but constant
recording will ll your hard drive very quickly. (The DVR does
record the equivalent of a DVD lm every two hours on every
channel, so that’s rather a lot of data!) Typically, we suggest
Motion as a better recording mode for most users.
Motion: The recommended recording setting for most
applications. The DVR will only record when it detects
something moving in front of a camera, and will then only
record footage from the camera(s) that do detect motion
unless you alter your Action settings “Alarm: Motion Detection
- Action” on page 36 to include other channels.
Before setting any of your schedule to Motion, ensure that
Motion Detection is properly congured for the channel(s)
you want to associate with it. See “Alarm: Motion” on page
34 for more information about setting up and conguring
Motion Detection.
None: As the name suggests, the DVR will not record
anything. This isn’t really a mode, but it’s listed here for
completeness.
Note: You can record using Normal and Motion at the same
time. The DVR will record constantly, but tag motion events
and mark them as such in the Video Search interface.


