


English
43
Advanced Conguration
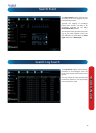
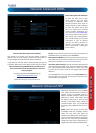
Alarm: Motion Detection Conguration
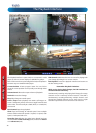
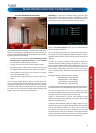
To set the MOTION DETECTION AREA
In the MOTION DETECTION menu, use the mouse or the arrow
buttons to highlight the SETUP button for the channel you
wish to setup the MOTION DETECTION AREA for, and conrm
by pressing select or left clicking.
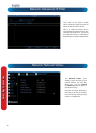
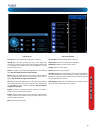
• You will see a grid of red boxes. The outlined boxes mark
the area that is sensitive to motion. The area without
the red outlines is not sensitive to motion.
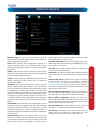
• Use the mouse to move the cursor around the screen.
• By pressing select or left clicking an area in the grid, you
can toggle motion detection ON or OFF in that location.
• Areas marked by red boxes will be sensitive to motion,
those not marked will not be.
• Click and drag to select the area you want to select or de-
select.
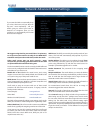
In the sample image above, a person moving about the
room would trigger the motion detection. However, a person
entering from the right of screen and ascending the staircase
should avoid the motion sensitive area. This is a good solution
to monitor the door (centre of image) without getting false
triggers every time someone ascends the stairs.
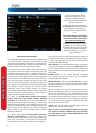
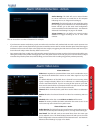
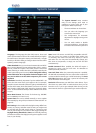
Sensitivity: To access the Sensitivity setting, press the right
mouse button. The Sensitivity setting is controlled by a slider,
allowing you to set a value between 0 and 50. The lower the
number, the more sensitive the motion detection will be.
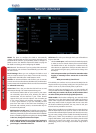
There are four time periods which you can dene dierent
motion sensitivity values for.
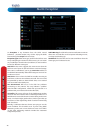
You can change what time(s) each period starts and ends to
best match the changing lighting conditions in your location.
Typically, values between 5 and 10 will give good results in the
daytime.
At night, you may get numerous false triggers unless you
raise the sensitivity setting, perhaps as high as 25 - 30. This is
because when cameras (particularly CMOS-based ones) use
active infrared night vision, they dramatically increase the
gain controls to the image sensor. This creates a lot of “noise”
in the camera’s images, which are interpreted by the DVR as
motion.
By default, the day is divided into four periods:
00:00 (Midnight) - 06:00 (6:00 AM)
06:00 (6:00 AM) - 12:00 (Midday)
12:00 (Midday) - 18:00 (6:00 PM)
18:00 (6:00 PM) - 00:00 (Midnight)
You might need to shift the beginning and ends of these times
to best suit the time(s) that lighting changes at your location.
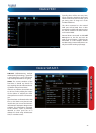
The start and end times can be set to anything you like,
provided the dierent time periods don’t overlap and there’s
no gap between one ending and the next starting.
There’s no requirement for all four time periods to have
dierent sensitivity levels, although we suggest that usually
gives the best performance.
To nd the best sensitivity values for dierent times of day/
night, it’s best to test the system during dierent time periods.
Get an able-bodied volunteer to move about in front of
the cameras you’d like to tune the sensitivity for. The ideal
sensitivity level is when your volunteer moving about always
triggers the motion detection, but there are no false triggers
(or very few) when your volunteer isn’t moving about.