


Copyright © 2003 TOSHIBA CORPORATION. All rights reserved.
62
You can label each video input source according to the type of
device you connected to each source, from the following preset
list of labels:
– – (default label)
Audio Receiver
VCR
Video Recorder
Laser Disk
Compact Disc
DVD
DTV
SAT (Satellite box)
CBL (Cable box)
DVI (DVI/HDCP device)
Note:
• If you set up devices in TheaterNet, the associated inputs are
automatically labeled and cannot be relabeled until you
remove the device from TheaterNet (see page 45).
• You cannot select IEEE-1394 devices through the INPUT
SELECTION window; however, you can select and control
IEEE-1394 devices through TheaterNet (see page 45).
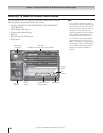
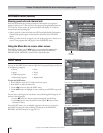
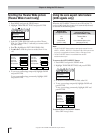
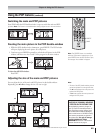
To label the video input sources:
1. Press MENU and open the PREFERENCES menu.
2. Highlight INPUT LABELING and press ENTER.
Preferences
Favorite Channels
Closed Caption Mode
• • •
Off
Closed Caption Advanced
Input Labeling
Menu Language
• • • •
English
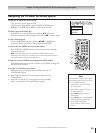
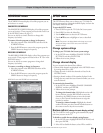
3. Press z or y to highlight the video source you want to
label.
4. Press x or • to select the desired label for that input source.
Input labeling
Video 1
Video 2
Video 3
ColorStream HD1
ColorStream HD2
DVI
Save Cancel Reset
– –
VCR
– –
DVD
– –
HD
5. To save the labels, highlight SAVE and press ENTER.
Chapter 8: Using the TV’s features
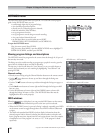
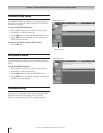
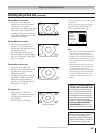
Input labeling example:
If you connect a VCR to VIDEO 1, a DVD player to
ColorStream HD-1, and a high-definition device to
DVI/HDCP, and then label the video input sources accordingly
(as shown in step 4 at left), when you press INPUT or
TV/VIDEO, the INPUT SELECTION screen would then look
like the screen below right:
Input Selection
ANT 1
Video 1
Video 2
Video 3
ColorStream HD 1
ColorStream HD 2
DVI
ANT 2
0 – 7: TO SELECT
O :
1 :
2 :
3 :
4 :
5 :
6 :
7 :
Input Selection
ANT 1
VCR
Video 2
Video 3
DVD
ColorStream HD 2
HD
ANT 2
0 – 7: TO SELECT
O :
1 :
2 :
3 :
4 :
5 :
6 :
7 :
Input Selection screen Input Selection screen with
with no inputs labeled inputs 1, 4, and 6 labeled
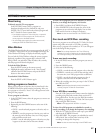
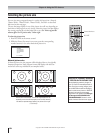
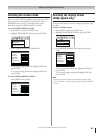
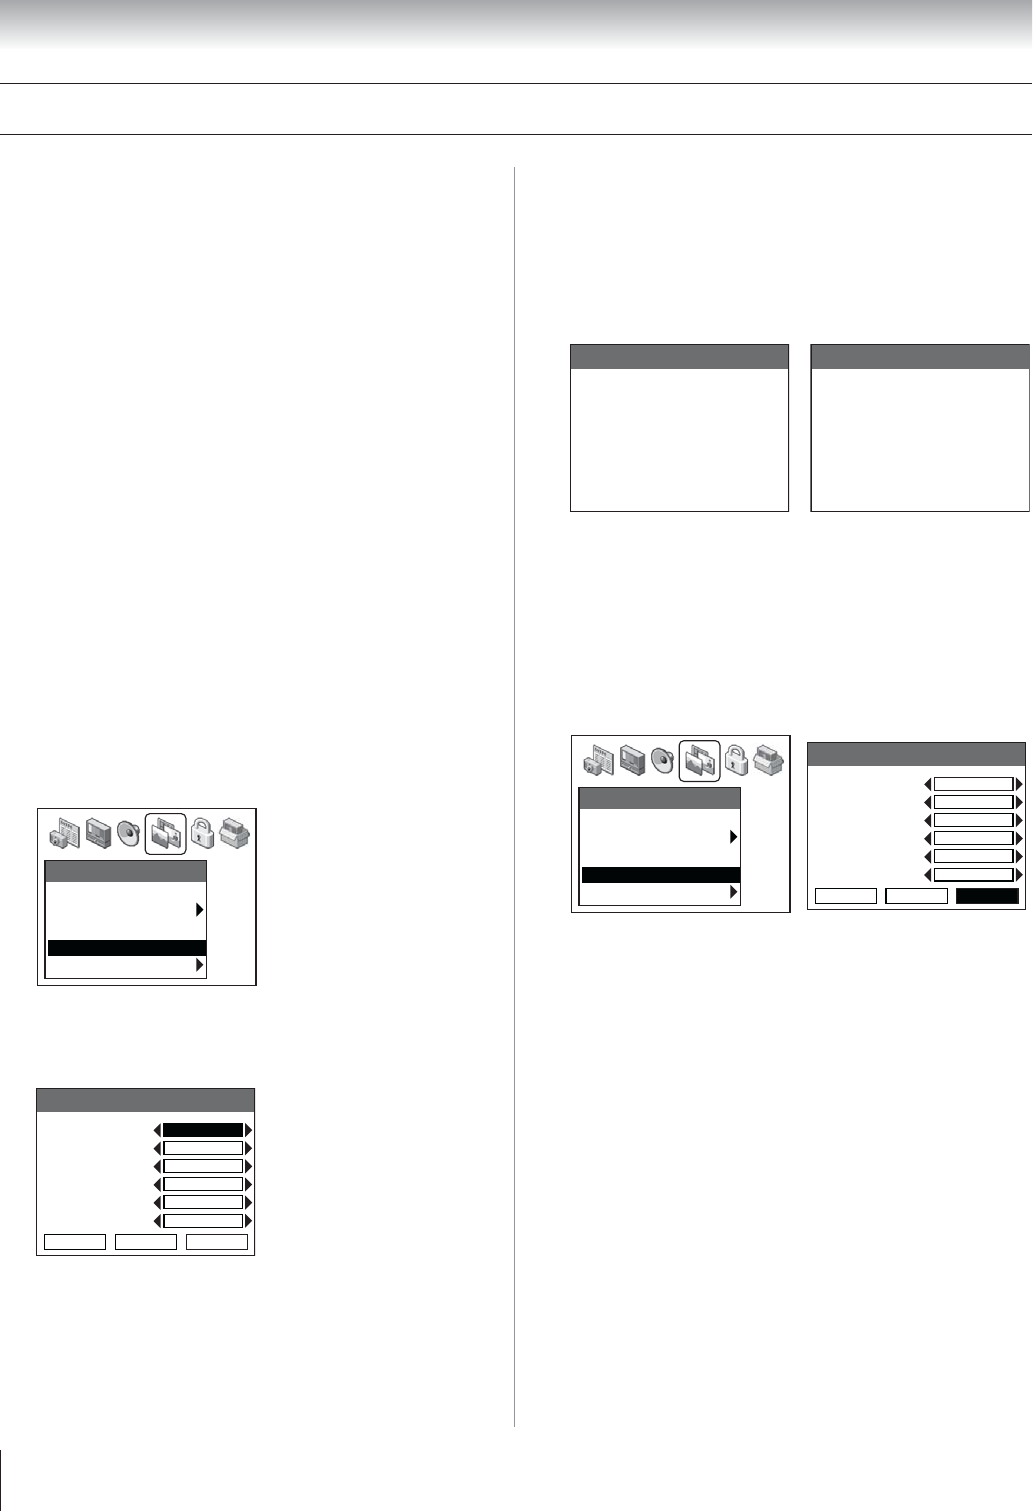
To clear the video labels:
1. Press MENU and open the PREFERENCES menu.
2. Highlight INPUT LABELING and press ENTER.
3. Highlight RESET and press ENTER.
4. Highlight SAVE and press ENTER.
Preferences
Favorite Channels
Closed Caption Mode
• • •
Off
Closed Caption Advanced
Input Labeling
Menu Language
• • • •
English
Input labeling
Video 1
Video 2
Video 3
ColorStream HD1
ColorStream HD2
DVI
Save Cancel Reset
– –
VCR
– –
– –
– –
– –
Note: Labels for devices you set up in TheaterNet will not be
cleared until you remove the device from TheaterNet (see
page 45). The screen above right illustrates an example of the
Input Labeling screen after it was reset that still shows the
VCR label for VIDEO 1 because the VCR was set up in
TheaterNet.
Labeling the video input sources