


Copyright © 2003 TOSHIBA CORPORATION. All rights reserved.
8
1. Carefully read the important safety, installation,
care, and service information on pages 2–4.
Keep this manual for future reference.
2. Do not plug in any power cords until AFTER you have
connected all cables and devices to your TV.
3. If you need to split your TV into two sections during
moving or installation, read the “Important Safety Precautions
for Split Cabinet Feature” on page 5.
4. Consider the following when selecting a location
for your TV:
• Place the TV on the floor only.
• Place the TV in a location where light does not reflect on
the screen.
• Place the TV far enough from walls and other objects to
allow proper ventilation. Inadequate ventilation may cause
overheating, which will damage the TV. THIS TYPE OF
DAMAGE IS NOT COVERED UNDER THE TOSHIBA
WARRANTY BECAUSE IT IS A RESULT OF MISUSE.
• Read “Installation” on pages 3–4.
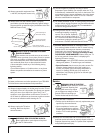
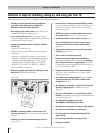
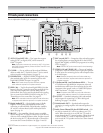
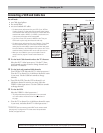
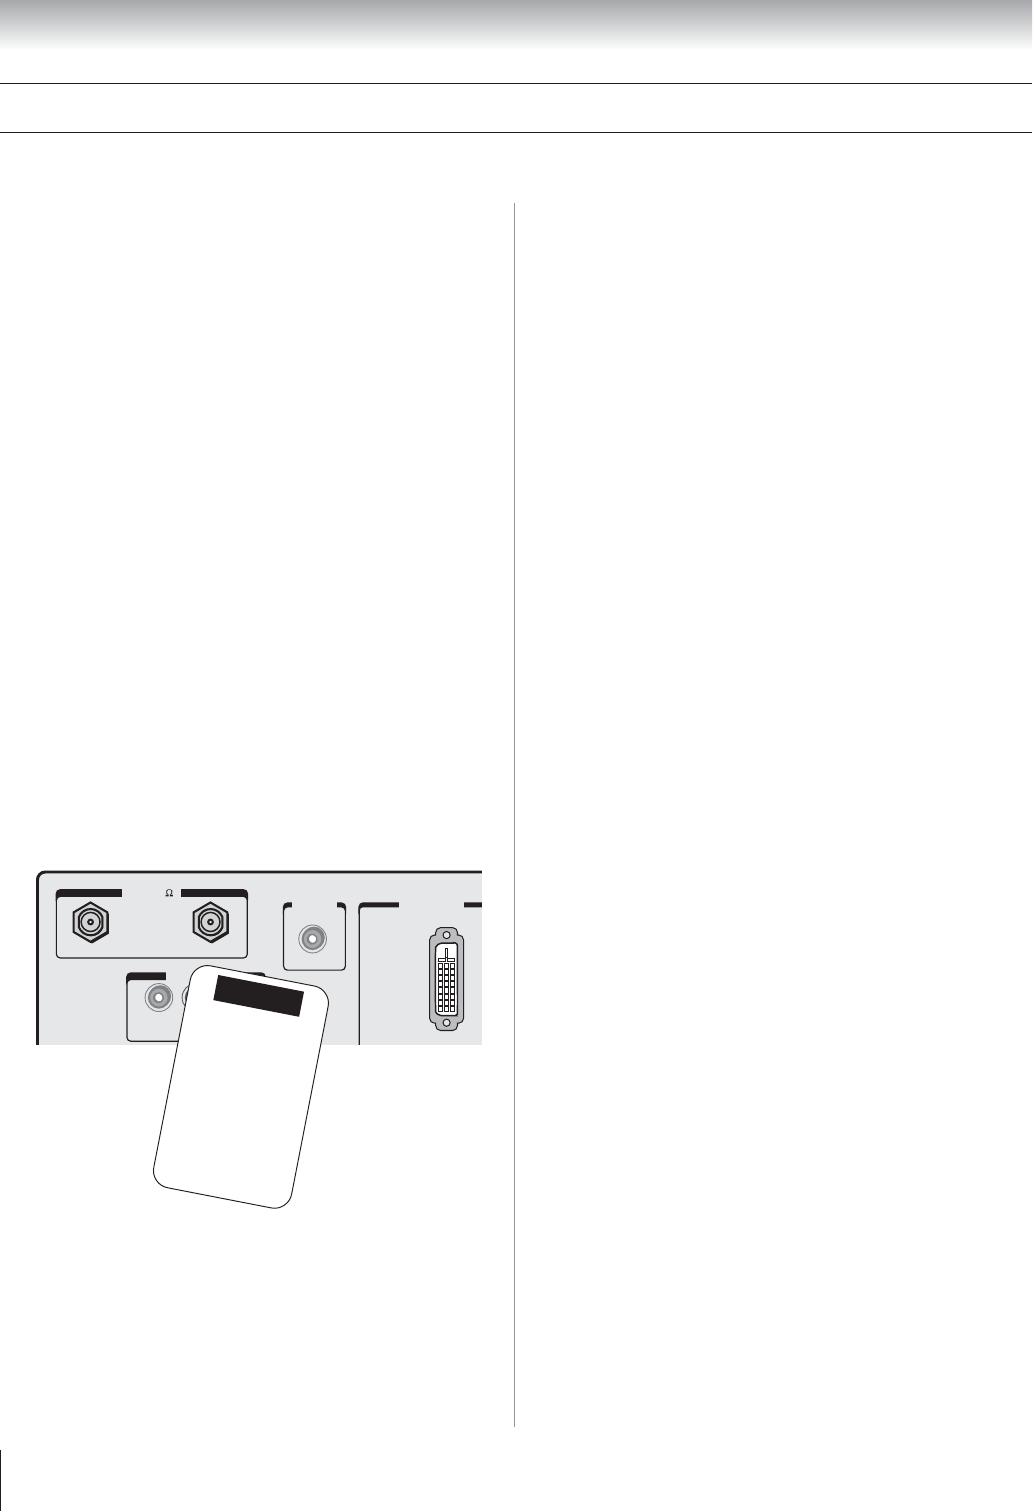
5. Remove the demo pin from the G-LINK jack on the
back of the TV (see illustration below).
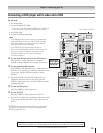
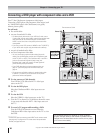
8. Connect one of the the enclosed IR blaster cables
from your VCR and/or Cable box to the G-LINK jack so you
can use the TV Guide On Screen™ one-touch recording
feature. See page 25.
9. AFTER connecting all cables and devices, plug in
the power cords for your TV and other devices.
10. Install the batteries in the remote control (page 27).
11. See “Learning about the remote control” for an
overview of the buttons on the remote control
(page 26).
12. Program the remote control to operate your other
device(s) (pages 27–33).
13. Turn on the TV and other device(s).
14. Follow the on-screen Quick Connect Guide for
assistance in configuring the TV’s settings and setting up
the TV Guide On Screen
™
program guide. (The Quick
Connect Guide starts automatically the first time you turn on
the TV.) See page 36 for details.
15. Program channels into the TV’s channel memory
(page 42), if you did not already do so during the Quick
Connect Guide setup.
16. See “Menu layout and navigation” (page 34) for a
quick overview of the TV’s menu structure and
navigation (page 35).
17. See Chapter 7 for details on using the TV Guide On
Screen™ program guide (if available in your area)
(page 53).
18. Set up the TheaterNet™ on-screen device control
feature (if applicable to your particular home theater system
components) (page 45).
19. See page 80 for details on using the
SmartMedia™/SD JPEG picture viewer.
20. See Chapter 8 for details on using the TV’s features.
21. For technical specifications, see page 93.
22. For help, refer to the Troubleshooting Guide on
pages 88–92.
23. For warranty information, see page 94-95.
24. Enjoy your new TV!
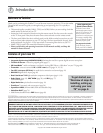
Overview of steps for installing, setting up, and using your new TV
Follow these steps to set up your TV and begin using its many exciting features.
Chapter 1: Introduction
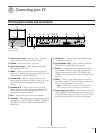
ANT
(
75
)
REC OUT
ANT-1 ANT-2
L
AUDIO
VIDEO
R
DVI/HDCP IN
G-LINK
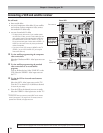
TV back panel
DEMO PIN
This Demo Pin
automatically activates the
TV Guide On Screen demo.
RETAILERS:
Do not remove this Demo Pin.
Removal will disable
the automatic demo.
CONSUMERS:
Remove this Demo Pin
and insert the IR blaster cable
here before using your TV.
6. BEFORE connecting cables or devices to the TV,
learn the functions of the TV’s connections and controls
(page 10).
7. Connect your other electronic device(s) to the TV
(pages 12–25).
➚
➚