


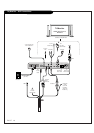
AUX Controller: Connection and Placement
PAGE 10
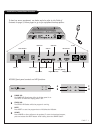
RJP
INTERFACE
REMOTE
IN
AUDIO IN AUDIO OUT RS-232C
DISPLAY
CONTROL
AUX
CONTROL
DIGITAL
VIDEO OUT
AC IN
DIGITAL AUDIO
OUT (OPTICAL)
AC OUT
DIGITAL
VIDEO IN
MAX 8A 960W AC 120V~ 60Hz
12
(+
)
(
)
(+
)
(
)
A
U
D
IO
(MO
NO
)
R
L
V
I
D
E
O
Y
P
BR
P
A
V
IN
P
U
T
A
U
D
I
O
RL
R
L
E
X
T
E
R
N
A
L S
PE
A
K
E
R
(8
)
A
C
INP
U
T
A
U
D
IO
IN
PU
T
S
-
V
I
D
E
O
C
O
M
P
O
N
EN
T
(
480
i/4
80
p
)
R
G
B
-
P
C
I
N
P
U
T
(VG
A
/S
V
G
A
/X
G
A
/S
X
G
A
)
(D
V
D
IN
P
U
T
)
R
S
-2
3
2
C
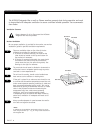
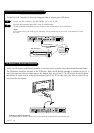
IR Bracket
IR Receiver
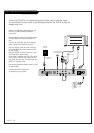
Install the IR Receiver and Bracket Assembly to the back of the monitor using the method described below.
The IR Receiver should be installed in the IR Bracket. When the IR Bracket assembly is attached to the TV, it
should be mounted with two-sided tape on the bottom-back side of the TV. The IR receiver should be aimed
toward the TV viewer and be visible at the bottom front of the TV, in order that it be able to receive IR sig-
nals from the user remote.
IR Receiver & Bracket Installation
THE IR RECEIVER UNIT IS PROVIDED. THIS WILL NEED TO BE MOUNTED ON THE MONITOR BACK WITH TWO-SIDED TAPE.
IR Receiver & IR Bracket Installation
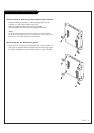
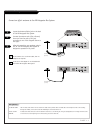
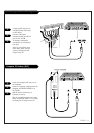
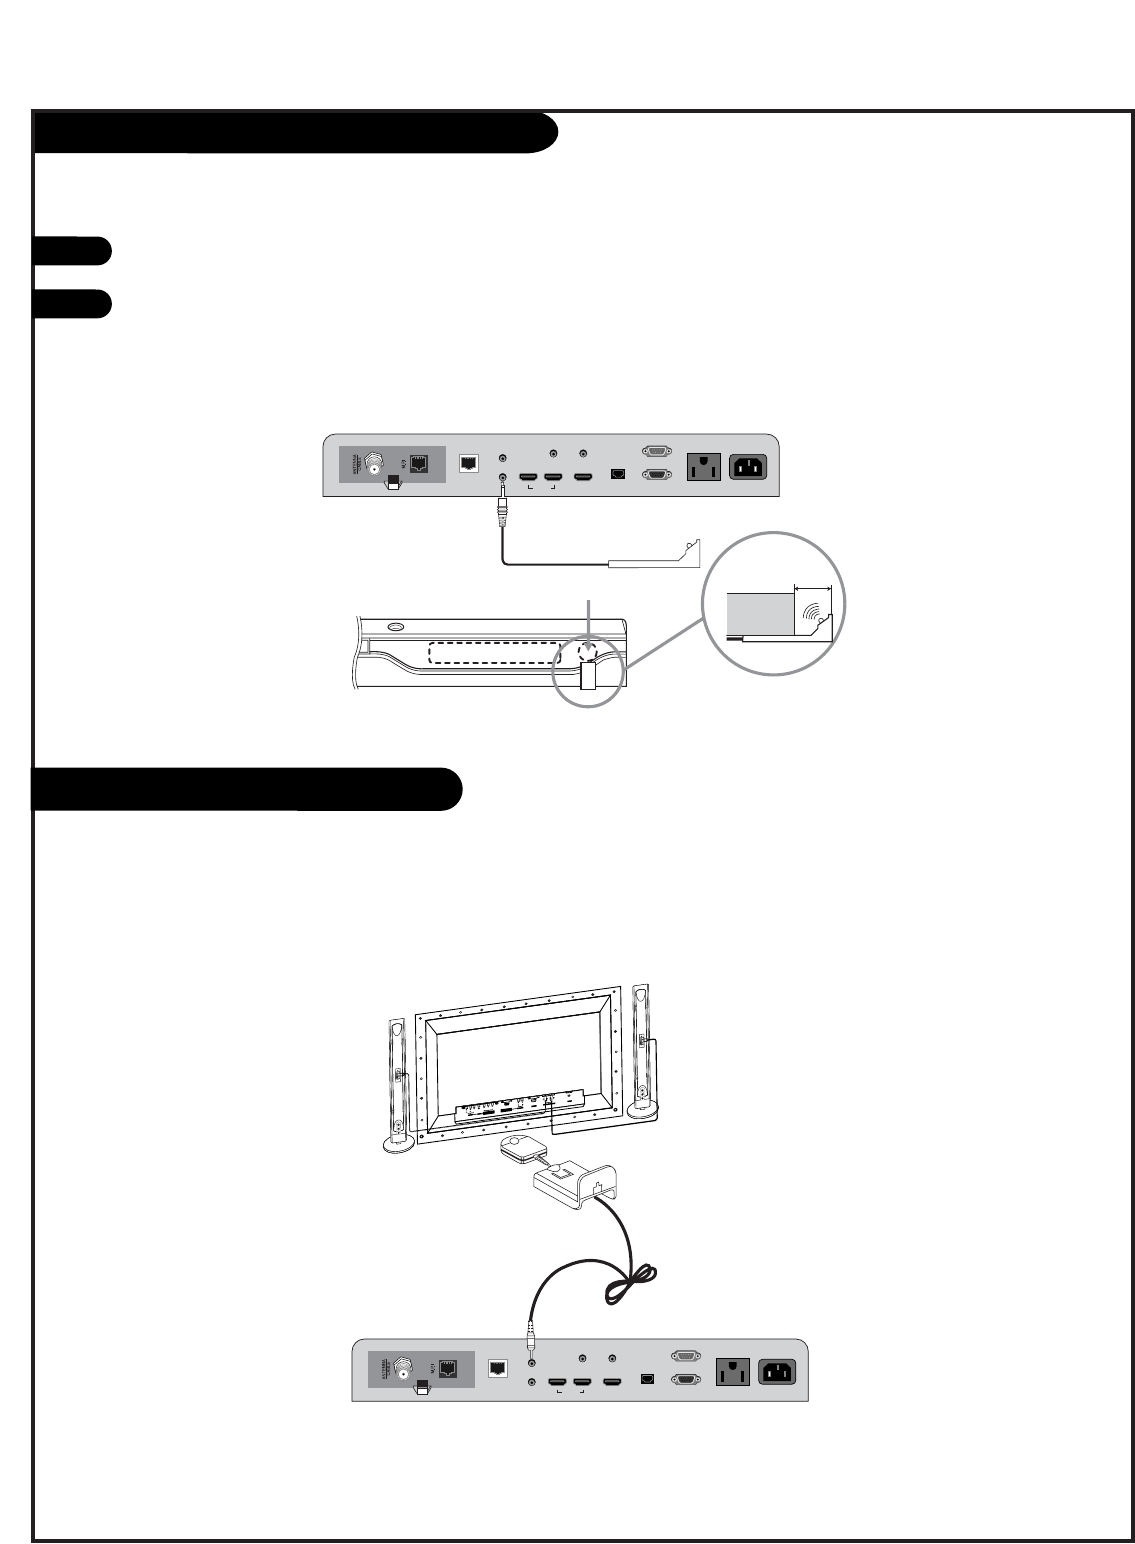
Connect the AUX Controller to allow the Integrator Box to operate your AUX device.
1
2
RJP
INTERFACE
REMOTE
IN
AUDIO IN AUDIO OUT RS-232C
DISPLAY
CONTROL
AUX
CONTROL
DIGITAL
VIDEO OUT
AC IN
DIGITAL AUDIO
OUT (OPTICAL)
AC OUT
DIGITAL
VIDEO IN
MAX 8A 960W AC 120V~ 60Hz
12
Connect the AUX Controller to the AUX CONTROL cord on the TV/STB.
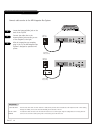
Place the AUX Controller under and in front of the AUX device.
The AUX Controller must extend just out in front of the infrared sensor on the AUX device.
*Note:
If the infrared sensor is not marked on your AUX device, shine a flashlight into the front panel of the AUX device to locate
the sensor.
DVD (Front View)
AUX Controller
DVD
(Side View)
1/2”
to 1”
IR Sensor
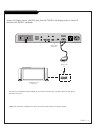
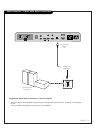
Monitor
Connections Panel
Connections Panel