


Connections and Setup
105
Connecting the Phone Line
5 Select Check Switch. Select Test.
6 The receiver begins performing the Check Switch tests. When it is finished, the Installation
Summary screen displays.
7 Make sure that the information on the Installation Summary screen identifies your system
correctly and shows all transponders for all satellites in your system.
8 Select OK to go to the Point Dish/Signal screen.
9 Select Cancel to exit the Point Dish menu. At this point, the receiver may walk you through
a procedure to download software. If this prompt displays, follow the instructions and do
not disturb the receiver until the nearby TV is displaying DISH Network video. Otherwise,
press VIEW LIVE TV. After a few minutes, you should be watching TV.
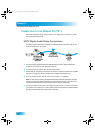
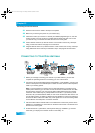
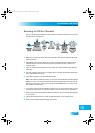
CONNECTING THE PHONE LINE
You must keep the receiver connected to an active telephone line to order Pay-Per-View
programs, use all of the DISH Home Interactive features, or other services from DISH
Network with your remote control.
Note: You may be able to use a wireless modem jack. However, this may not support all
the features of this receiver, such as Caller ID. See www.dishnetwork.com for compatible
modem products.
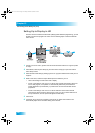
Note: If you have a Digital Subscriber Line (DSL), you may have to install a DSL filter
between the receiver’s back panel Phone Jack and the telephone wall jack to successfully
connect with DISH Network. You can obtain a filter from your DSL provider.
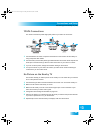
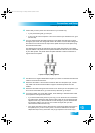
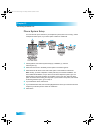
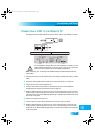
Phone Line Connection
Run a telephone cable with a standard RJ-11 connector from the receiver’s back panel
Phone Jack to an active telephone connection.
Chapter 12 Two Color.fm Page 105 Tuesday, December 20, 2005 2:12 PM