18
Turning on your TV for the first timeDX-32L100A13
Turning on your TV for the first
time
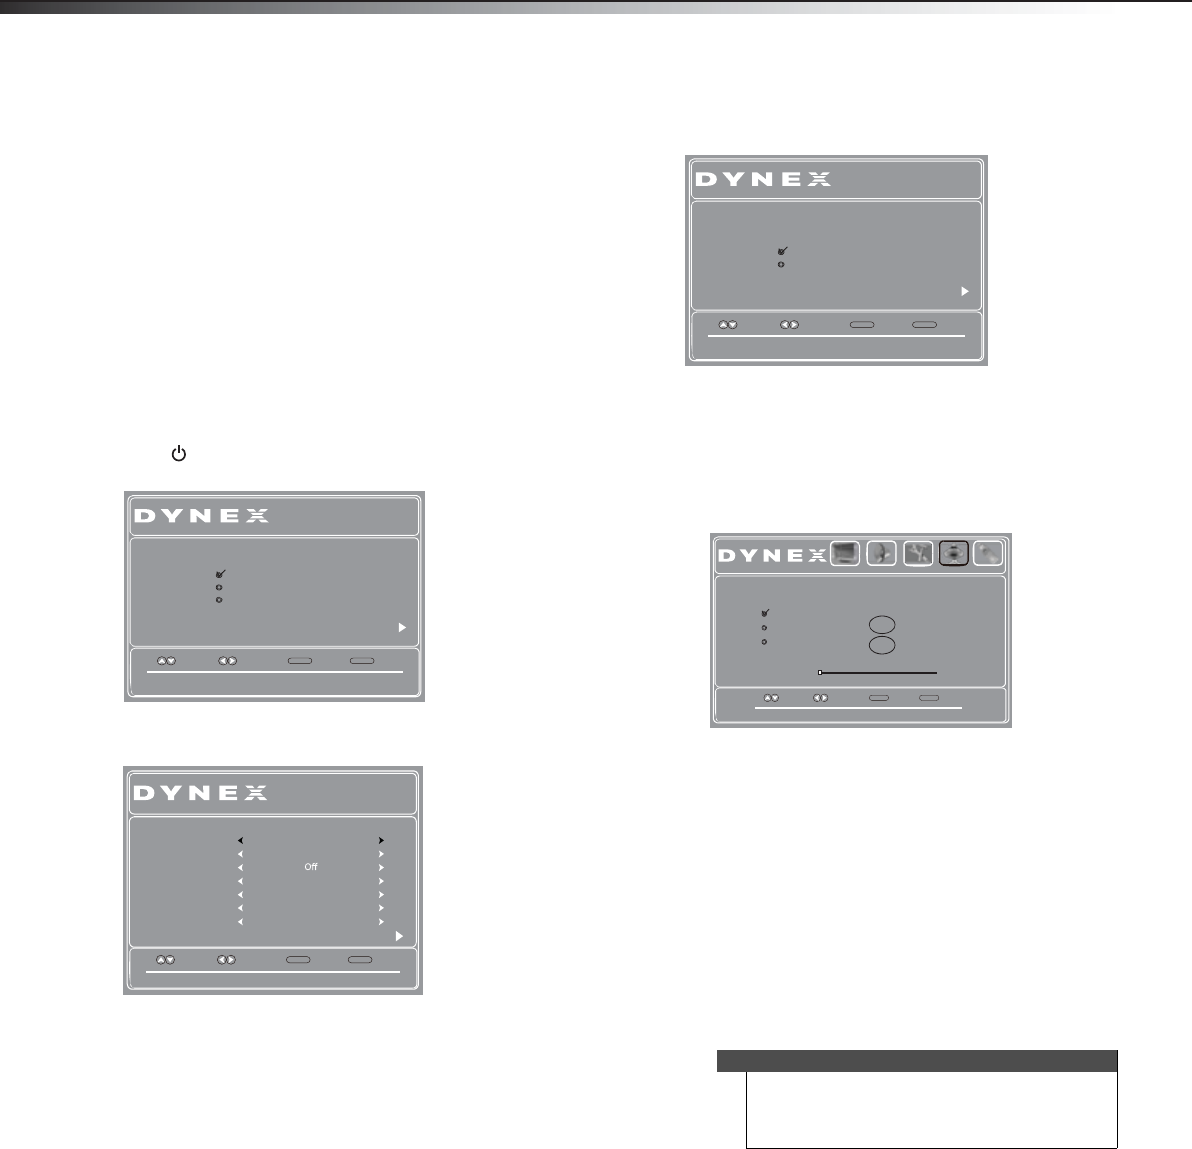
The first time you turn on your TV, the Setup Wizard opens.
The Setup Wizard guides you through setting up basic
settings including the menu language, date and time,
picture mode, and TV signal source.
To set up your TV:
1 Make sure that you have:
• Installed the remote control batteries. (See
page 17 for details).
• Connected an antenna, cable TV, or satellite TV.
(See page 9 to page 11 for details.)
• Connected the power cord. (See page 9 for
details.)
2 Press (Power), then wait several seconds. The
Choose Your Menu Language screen opens.
3 Press or to highlight a language, then press
ENTER. The Choose Your Time Setting screen opens.
4 Press or to highlight Mode, then press or
to select Custom (to set the date and time
manually), or Auto (to set the date and time
automatically from a TV signal source, based on the
time zone you select).
5 If you selected Auto for mode, press or to
highlight Time Zone, then press
or to select
your time zone. Choices include Eastern, Central,
Mountain, Pacific, Alaska, Hawaii, Atlantic, or
Newfoundland.
6 If you selected Auto for mode, press or to
highlight Daylight Savings, then press
or to
select On (if your viewing area observes Daylight
Savings Time), or Off (if your viewing area does not
observe Daylight Savings Time).
7 If you selected Custom for Mode, set the date by
pressing
or to highlight Year, Month, or Day,
then press or to change the setting.
8 If you selected Custom for Mode, set the time by
pressing
or to highlight Time, then press or
to highlight the hour, minute, or AM/PM.
9 Press or to adjust the setting.
10 Press ENTER. The Choose Your Picture Mode screen
opens.
11 Press or to highlight Home Mode or Retail
Mode, then press ENTER.
If you selected Retail Mode, a message appears
“If you select Retail Mode, then Energy saving is
not realized.” Select Yes to continue, or select No
to change your selection. The Choose Your TV
Source screen opens.
12 Press or to highlight Antenna, Cable, or Cable/
Satellite Box (if your cable TV uses a box, select
Cable/Satellite Box), then press ENTER.
•If you chose Antenna or Cable, your TV
automatically starts scanning for channels
available in your viewing area. If you chose
Cable/Satellite box, your TV does not need to
scan for channels.
• During the auto channel scan your TV searches
for digital channels first. When the digital
channel search is complete, a message appears
asking if you want to search for analog channels.
Select Ye s to continue searching for analog
channels, or No to stop searching for channels.
13 To watch TV, press INPUT, press or to highlight
the video input source for your TV in the INPUT
SOURCE list, then press ENTER.
• If your TV is connected to an antenna, cable TV
(no box), or cable or satellite TV box using a
coaxial cable, select TV.
• If your TV is connected to a cable or satellite box
using an HDMI cable or HDMI cable with a DVI
adapter, select HDMI.
• If your TV is connected to a cable or satellite box
using a component video cable, select
Component.
• If your TV is connected to a cable or satellite box
using a composite video cable, select AV.
Choose Your Menu Language
Español
Français
English
Setup Wizard
Set menu language to English,Français,Español
Next
Move Select Back
MENU
Exit
EXIT
Setup Wizard
If Automatic,options are automatically set by TV source
Next
Move Select Back
MENU
Exit
EXIT
AutoMode
Time
Day
Month
Year
Daylight Savings Time
cificaPenoZemiT
12 : 00 AM
01
01
2010
Choose your Time Setting
Note
The channel scan can take up to 20+ minutes. You
can press EXIT at any time to stop the auto scan, but
you will need to run the auto scan again to create a
channel list.
Setup Wizard
Reduces total power consumption
Next
Move Select Back
MENU
Exit
EXIT
Choose your Picture Mode
Retail Mode
Home Mode
Move
Select Back
MENU
Exit
EXIT
Picture Audio Settings Channels USB
Select Antenna if using an antenna for standard or HD TV.
Choose Your TV Source
Cable/Satellite Box
Cable
Antenna
Digital Channels
Analog Channels
0
0
RF CH
0
Scan for Channels
12-0956_DX-32L100A13 MAN_V2_EN.book Page 18 Monday, September 24, 2012 10:39 AM


